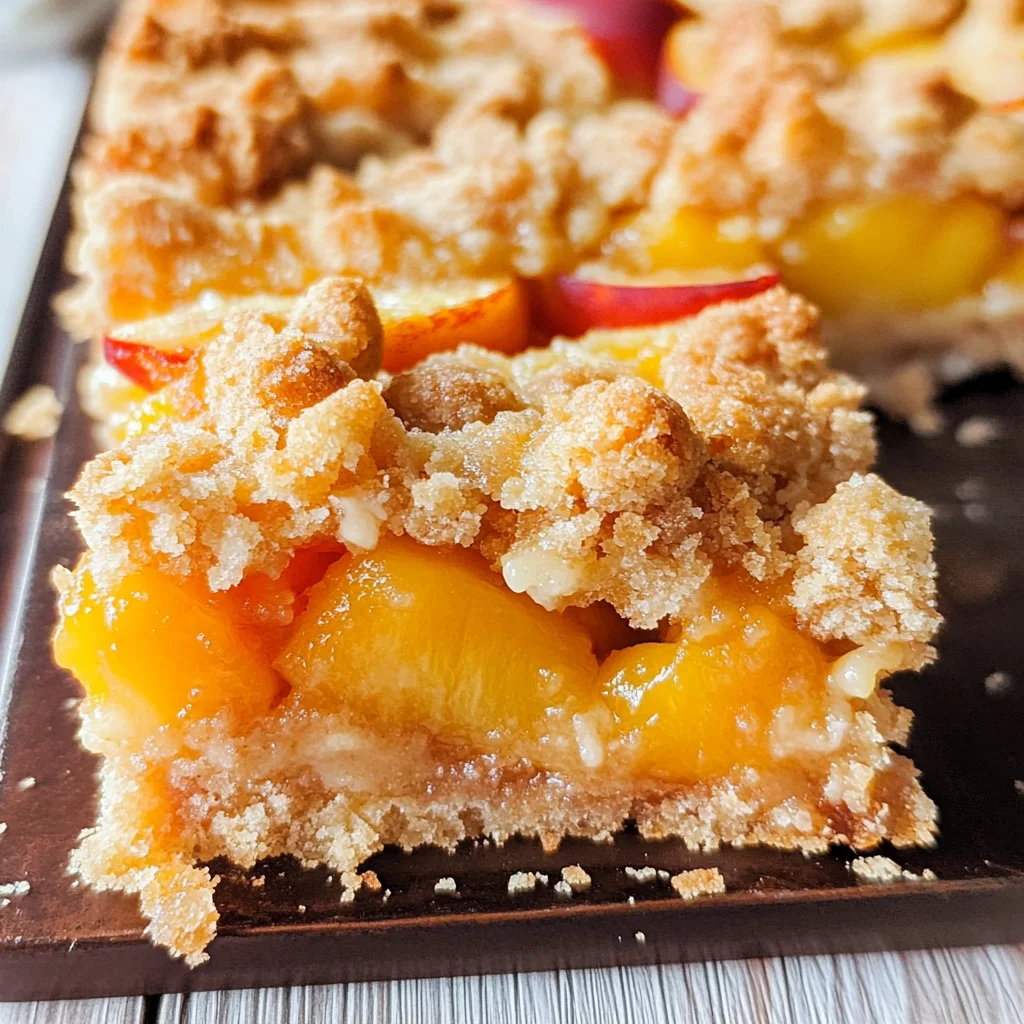
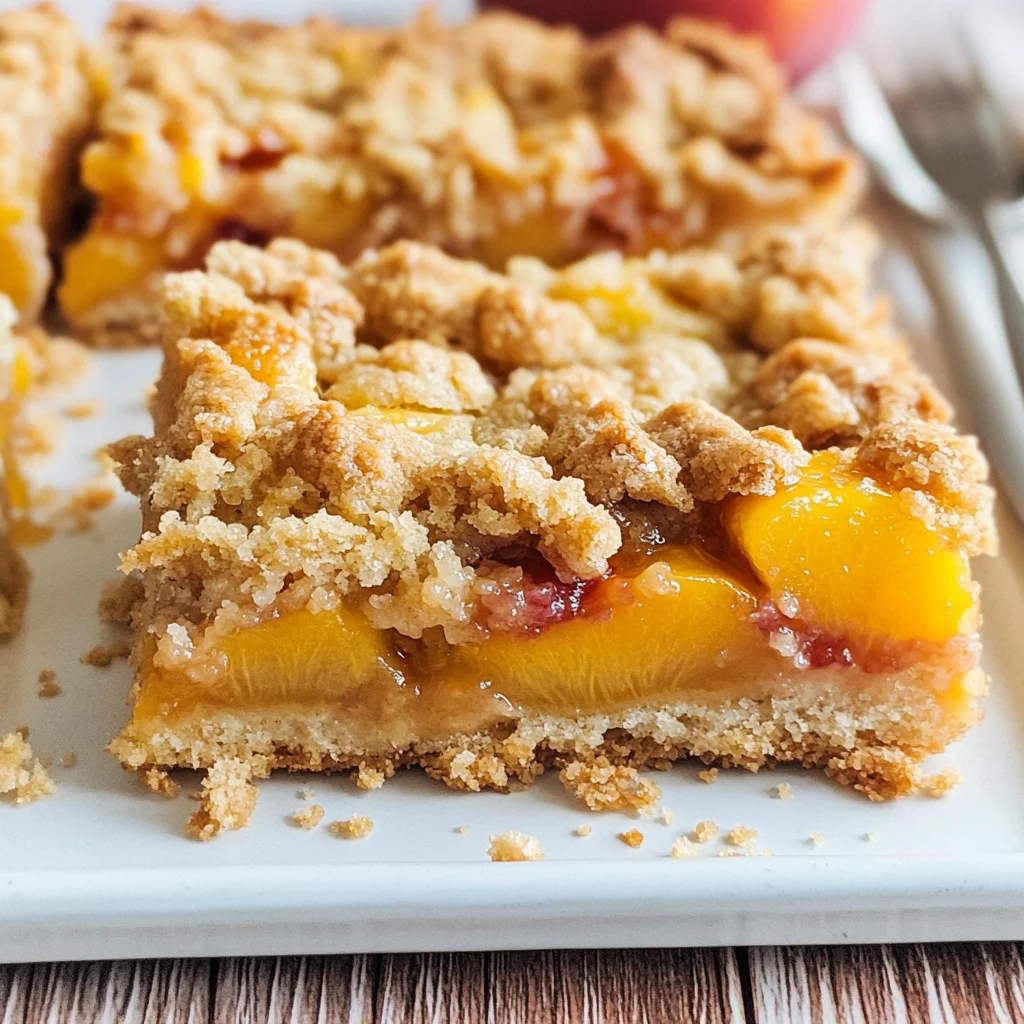
Peaches and Cream Crumble Bars
There’s something utterly magical about the combination of peaches and cream, isn’t there? It evokes memories of summer picnics, laughter among friends, and the sweet scent of sun-ripened fruit wafting through the air. Every time I think about Peaches and Cream Crumble Bars, I’m transported to a warm afternoon where joy permeates every bite. These bars are not just a dessert; they’re a love letter to summertime, a celebration of seasonal bounty, and an invitation to slow down and savor life’s simple pleasures. The crunch of the crumbly topping juxtaposed with the luscious, peachy filling creates a symphony of flavors that dances on your palate. Trust me when I say this: once you take your first bite, you’ll understand why these bars are so beloved.
As we embark on this culinary journey together, allow yourself to get lost in the process. Cooking is about connection—between flavors, between people, and even between generations. I promise you that making these Peaches and Cream Crumble Bars will not only fill your home with the most inviting aroma but also create moments worth cherishing. Whether it’s sharing them with family at a gathering or enjoying a quiet moment with a friend over coffee, these bars have a way of bringing people together. So let’s roll up our sleeves and dive into this delightful recipe that merges tradition with innovation in every bite.
Ingredients:
Gathering quality ingredients is like setting the stage for a wonderful performance; each one plays its part beautifully in our Peaches and Cream Crumble Bars. Let’s explore what makes each ingredient special and how they work together to create something truly extraordinary.
- 2 1/2 cups (350 g/12.5 oz) all-purpose flour: This flour is the backbone of our crumble bars; it provides structure while allowing for that delightful crumbly texture we crave. When shopping for all-purpose flour, look for brands that have been finely milled and stored properly to ensure freshness. If you’re feeling adventurous or simply want more flavor complexity, consider using half whole wheat flour for an earthy twist—just remember that it may slightly alter the texture.
- 2/3 cup (140 g/5 oz) granulated sugar: Sugar does more than just sweeten; it contributes to the overall texture and balance of flavors in our dessert. The granulated sugar helps create that golden crust through caramelization while enhancing the peach filling’s natural sweetness without overwhelming it. Make sure to choose fine-grained sugar as it dissolves better during baking—this ensures that you won’t end up with gritty bits in your lovely bars.
- 1/2 teaspoon salt: Salt is often overlooked but is absolutely paramount in balancing sweetness and elevating flavors. It acts like a maestro conducting an orchestra; without it, your bars might taste flat or one-dimensional. A good-quality sea salt can add subtle complexity—so don’t skimp on this tiny but mighty ingredient!
- 1 1/4 cups (280 g/10 oz) cold unsalted butter, cut into small cubes: Butter is where we get our rich flavor and flaky texture from; it’s essential for creating that melt-in-your-mouth experience we all adore in dessert bars! Using cold butter ensures that you achieve the perfect crumbly consistency when mixed into your flour—this will give you those beautiful layers we’re after. When selecting butter, opt for unsalted as it gives you complete control over the salt levels in your recipe.
- 1/4 cup (50 g/1.7 oz) brown sugar, preferably dark: Brown sugar brings depth and caramel notes to our crumble topping while also adding moisture. Dark brown sugar contains more molasses than light brown sugar, which means richer flavor—so if you’re seeking that extra touch of warmth in your bars, this is your go-to! Just be mindful of clumps; break them up gently as you mix them into your ingredients.
- 1 cup (200g/7 oz) granulated sugar: This additional dose of sugar plays a key role in sweetening our peach filling while creating juicy goodness as it bakes down into syrupy perfection. It’s important here to measure accurately so that every bite bursts with just enough sweetness without overshadowing the delicate flavor of fresh peaches.
- 1/4 cup (35 g/1.3 oz) all-purpose flour: Adding this small amount of flour into the peach mixture acts as a thickening agent—it helps absorb some of the juices released by those luscious peaches during baking so we don’t end up with a soggy bottom! When selecting this ingredient, ensure it’s sifted well to avoid any lumps—trust me; nobody wants clumps in their filling!
- 1/2 teaspoon ground cinnamon: Cinnamon adds warmth and spice—a whisper of nostalgia reminiscent of cozy kitchens filled with baked goods cooling by the window! You can always adjust this according to personal preferences; feel free to experiment with other spices like nutmeg or allspice if you’re feeling adventurous.
- 1/4 teaspoon salt: Yes, another sprinkle! This tiny pinch ensures all flavors shine bright—the harmonious blend between sweet peaches and creamy goodness will be nothing short of heavenly when balanced correctly.
- 5 cups pitted (peeled and chopped) peaches (about 7-8 peaches / 2.5 pounds): Fresh peaches are undoubtedly the star here! Their juicy flesh transforms into an intoxicating filling as they bake down into gooey perfection—a combination that’s downright irresistible! Look for ripe peaches at your local farmer’s market or grocery store; they should yield slightly under pressure when gently squeezed yet still hold their shape when sliced.
- 6 tablespoons (90 ml) heavy cream: Heavy cream enriches our filling significantly—it brings creaminess that elevates each bite from deliciousness to pure indulgence! Make sure not to substitute with low-fat dairy options as this would compromise both flavor and texture; we want luxurious creaminess here!
- 1/2 teaspoon vanilla extract, optional: Vanilla adds an ethereal layer of flavor—it enhances sweetness while providing aromatic notes reminiscent of childhood desserts enjoyed on sun-soaked afternoons! Feel free to omit if desired but trust me when I say it’s worth including!
Equipment You’ll Need:
Having the right tools at hand makes all the difference between an enjoyable baking experience and one that’s fraught with frustration! These essential pieces will help you craft perfectly baked Peaches and Cream Crumble Bars while ensuring ease along every step of your journey.
- 9×13-inch pan: This pan size ensures even baking throughout—larger pans may spread out batter too thinly while smaller ones can lead to uneven cooking times or overflow during baking! If you don’t have one readily available, any similarly sized baking dish will work wonders too; just keep an eye on timing as variations may arise based on material composition.
- Food processor or pastry cutter: A food processor streamlines combining dry ingredients efficiently while also helping achieve that ideal crumbly texture effortlessly—saving time without sacrificing results! However, if you prefer hands-on methods or lack access to such appliances, using a pastry cutter will do just fine—this technique allows for precision control when incorporating butter into flour mixtures!
- Mixing bowls: A set ranging from small to large gives room for various components—from mixing dry ingredients together seamlessly without messes spilling over edges during stirring sessions—to accommodating larger fillings comfortably before transferring onto crusts later on!
- Measuring cups & spoons: Accurate measurement plays an integral role in successful baking outcomes—the last thing anyone wants is imbalanced flavors due lack thereof! Investing in clear measuring tools helps track amounts effectively ensuring consistent results every time!
Preparing the Peaches and Cream Crumble Bars
Step 1: Preheating for Perfection
The first step might seem simple—preheating your oven—but trust me when I say this sets everything else into motion! Set your oven temperature to 350°F (180°C). Preheating allows baked goods like these Peaches and Cream Crumble Bars not only cook evenly but also rise beautifully from within—a crucial factor in achieving those airy textures we crave so dearly! Use this time wisely by greasing your 9×13-inch pan or lining it with parchment paper—that little overhang will prove invaluable once it’s time for lifting those glorious crumbly bars out post-baking!
Step 2: Crafting Your Base
Now let’s create our crust—the foundation upon which all deliciousness rests! In either a food processor or large mixing bowl (depending on preference), combine 2½ cups all-purpose flour along with ⅔ cup granulated sugar and ½ teaspoon salt until fully blended—this usually takes mere seconds if using machinery but don’t fret if mixing by hand takes longer; patience pays off here! Once combined adequately, incorporate chilled butter cubes gradually until mixture resembles coarse meal-like crumbs—you want those little buttery pockets throughout because they yield flakiness when baked—that’s non-negotiable!
Next comes reserving some crumb mixture—set aside 1½ cups for later use as topping before pressing remaining crumbs firmly into prepared pan ensuring even coverage across bottom surface area before sliding into preheated oven where magic awaits us!
Step 3: Streusel Topping Dazzle
While our crust bakes away blissfully (approximately 15 minutes), let’s whip up something truly divine—the streusel topping! In another bowl containing reserved crumbs from before add dark brown sugar then toss gently by hand until large clumps form unexpectedly transforming ordinary crumbs into something spectacularly crunchy atop warm fruity goodness soon-to-be waiting below once ready for assembly later on!
Step 4: Heavenly Peach Filling
As aromas start wafting through kitchen air signaling progress towards perfection take advantage by preparing sumptuous peach filling next—it consists primarily of freshly chopped pitted peaches mixed harmoniously alongside additional granulated sugar plus remaining quarter cup flour alongside cinnamon pinch plus salt sprinkle which brings everything together beautifully harmonizing flavors magnificently throughout layers ahead hereafter! Pour heavy cream mixture slowly after combining thoroughly then fold gently ensuring no chunks escape blending well until uniform consistency achieved before transferring over warm crust directly awaiting eagerly beneath streusel topping sprinkled generously across surface area inviting juiciness bubbling beneath soon thereafter turning golden brown throughout final bake period lasting around forty-five minutes altogether depending upon individual ovens used therein ensuring visual cues observed closely whilst delightfully tantalizing fragrance fills surrounding spaces…
Breathe deeply now—you’re doing wonderfully already—and stay tuned because things are about heat up even further soon enough…
Step 5: Crafting the Heavenly Peach Filling
Now, let’s dive into the heart of our Peaches and Cream Crumble Bars—the luscious peach filling that dances on your palate like a summer breeze. In a large bowl, start by whisking together 1 cup of granulated sugar, 1/4 cup of flour, 1/2 teaspoon of ground cinnamon, and 1/4 teaspoon of salt until well combined. This blend is utterly crucial because the sugar will sweeten the peaches while the flour acts as a thickening agent, helping to create that delightful gooeyness we all crave. I want you to picture those juicy peaches releasing their natural sweetness as they cook down, creating a syrupy wonderland that hugs each bite.
Next comes the pièce de résistance—our gorgeous peaches! You’ll need about 5 cups of pitted, peeled, and chopped peaches, which is roughly 7-8 medium-sized peaches or about 2.5 pounds. When you toss these beauties into the bowl with your dry mixture, take a moment to breathe in the intoxicating aroma; it’s like sunshine captured in fruit form! Gently fold them together using a spatula, ensuring each piece is coated in that sugary goodness. Now, let’s add 6 tablespoons of heavy cream and if you fancy it, a splash of 1/2 teaspoon vanilla extract—this step adds an extra layer of richness and warmth. I can’t stress enough how this creamy element not only enhances flavor but also contributes to a velvety texture that perfectly complements the juicy fruit. Once everything is mixed well and you see that beautiful peach blend come to life, you’re ready to pour this glorious concoction over your warm crust from earlier.
Step 6: The Art of Layering
With your filling prepped and ready to go, it’s time for the grand assembly! Carefully pour that luscious peach mixture right onto your warm crust; trust me when I say this step is non-negotiable! Pouring it onto a warm base helps meld those flavors together beautifully as they bake—creating an irresistible layer of molten peach goodness. Make sure to spread it out evenly with your spatula so every bite gets its fair share of that sweet nectar.
But wait! Before we dive into baking this masterpiece, let’s sprinkle on our streusel topping for that perfect crunch. Remember those reserved crumbs from earlier? Now’s their time to shine! Add 1/4 cup of brown sugar to those remaining crumbs and mix gently with your fingers until large clumps form—this is what gives us those delightful crispy bits atop our bars. These clumps are vital; they create texture contrast against the soft filling below. Once combined, sprinkle this delightful streusel topping evenly over the peach filling like confetti at a celebration—each scoop creating anticipation for the deliciousness to come.
Step 7: Baking Magic
Now it’s time for the oven magic! Preheat your oven to 350°F (180°C) if you haven’t already done so—it should be nice and hot by now, just waiting to envelop our creation in warmth. Place your pan in the center rack and let it bake for about 45 minutes. During this time, I want you to imagine how those flavors are melding together—the sweet smell wafting through your kitchen will be utterly intoxicating! Keep an eye on it during baking; you’re looking for two key indicators: first, watch for bubbling juices around the edges—that’s a beautiful sign of flavor development—and second, look for that golden-brown top which indicates our streusel has reached its perfect crispiness.
Don’t rush this part; patience is key! As tempting as it might be to dive in early (believe me, I’ve been there), allowing it to bake fully ensures that everything sets beautifully together rather than turning into a soggy mess. If you’re unsure whether it’s done, gently shake the pan; if there’s minimal jiggle in the center and you see bubbling around the edges—you’re golden!
Step 8: The Importance of Cooling
Once they’re out of the oven—with that lovely golden hue beckoning you closer—you might feel an overwhelming urge to dig in right away. But hold on just a moment! Cooling is absolutely paramount here; let these bars cool completely on a wire rack before cutting into them. This cooling phase allows the filling to set properly—you want those juices thickened up just enough so when you slice into them later, they hold their shape beautifully instead of spilling everywhere like a runaway river.
I recommend letting them sit for at least 30 minutes, but if you can resist (which is no easy task!), allow them to cool completely for about 2 hours before indulging. This extra time transforms them from delightful treats into extraordinary bites of heaven where every layer shines through in perfect harmony. While they cool, consider pouring yourself a cup of tea or coffee; after all this hard work (and mouth-watering aromas), you’ve earned a little break!
Final Touches: Serving Your Peaches and Cream Crumble Bars
Step 9: The Sweet Reveal
Now comes one of my favorite parts—the big reveal! Once cooled completely (you did wait patiently, right?), grab a sharp knife and carefully cut these bars into squares or rectangles—whatever suits your fancy! You’ll notice how beautifully they hold together with clean lines showcasing layers upon layers of fruity goodness topped with crunchy streusel—it’s like art on your plate!
To elevate your serving experience even more (because why not?), feel free to dust each square lightly with powdered sugar or serve alongside a dollop of whipped coconut cream for an added layer of decadence that pairs perfectly with those juicy peaches. As you take that first bite, close your eyes and savor every morsel—the buttery crust grounding each flavor while bursts of sweet peach fill your mouth—it truly is profound satisfaction!
And there you have it—your very own batch of Peaches and Cream Crumble Bars ready to be shared with friends or savored solo during quiet moments at home. Trust me when I say these bars will become an instant favorite among family gatherings or cozy nights in—there’s just something special about sharing food made with love—and these bars are bursting with just that! Enjoy every crumb! 🍑🍰
Storage and Enjoyment Tips for Your Peaches and Cream Crumble Bars
Now that your kitchen is filled with the intoxicating aroma of baked peaches mingling with buttery crumble, it’s time to savor these delightful bars! But before you dig in (trust me, I get it!), let’s talk about how to preserve this culinary masterpiece so you can enjoy it long after the last bite. Proper storage will ensure that the flavors remain vibrant and the texture stays just right.
Storing Leftover Peaches and Cream Crumble Bars
To keep your Peaches and Cream Crumble Bars fresh, simply transfer any leftovers into an airtight container. This is key because it locks in moisture while preventing those pesky fridge odors from sneaking into your delicious creation. You can store them in the refrigerator for up to three days, but I promise you, they’re so good that they might not even last that long! For a little extra trick, you can place a slice of bread in the container; it absorbs moisture while helping keep those bars beautifully moist. The flavor only becomes more profound with time, as the juices from the peaches seep beautifully into that crumbly topping. When you’re ready to enjoy them again, feel free to serve them chilled straight from the fridge or gently reheat them in a warm oven until they’re just warmed through—this brings back that comforting hug of warmth that makes these bars truly extraordinary.
Freezing Peaches and Cream Crumble Bars for Later
If you’ve made a batch that you know you’ll want to enjoy later (and trust me, you will), freezing is a fantastic option! To freeze your delicious creations properly, cut the cooled bars into squares and arrange them in a single layer on a baking sheet first; this prevents them from sticking together. Once frozen solid (about 1-2 hours), transfer them into an airtight freezer bag or container, where they’ll stay fresh for up to three months. When you’re ready to indulge, just take out what you need and let them thaw at room temperature or reheat gently in the oven—it’s like unearthing a sweet treasure from your own kitchen! This convenience factor means you can have homemade happiness on hand whenever those peach cravings strike.
With these tips in mind, I hope you’ll find every excuse to whip up another batch of these heavenly bars!
Peaches and Cream Crumble Bars
Indulge in the delightful experience of Peaches and Cream Crumble Bars, where juicy peaches meet a buttery crumble topping that will transport you to sun-soaked summer days. This simple yet mouthwatering recipe is perfect for gatherings or quiet evenings at home. With lush peach filling enveloped in a crispy topping, every bite delivers a burst of flavor and nostalgia. Easy to prepare and even easier to devour, these bars embody the essence of seasonal fruit desserts and are sure to impress your family and friends. Get ready to savor life’s sweet moments!
- Prep Time: 20 minutes
- Cook Time: 60 minutes
- Total Time: 1 hour 20 minutes
- Yield: Makes about 12 servings 1x
- Category: Dessert
- Method: Baking
- Cuisine: American
Ingredients
- 2 1/2 cups all-purpose flour
- 2/3 cup granulated sugar
- 1/2 teaspoon salt
- 1 1/4 cups cold unsalted butter, cubed
- 5 cups pitted and chopped peaches (about 7–8 medium peaches)
- 1 cup granulated sugar (for filling)
- 6 tablespoons heavy cream
- 1/4 cup brown sugar, preferably dark
- 1/4 cup all-purpose flour (for filling)
- 1/2 teaspoon ground cinnamon
- 1/4 teaspoon salt (for filling)
- Optional: 1/2 teaspoon vanilla extract
Instructions
- Preheat your oven to 350°F (180°C) and grease a 9×13-inch pan or line it with parchment paper.
- In a mixing bowl, combine flour, 2/3 cup granulated sugar, and salt. Gradually mix in cubed cold butter until the mixture resembles coarse crumbs.
- Reserve 1 ½ cups of this crumb mixture for topping, then press the remaining crumbs into the bottom of the prepared pan.
- Bake the crust for about 15 minutes until lightly golden.
- Meanwhile, in another bowl, mix together the peaches, 1 cup granulated sugar, flour, cinnamon, and salt until combined. Gently fold in heavy cream.
- Pour the peach filling over the baked crust and top with the reserved crumb mixture.
- Bake for an additional 30-45 minutes until golden brown and bubbly.
- Allow cooling completely before slicing into squares.
Nutrition
- Serving Size: 1 bar (60g)
- Calories: 250
- Sugar: 18g
- Sodium: 150mg
- Fat: 12g
- Saturated Fat: 7g
- Unsaturated Fat: 5g
- Trans Fat: 0g
- Carbohydrates: 33g
- Fiber: 2g
- Protein: 3g
- Cholesterol: 30mg