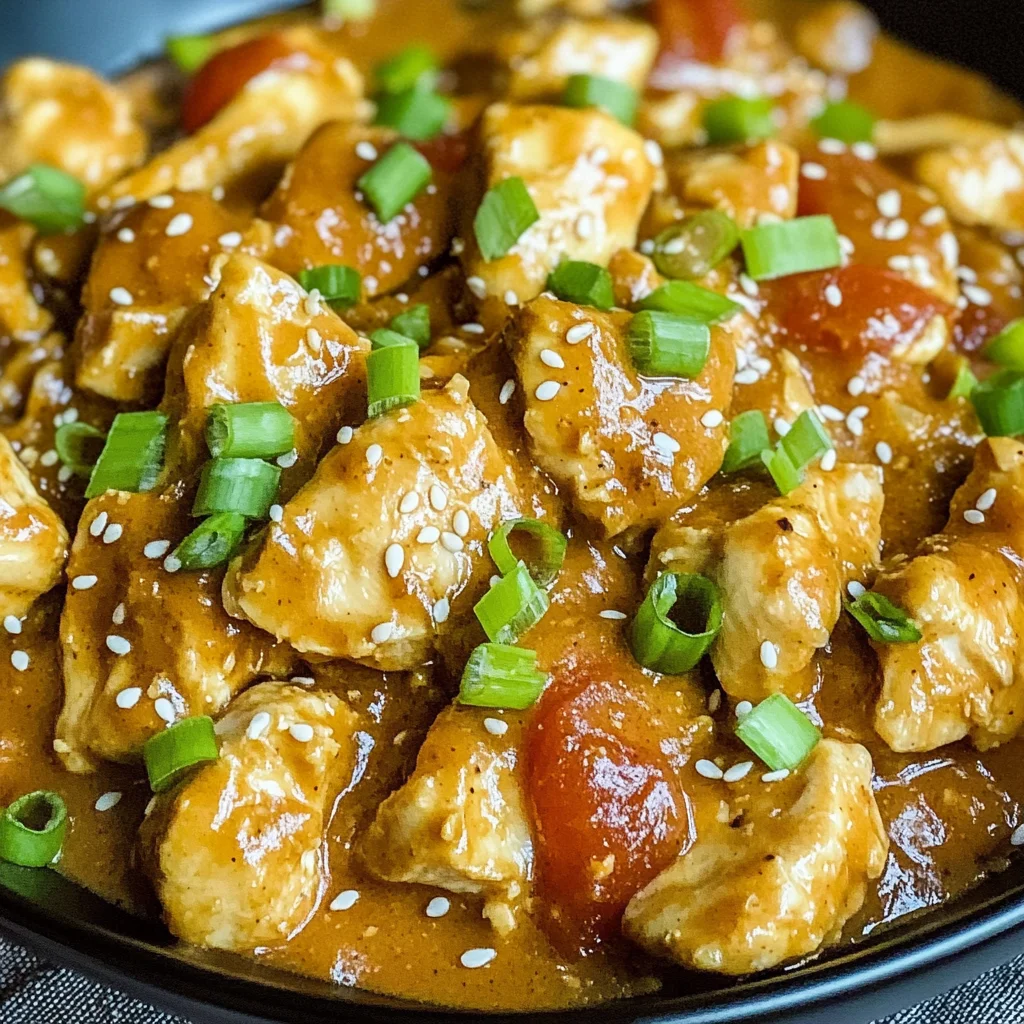
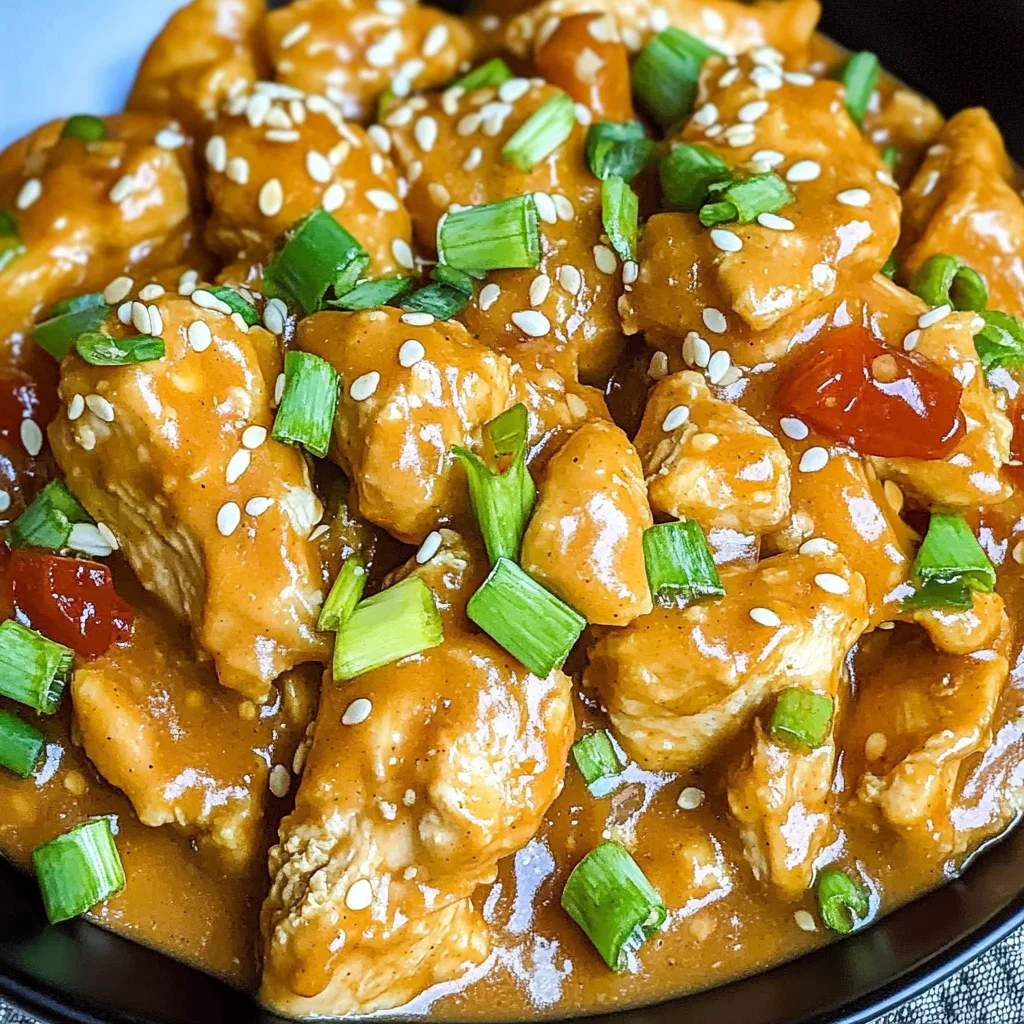
Peanut Butter Chicken
There’s something truly magical about the way food can evoke memories and emotions, isn’t there? This Peanut Butter Chicken is not just another dish; it’s an experience that wraps you in warmth and comfort with every bite. Imagine the rich, nutty aroma of peanut butter mingling with savory soy sauce and the subtle hint of garlic, creating a symphony of flavors that dance on your palate. As you take that first spoonful, you’re not just tasting dinner; you’re savoring a moment filled with love, laughter, and satisfaction. I promise you, this recipe will not only satisfy your hunger but also nourish your soul.
Every time I make this Peanut Butter Chicken, I’m reminded of joyful evenings spent around the table with family and friends, sharing stories and creating connections over delicious food. It’s quick enough for a weeknight meal yet impressive enough to serve at gatherings. Trust me when I say this dish is so much better than takeout—it’s healthier, fresher, and made with love right in your own kitchen! With just fifteen minutes from start to finish, you’ll find yourself whipping up this culinary delight more often than you’d think.
The Irresistible Allure of Sweet and Salty
What makes this recipe stand out is its beautiful balance of sweet and salty flavors. The creamy peanut butter brings an indulgent richness while the hoisin or teriyaki sauce adds a delightful sweetness that complements the savory notes of soy sauce perfectly. This dynamic combination isn’t just delicious; it’s profoundly satisfying—like a warm embrace on a chilly evening. It’s also incredibly versatile! Whether served over fluffy rice, tossed with noodles, or paired with vibrant vegetables, this dish can fit seamlessly into any meal plan. I find it especially wonderful for busy nights when you want something comforting but don’t have hours to spend in the kitchen.
Now that we’ve set the stage for this delightful dish let’s dive into making our very own Peanut Butter Chicken!
Peanut Butter Chicken: A Quick & Irresistible Delight
Let’s embark on this culinary journey together! This recipe is incredibly straightforward and perfect for both seasoned cooks and those just starting out. You’ll see how simple ingredients come together to create something utterly intoxicating!
Ingredients:
As we gather our ingredients for this delightful Peanut Butter Chicken, think of each one as a building block that contributes to the overall flavor profile of the dish. Each ingredient plays a unique role in crafting that unforgettable taste.
- 1½ lb chicken breast (cut into bite-sized pieces). The chicken breast is the star of our show; it provides lean protein that keeps this dish healthy without sacrificing flavor. When selecting chicken, look for pieces that are firm to the touch and have a pink hue—avoid any that look discolored or have an unpleasant smell. Cutting them into bite-sized pieces not only helps them cook quickly but also allows them to soak up all those delicious sauces we’re about to whip up!
- 3 Tbsp cornstarch (or almond flour). Here’s where we add some magic to our chicken! Cornstarch acts as a coating for our chicken pieces, creating an ultra-crispy exterior when fried while keeping the meat succulent inside. If you prefer almond flour for a nutty twist or are looking for gluten-free options, feel free to substitute it here—it works beautifully too!
- ¼ cup peanut butter. This is where our dish gets its luscious creaminess! Choose natural peanut butter if possible; it has no added sugars or hydrogenated oils, allowing you to taste the pure essence of peanuts in every bite. Plus, as it cooks down in our sauce, it transforms into an irresistible liquid gold that clings lovingly to each piece of chicken.
- ¼ cup hoisin sauce (or teriyaki sauce). Hoisin sauce adds depth with its sweet-and-salty flavor profile; it’s like a secret weapon in Asian cuisine! If you’re opting for teriyaki sauce instead, know it will lend a slightly different sweetness but still deliver that satisfying umami kick we crave.
- 3 Tbsp soy sauce. Soy sauce introduces saltiness and complexity—it’s absolutely paramount in balancing out all those flavors we’ve introduced so far. When choosing soy sauce, look for low-sodium versions if you’re watching your salt intake; it allows us to control how much sodium is going into our meal without losing flavor.
- 1 tsp sesame oil. Just a touch goes a long way! Sesame oil adds a nutty aroma that’s simply intoxicating and enhances the overall flavor profile beautifully. Use toasted sesame oil if you can find it; its rich flavor will elevate your dish even further.
- 1 tsp garlic (minced). Freshly minced garlic is non-negotiable here! Its bold flavor complements our peanut butter perfectly while adding aromatic depth that rounds out our dish beautifully. Don’t rush chopping it—take your time to get those small pieces just right!
- ⅔ cup water. Water serves as a thinning agent for our sauce, ensuring everything melds together nicely without being overly thick or gloopy. It helps achieve that silky texture we’re after!
- 2 Tbsp cooking oil (for frying). We need oil in order to fry our chicken until golden brown and crispy! Use high smoke point oils like vegetable or canola oil which are perfect for achieving that lovely sear without imparting too much flavor themselves.
- ½ Tbsp sesame seeds (optional for topping). These little nuggets add texture and visual appeal when sprinkled over your finished dish—a nice touch but entirely optional if you want to keep things simple.
- 1 Tbsp green onions (chopped, optional for topping). Green onions bring freshness and color—it’s like adding nature’s confetti on top of your meal! They provide a mild oniony crunch that contrasts wonderfully with the creamy texture of the chicken.
Equipment You’ll Need:
Having the right tools handy makes cooking not only easier but also more enjoyable! Think of these utensils as essential partners in bringing your Peanut Butter Chicken dream alive.
- Large skillet or wok – A good quality skillet with non-stick properties helps ensure even cooking without sticking issues—crucial when frying up those tender chicken pieces until they reach golden perfection.
- Mixing bowls – A couple of mixing bowls will help keep things organized during prep time; one for coating the chicken and another for whisking together your delectable peanut butter sauce.
- Measuring cups and spoons – Precision matters! Having these tools ensures you’re getting all those delicious ratios just right so each element shines through beautifully.
- Spatula – An essential tool for stirring gently without tearing apart your delicate chicken pieces as they cook away happily in their flavorful bath!
Now that we’ve gathered everything we need let’s dive into preparing this mouthwatering Peanut Butter Chicken!
Step 1: Prepare Your Chicken
Start by taking your 1½ lb chicken breast cut into bite-sized pieces and tossing them gently with 3 Tbsp cornstarch in a small mixing bowl until they’re well coated. This step is crucial because cornstarch forms an excellent crust when fried—it locks moisture inside while providing crispness outside—a textural contrast that’s utterly satisfying! Set aside this mixture while we focus on crafting our sauce next.
Step 2: Whisk Up That Sauce
In another bowl—a medium one should do nicely—combine ¼ cup peanut butter with ¼ cup hoisin sauce (or teriyaki), 3 Tbsp soy sauce, 1 tsp sesame oil, minced garlic (1 tsp), and ⅔ cup water until everything is evenly blended together into smooth liquid gold goodness! Don’t rush this step; take time creating harmony among these ingredients—the result will be worth every second spent whisking away!
Step 3: Sear The Chicken
Next comes my favorite part—cooking up those cornstarch-coated morsels! Heat up 2 Tbsp cooking oil over medium heat in your skillet until shimmering gently—a sign it’s ready for action! Carefully place your coated chicken pieces into hot oil; spread them out so they have room to fry rather than steam together… Oh my goodness—the sizzle alone will make your heart sing! Cook them undisturbed initially for about 5 minutes before flipping occasionally until they turn golden brown all over—a glorious sight indeed!
Step 4: Coat With Sauce
Once you’ve achieved beautiful browning on each side (and perhaps been tempted already by their tantalizing aroma!), pour that luscious peanut butter mixture directly over cooked chicken pieces within the skillet while giving everything a lovely stir until fully coated—trust me here—the transformation happening is mesmerizing! Allow it to simmer gently over low heat now as flavors meld together harmoniously; let it thicken slightly over about 4 minutes before serving hot off-the-stove glory onto plates ready adorned with optional sesame seeds & chopped green onions if desired… Ahh perfection awaits!
This Peanut Butter Chicken recipe is bound not only to become one of your favorites but will also surely impress anyone fortunate enough to share in such delightful dining moments around tables filled laughter & joy alike… Now go forth my friend & create something extraordinary today—happy cooking!
Step 5: Pouring in the Peanut Butter Sauce
Now that your chicken is beautifully cooked and no longer pink, it’s time for the magic to happen—this is where the peanut butter sauce comes into play! Carefully pour the velvety mixture into the skillet, allowing it to envelop each piece of chicken like a warm hug. Stir gently but thoroughly; you want every morsel to be coated in that luscious sauce. This step is absolutely paramount because it infuses the chicken with a rich, nutty flavor that takes this dish from ordinary to extraordinary. As you stir, take a moment to savor the intoxicating aroma wafting up from the pan—it’s a delightful combination of sweet and savory scents that will have your mouth watering.
Let’s talk about thickening. As you continue to cook, you’ll notice that the sauce begins to bubble and thicken beautifully. This transformation occurs as the water evaporates and the cornstarch works its magic, creating a silky glaze. Keep an eye on it during this cooking time, which should be around 4-5 minutes. You’ll know it’s ready when the sauce clings lovingly to the chicken pieces instead of pooling at the bottom. Trust me on this; patience is key here! If you rush through this process, you might end up with a watery sauce that lacks that rich depth of flavor we’re aiming for.
Step 6: The Final Flourish
Once your peanut butter chicken has reached its glorious thickness, it’s time to take it off the heat and prepare for serving! But before you do so, consider this—the garnishes can elevate your dish from great to spectacular. I often sprinkle a handful of sesame seeds across the top; they add both texture and a touch of elegance that makes this meal feel extra special. If you have some green onions on hand, chop them finely and sprinkle those over as well—this adds a vibrant pop of color as well as a refreshing crunch that contrasts beautifully with the creamy sauce.
As you’re doing this, take a moment to appreciate what you’ve just created—a simple yet profoundly satisfying meal bursting with flavor! The combination of peanut butter and hoisin sauce brings together sweet and savory notes in a way that dances on your palate. Imagine serving this at your dinner table—the smiles on your family’s faces as they dig into their bowls will make all your efforts worthwhile!
Step 7: Plating Perfection
Now comes one of my favorite parts—the plating! How we present our food can truly enhance our dining experience. Grab some plates or bowls (depending on whether you’re feeling casual or fancy) and start by spooning a generous portion of your peanut butter chicken onto each one. If you’re serving rice or noodles alongside (which I highly recommend for soaking up that delicious sauce), create a small nest in the center of each plate before layering on the chicken. This not only looks appealing but also allows everyone to enjoy every last drop of that irresistible sauce.
Don’t forget about those garnishes we prepared earlier! Sprinkle sesame seeds and chopped green onions over each plate just before serving; these little details are what transforms dinner into an event. And let’s not overlook how good it feels to share something homemade with those we love—there’s nothing quite like watching them enjoy something you’ve poured your heart into!
Step 8: Savoring Every Bite
As you sit down at the table with your family or friends, take a moment before diving in—breathe in those delectable aromas swirling around you! The best meals are not just about nutrition; they’re about connection, conversation, and enjoyment. Before digging in, I encourage you to share why this dish means so much—perhaps it reminds you of cozy family dinners or late-night cravings satisfied after a long day. Whatever story you share will deepen everyone’s appreciation for what’s before them.
When you’re finally ready to take that first bite (and trust me, you’ll want to!), allow yourself to fully immerse in all those flavors—the creaminess of peanut butter mingling with sweet hoisin and savory soy sauce creates an extraordinary symphony for your taste buds. Each mouthful is not just food; it’s an experience filled with warmth and love—something truly unforgettable!
Next Major Phase: Enjoying Your Meal
Congratulations! You’ve successfully navigated through making homemade peanut butter chicken that’s even more delicious than anything you’d find at takeout—and so much healthier too! Now it’s time for everyone to dig in and enjoy every last bit of this delightful creation together. Whether served over rice, noodles, or simply enjoyed on its own with fresh veggies on the side, I promise it’s going to be a hit at your dinner table!
Storage and Enjoyment Tips for Your Peanut Butter Chicken
Now that your kitchen is filled with the intoxicating aroma of your freshly made peanut butter chicken, it’s time to dig in! I can already imagine the smiles around your dinner table as everyone takes their first bite. But if you happen to have leftovers (which is rare because it’s just so delicious), don’t worry! I’ve got some stellar tips on how to store and enjoy this scrumptious dish even after the meal is over.
Storing Leftover Peanut Butter Chicken
To keep your peanut butter chicken as delightful as it was fresh off the stove, I recommend transferring any leftovers into an airtight container. This will help seal in all those flavors and keep the chicken juicy! You can easily store it in the refrigerator for up to three days, but trust me when I say it’s best enjoyed within the first couple of days. If you’re concerned about keeping that creamy sauce from becoming too thick or congealed, place a slice of bread inside the container before sealing it up; it acts like a sponge, absorbing excess moisture while maintaining the quality of your dish. When you reheat it, simply pop it in a skillet over low heat or warm it in the microwave until heated through. You’ll find that while the flavors may deepen slightly, they remain utterly delicious—making this a wonderful option for quick lunches or satisfying dinners throughout the week!
Freezing Peanut Butter Chicken for Later
If you want to keep this delightful dish on hand for even longer, consider freezing your peanut butter chicken! To do this properly, allow it to cool completely before transferring it into a freezer-safe container or heavy-duty zip-top freezer bags. Make sure to remove as much air as possible before sealing; this will prevent freezer burn and ensure that when you’re ready to enjoy it again, the flavors are still vibrant and rich. Properly stored, your peanut butter chicken can last up to three months in the freezer. When you’re ready to savor those flavors again, simply thaw it overnight in the fridge and reheat on a skillet or microwave—no one will ever know it was frozen! The convenience factor here is absolutely paramount; having this meal ready at a moment’s notice makes dinner planning feel like a breeze!
Peanut Butter Chicken

Peanut Butter Chicken is a quick and delicious dish that brings together the creamy richness of peanut butter with savory Asian flavors to create a meal that’s both satisfying and comforting. In just 15 minutes, you can prepare this easy chicken dinner that’s perfect for busy weeknights or special occasions. The sweet and salty balance of hoisin sauce and soy sauce elevates the dish, making it a family favorite. Serve it over rice or noodles, and watch as everyone at the table digs in with delight. This homemade recipe is not just about filling your belly; it’s about creating heartwarming moments with loved ones as you savor every flavorful bite.
- Prep Time: 10 minutes
- Cook Time: 5 minutes
- Total Time: 15 minutes
- Yield: Serves 4
- Category: Main
- Method: Frying
- Cuisine: Asian
Ingredients
- 1½ lb chicken breast (cut into bite-sized pieces)
- 3 Tbsp cornstarch (or almond flour)
- ¼ cup natural peanut butter
- ¼ cup hoisin sauce (or teriyaki sauce)
- 3 Tbsp soy sauce
- 1 tsp sesame oil
- 1 tsp garlic (minced)
- ⅔ cup water
- 2 Tbsp cooking oil (for frying)
Instructions
- Toss the chicken pieces in cornstarch until well coated.
- In another bowl, mix peanut butter, hoisin sauce, soy sauce, sesame oil, garlic, and water until smooth.
- Heat cooking oil in a skillet over medium heat. Fry the chicken until golden brown and fully cooked.
- Pour the peanut butter sauce over the chicken in the skillet and stir to coat evenly.
- Allow to simmer for about 4-5 minutes until the sauce thickens.
- Serve hot over rice or noodles, topped with sesame seeds and chopped green onions if desired.
Nutrition
- Serving Size: 1 cup (approximately 200g)
- Calories: 360
- Sugar: 8g
- Sodium: 720mg
- Fat: 18g
- Saturated Fat: 3g
- Unsaturated Fat: 12g
- Trans Fat: 0g
- Carbohydrates: 20g
- Fiber: 2g
- Protein: 30g
- Cholesterol: 70mg