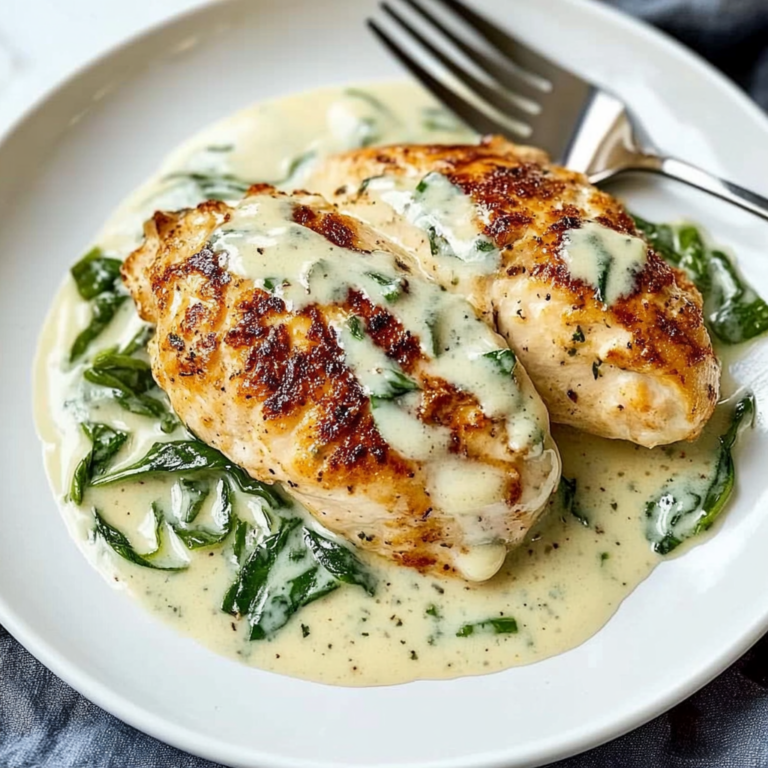
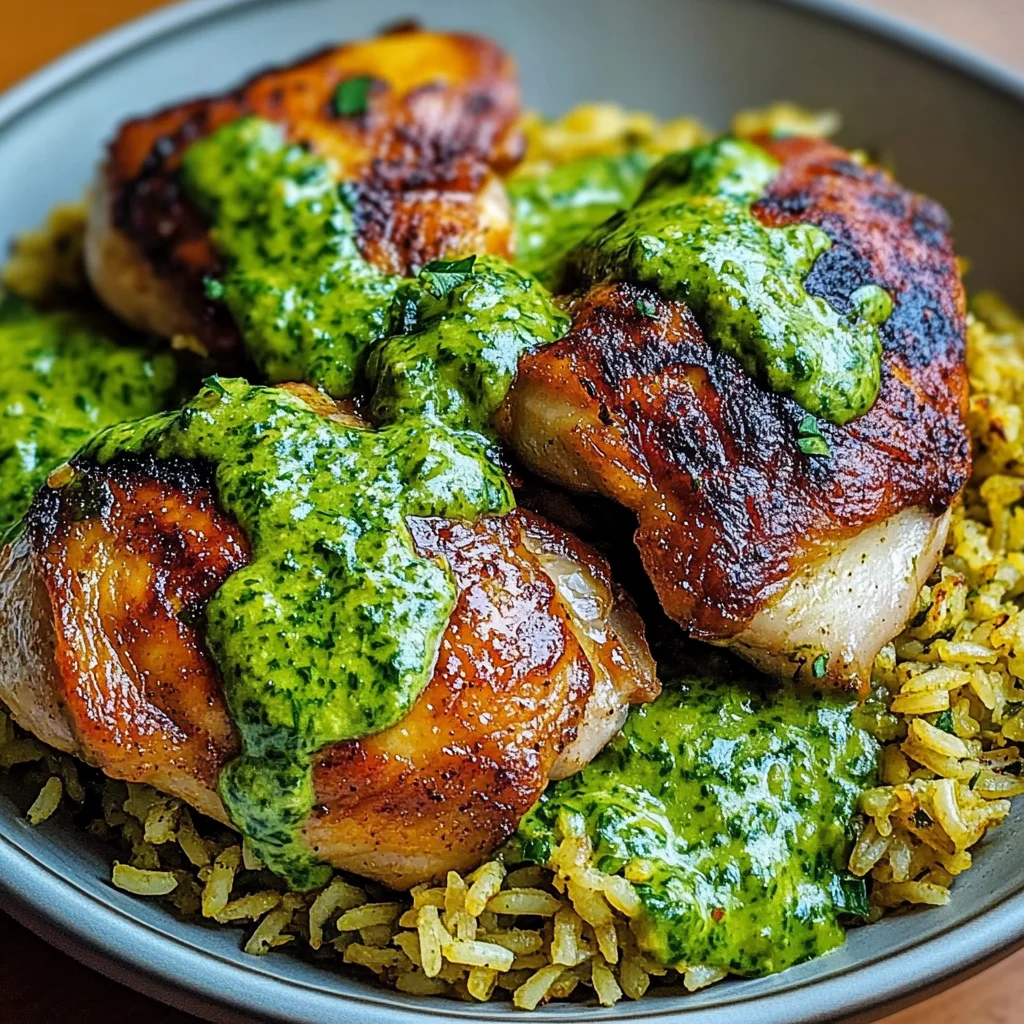
Peruvian Chicken And Rice with Green Sauce
There’s something truly magical about how a simple dish like chicken and rice can evoke feelings of warmth, nostalgia, and comfort. As I think about the vibrant streets of Lima, where the aroma of spices mingles with laughter and chatter, I’m always transported back to those moments spent sharing meals with loved ones. This Peruvian Chicken And Rice with Green Sauce is not just a recipe; it’s a journey into a world of flavors that beautifully marries tradition with innovation. Picture tender, juicy chicken seasoned to perfection, nestled atop fluffy cilantro-lime rice, all drizzled in that legendary green sauce – a creamy, zesty aji verde that dances across your palate and beckons you for another bite. Trust me when I say that every forkful is an experience you won’t soon forget.
Cooking this dish feels like crafting a colorful tapestry; each ingredient plays its part in creating something profoundly satisfying. The chicken thighs are marinated in aromatic spices that infuse them with flavor while ensuring they remain juicy and tender during cooking. The rice, light and fragrant from the addition of fresh cilantro and lime juice, serves as the perfect canvas for our star players. And let’s not forget about that green sauce! It’s not merely an accompaniment; it’s the heart and soul of this dish—spicy, tangy, and utterly intoxicating. Whether you’re gathering friends for a casual dinner or simply treating yourself to a delicious meal at home, this recipe brings people together over a shared love for good food.
The Irresistible Allure of Aji Verde
What makes this dish so special? It’s more than just the beautiful presentation or the enticing flavors; it has deep cultural significance deeply rooted in Peruvian cuisine. Aji verde has become synonymous with Peruvian cooking—a staple that elevates countless dishes beyond their humble beginnings. Its vibrant green hue is not only visually appealing but also represents freshness and zest. People often gather around tables to share stories while enjoying dishes drizzled with this remarkable sauce, celebrating both heritage and innovation. It’s perfect for any occasion—from family dinners to festive gatherings—and I promise you’ll find yourself craving it long after your plate is clean.
Ingredients:
Now that we’ve set the stage for this culinary adventure, let’s dive into what you’ll need to create this enchanting dish! Each ingredient has its own story to tell and plays a vital role in bringing our Peruvian Chicken And Rice with Green Sauce to life.
- 4 bone-in, skin-on chicken thighs (about 2 pounds). These chicken thighs are absolute stars in our recipe! Their bone-in nature ensures they remain juicy and flavorful throughout cooking while the skin crisps up beautifully in the oven. When selecting your chicken, look for thighs that are plump with even coloring—this usually indicates freshness. If you prefer boneless options or want to save time, feel free to substitute with boneless thighs or even chicken breasts, though keep in mind that they may require less cooking time.
- 2 tablespoons olive oil. This luscious liquid gold is perfect for searing our chicken before it heads into the oven. Olive oil not only adds richness but also helps achieve that crispy skin we all crave. When choosing your olive oil, go for extra virgin if possible—it has a more robust flavor profile that can elevate your dish significantly.
- 1 teaspoon ground cumin. Cumin carries an earthy warmth that really ties our spices together beautifully here. It’s one of those ingredients that feels essential when making Latin American dishes because it adds depth without overpowering other flavors. Make sure your cumin is fresh—ground spices lose potency over time—so if yours has been sitting on the shelf for ages, consider grabbing some new.
- 1 teaspoon smoked paprika. This spice introduces a subtle smokiness that rounds out our flavor profile perfectly! Unlike regular paprika, smoked paprika brings an additional dimension that’ll make your taste buds sing with joy! Look for Spanish smoked paprika (or pimentón) if you can—it tends to be richer and more complex than regular varieties.
- 1 teaspoon garlic powder. While fresh garlic is wonderful in many recipes, garlic powder offers convenience without sacrificing flavor here! It blends seamlessly into our spice mix and provides an underlying layer of savory goodness throughout the dish.
- 1 teaspoon salt. A vital component in any recipe! Salt enhances every single flavor present in your dish—it’s truly non-negotiable! Use kosher salt if possible as its larger grains make it easier to control seasoning without overwhelming your food.
- ½ teaspoon black pepper. Black pepper adds warmth and a hint of spice while balancing out the other flavors beautifully! Freshly ground black pepper is ideal since pre-ground versions often lack robust flavor—investing in whole peppercorns will absolutely enhance your culinary endeavors!
- 1½ cups jasmine rice (basmati works beautifully too). Jasmine rice lends itself perfectly due to its fragrant aroma and slightly sticky texture when cooked—ideal for soaking up all those delicious saucy flavors! Basmati is another fantastic option as well; just ensure you rinse before cooking until water runs clear—it removes excess starch for fluffier grains!
- 2¼ cups chicken broth. Using broth rather than water adds layers upon layers of flavor to our rice! Homemade broth is always best if you have it on hand; however, store-bought works fine too—just be mindful of sodium levels!
- ¼ cup fresh cilantro, chopped. Fresh herbs brighten any dish instantly—a splash of color paired with aromatic flair elevates everything from meats to grains! Choose vibrant green leaves without wilting or browning; these beauties lend freshness right at serving time!
- 2 tablespoons lime juice. Bright acidity from lime juice wakes up flavors like nothing else can! It cuts through richness while enhancing sweetness naturally found within ingredients like chicken or rice—don’t skip this step!
- 1 tablespoon butter. Butter brings creaminess into play here—the secret ingredient behind luscious mouthfeel without overpowering anything else going on throughout this dish!
- ½ teaspoon salt (for rice). Yes—you’ll need additional salt specifically tailored toward seasoning our rice too! Think about balancing tastes as we build layers upon layers within each bite!
- 4-5 jalapeño peppers, stems removed. Jalapeños introduce heat along with vibrant color—I recommend tasting one before cooking so you know exactly how spicy they’ll be! If you’re seeking milder results opt-out on seeds; removing them will provide just enough kick without setting everyone ablaze!
- 1 cup fresh cilantro leaves and tender stems (for green sauce). You can’t have authentic Peruvian green sauce without copious amounts of cilantro—the more greenery here means brighter flavors achieved later on during blending prep time!
- ½ cup mayonnaise (can substitute vegan mayo). Creaminess comes courtesy of mayo—it acts as glue binding everything together while providing silky texture we adore when drizzling atop plated portions afterward!
- ¼ cup queso fresco (or feta cheese) (optional). Crumbled cheese lends richness alongside tanginess—we’re using it sparingly here so feel free to adjust based on preference—or omit altogether depending on dietary restrictions/preferences noted earlier!
- 2 garlic cloves, minced or pressed into paste form preferred (optional). Freshly minced garlic offers robust aromas plus intensified taste—it intensifies overall experience found within sauces prepared from scratch!
- 2 tablespoons lime juice (for green sauce). Just like earlier mentioned—the zing from citrus elevates flavors throughout every bite taken later on so make sure there are plenty left over after prepping sauces upfront!
- 1 tablespoon olive oil (for green sauce). Adds richness again but also helps emulsify everything nicely together once blended ensuring smooth consistency desired at finish line here—a little extra never hurt anyone right?
- Salt (to taste). Always keep tasting as cooking progresses—you want things balanced properly before final plating happens ensure satisfaction factor remains high among guests gathered around table tonight!
Equipment You’ll Need:
Before we jump headfirst into preparing our delightful Peruvian Chicken And Rice with Green Sauce, let’s take a moment to talk about having the right tools at hand; they’re essential partners in creating something wonderful! Having these kitchen essentials will make your cooking experience smoother and more enjoyable—not only saving time but also helping you achieve delicious results every time.
- Large oven-safe skillet – This versatile pan is crucial because it allows us to sear the chicken perfectly on the stovetop before finishing it off in the oven—all without needing extra dishes! You want something heavy-bottomed like cast iron or stainless steel which holds heat well ensuring even browning occurs across all surfaces during searing process.
- Food processor or blender – This tool becomes invaluable when whipping up our luscious green sauce—you’ll want something powerful enough so ingredients blend seamlessly together resulting in velvety consistency desired by everyone who tries it afterward! If neither option’s available consider using mortar/pestle instead but be prepared for some extra work involved there…
- Medium saucepan – We need this trusty pot mainly dedicated towards cooking jasmine rice alongside simmering flavorful broth until fluffy goodness emerges post-cooking phase—lookout pots made from stainless steel—they distribute heat evenly helping prevent any sticking issues while achieving perfect texture needed later on serving plate!
Now that we have gathered all our ingredients along with essential equipment needed ahead… let’s take steps toward transforming these humble components into culinary magic through preparation instructions provided below—together we’ll create something truly extraordinary worthy enough show off during next gathering held amongst friends/family alike…
Step 1: Seasoning & Preparing the Chicken
First things first: let’s season those lovely chicken thighs! Pat them completely dry using paper towels—this step is absolutely paramount because moisture prevents crispy skin from forming during searing stages ahead later down line here… We want golden brown crispiness enveloping juicy meat inside which means no excess liquid allowed at start point either way here folks! In order mix seasoning blend together combine ground cumin along smoked paprika alongside garlic powder along salt/pepper yields aromatic mixture ready coat each piece thoroughly afterwards letting sit briefly prior transitioning onto next phases outlined further down road…
This process called “dry brining” helps build flavor deep within meat itself allowing spices permeate better leading ultimately towards succulent bites enjoyed after roasting takes place inside hot oven moments later… Make sure rub gets under skin whenever possible too—that’s where maximum flavor lives so don’t skimp out playing nice there okay? Let seasoned pieces rest undisturbed during prep times approaching next stages ahead ensuring maximum impact felt later enjoyed through final result awaited patiently upon serving plate soon thereafter…
Step 2: Crafting Our Green Sauce
While waiting patiently during resting periods happening around seasoned poultry items now let’s create unforgettable emerald elixir known widely across Peru today—the famous ají verde sauce beloved by many around globe alike wanting something fresh yet spicy accompanying various dishes served regularly whenever gatherings occur near near homes everywhere… Begin by adding jalapeños directly into food processor pulsing away until roughly chopped making sure seeds get removed beforehand should milder option desired otherwise leave intact kick things up notch accordingly based preferences noted previously above…
Next toss freshly chopped cilantro leaves alongside mayonnaise plus crumbled queso fresco making rich creamy texture unfold right before eyes blending harmoniously throughout mixing bowl ensuring consistent smoothness achieved along edges scraping sides periodically whilst processing away towards perfection reached finally… Add minced garlic cloves then squeeze zesty lime juice straight onto top improving brightness while adding depth overall layered taste profiles built meticulously over course prep times occurring earlier noted above… Finish off drizzle remaining olive oil finally tossing generous pinch salt adjust based personal preference experienced thus far keeping everything balanced appropriately among contrasting notes presented throughout entire experience enjoyed afterwards once plating completes successfully done correctly coming forth soon thereafter…
Step 3: Searing Our Chicken
Now comes one of my favorite parts: searing those seasoned thighs until golden brown perfection unfolds right before us… Heat up olive oil inside large oven-safe skillet placed over medium-high heat until shimmering begins happening revealing readiness cues shown plainly back toward center eye focused carefully observing progress unfold steadily leading direct pathway forward toward crispy skins developing underneath direct contact surfaces met successfully along route taken thus far leading towards delicious outcomes anticipated eagerly ahead shortly thereafter…
Carefully place each thigh skin-side down taking care resist urge move them around initially allow proper crust form instead listening intently sounds sizzling emanating forth indicating Maillard reaction happening actively transforming plain poultry items becoming more flavorful right before very eyes witnessed closely watching progress unfold steadily… Sear approximately four-five minutes minimum till skins release easily then turn over flip onto opposite side continuing process another three minutes allowing browning deepen sufficiently throughout entire surface area meeting goal expectations set high when starting initial preparations realized previously recalling earlier discussions shared amongst family members/friends alike regarding culinary adventures undertaken previously together today…
Step 4: Finishing Off Chicken In The Oven
Once both sides fully browned ensure transfer skillet carefully preheated oven set temperature reaching four hundred degrees Fahrenheit ideally suited roast remaining portions reaching perfect internal temperature achieved comfortably nestled between bones located nearby allowing juices flow freely maximizing tenderness experienced fully eventually discovered once fork penetrates easily breaking apart upon contact observed once servings commence following shortly thereafter finished roasting period concluded completely satisfied moments await eagerly just beyond horizon seen clearly now approaching fast ahead moving onward towards completion expected imminently shortly thereafter reaching final destination awaited patiently by everyone gathered around dining table tonight enjoying company shared amongst relatives/friends alike reminiscing fond memories created alongside exciting new experiences awaiting discovery together soon afterward…
With these detailed steps laid out clearly accompanied alongside ample encouragement provided earlier throughout entire process expect nothing short extraordinary results achieved through dedication effort put forth culminating beautiful masterpiece enjoyed shared lovingly amongst loved ones gathered around tables everywhere tonight celebrating life itself through incredible feasts prepared together warmly embraced momentarily capturing essence joy inherent found within simple pleasures noticed effortlessly amidst daily routines experienced daily around world today… Happy cooking friends—I promise you’ll love every minute spent nurturing creativity sparked forth inspired by tradition embraced wholeheartedly everywhere across culinary landscape explored deeply further down path chosen knowingly traveled onward connecting hearts peoples through delightful encounters forged cherished memories formed forever lasting bonds portrayed vividly alive expressed artfully displayed proudly showcasing talents intertwined effortlessly showcased showcasing uniqueness crafted collectively cherishing shared inspirations igniting passions discovered inspiring future journeys unfolding gracefully moving forward joyfully side-by-side each step taken forward evermore together united blissfully enjoying delights encountered endlessly fulfilling nourishment sought after yearning fulfillment always dreamed returned lovingly heartwarming hug wrapping around souls intertwined intimately forevermore…
Step 5: Savoring the Sauce
Now that your vibrant green sauce is ready, we can turn our attention back to the chicken. But first, let’s take a moment to appreciate this creamy concoction you’ve just created. The combination of jalapeños, fresh cilantro, and smooth mayonnaise brings a unique depth of flavor that’s simply intoxicating. I often find myself sneaking spoonfuls straight from the processor! This step is not just about making a sauce; it’s about creating an experience that will elevate your Peruvian Chicken And Rice with Green Sauce from merely good to undeniably extraordinary.
Once blended, don’t rush into using it yet! Allow the sauce to rest for at least 10 minutes; this is crucial for letting those flavors meld together beautifully. Trust me on this—letting it sit allows each ingredient to harmonize, resulting in a luscious sauce that dances on your taste buds. You’ll notice how it transforms from a simple mixture into a truly special accompaniment for your chicken and rice. While it rests, make sure to taste it one last time; this is your moment to adjust the seasoning. A pinch more salt or a dash of lime might be just what it needs to reach perfection!
Step 6: Searing the Chicken
With the green sauce resting comfortably, we’re diving back into the heart of this dish—the chicken! This is where patience pays off in golden skin and delectable flavor. Heat two tablespoons of olive oil in a large oven-safe skillet over medium-high heat until shimmering but not smoking—this is the sweet spot for searing. Now, place your seasoned chicken thighs skin-side down in the pan and resist any temptation to move them around. Listen closely; that sizzle you hear means you’re building an incredible crust that will add layers of flavor and texture.
Allow the chicken to sear for about 4-5 minutes without interference; this step is essential because it creates that beautiful golden-brown exterior we all crave. You’ll know they’re ready to flip when they release easily from the pan—if they stick, they need more time! Once flipped, sear the other side for an additional 3 minutes before transferring the skillet to your preheated oven. This dual cooking method ensures your chicken remains juicy on the inside while achieving that coveted crispy skin on the outside. Remember, it’s all about creating layers of flavor through careful cooking techniques!
Step 7: Finishing in the Oven
Now comes one of my favorite parts—the oven finish! Carefully transfer your skillet full of sizzling chicken into a preheated oven set at 400°F (200°C). This high temperature is absolutely paramount because it helps crisp up that skin even further while allowing the meat to cook through without drying out. Roast those beauties for about 20-25 minutes until they reach an internal temperature of 165°F (74°C). If you have a meat thermometer handy, now would be a great time to use it!
Keep an eye on them as they roast; you want to see bubbling juices around the edges and golden skin that looks almost caramelized. The aroma wafting through your kitchen will be utterly intoxicating—a true testament to what’s happening inside that oven! Once done, remove them from the oven and allow them to rest for at least five minutes before serving. This resting period might feel like an eternity (I know!), but trust me—it allows those juices within the meat to redistribute evenly, ensuring every bite is profoundly satisfying and juicy.
Step 8: Preparing Cilantro-Lime Rice
While your chicken roasts away in blissful heat, let’s talk about preparing that fluffy cilantro-lime rice—it’s going to be your perfect sidekick for this meal! Start by rinsing 1½ cups of jasmine rice under cold water until it runs clear; this step removes excess starch and prevents your rice from becoming gummy or sticky during cooking—nobody wants clumpy rice with such flavorful chicken! In a medium saucepan, bring 2¼ cups of chicken broth to a rolling boil; using broth instead of water adds depth and richness that plain water could never achieve.
Once boiling, add in the rinsed rice along with half a teaspoon of salt (you want every layer seasoned!) and then reduce the heat immediately—this part is non-negotiable! Cover with a lid and let it simmer gently on low heat for exactly 18 minutes without lifting that lid (I know it’s tempting!). During this time, let all those steam-filled aromas envelop you as they work their magic on transforming simple grains into fluffy perfection. After 18 minutes are up, remove from heat but keep covered; let it sit undisturbed for another five minutes—this resting time allows residual steam to finish cooking any stubborn grains.
When you finally do lift that lid, prepare yourself for sheer delight as you fluff up the rice with a fork—it should look light and airy! Fold in freshly chopped cilantro, zesty lime juice, butter, and additional salt if needed; each ingredient enhances these grains beautifully while providing bright acidity and freshness. It’s incredible how such simple components can elevate something so basic into something extraordinary!
Final Touches
As we bring everything together for our Peruvian Chicken And Rice with Green Sauce feast, it’s time for those final touches that make all the difference between merely eating dinner and savoring an experience filled with heartwarming flavors.
Step 9: Plating Your Masterpiece
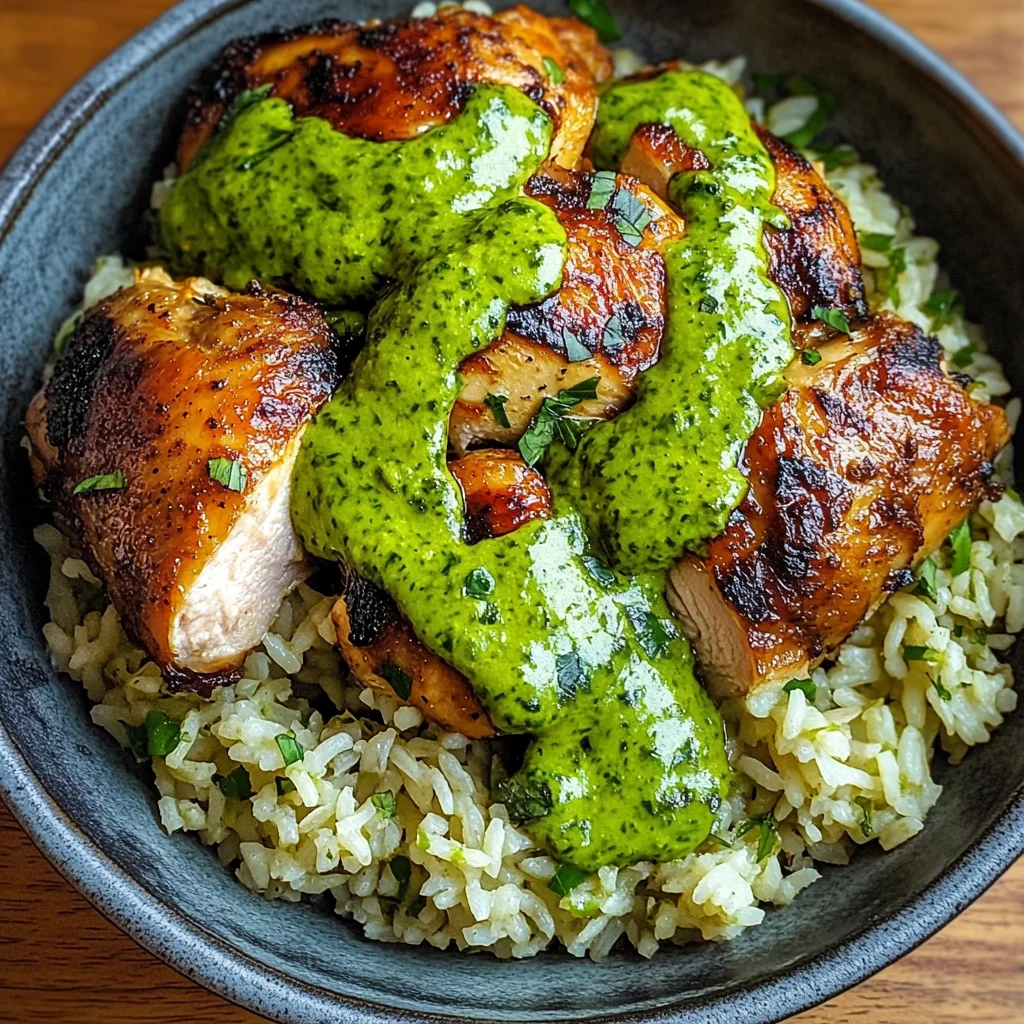
Now comes my favorite part—plating up this culinary creation! Start by ladling generous scoops of fluffy cilantro-lime rice onto each plate; allow some space on one side because here comes our star player—the crispy chicken thighs glistening invitingly next door! Nestle them right beside their bed of rice as if they’re meant to be together—and trust me—they are!
Finally, don’t forget about our vibrant green sauce! Drizzle it generously over both the chicken and rice like liquid gold cascading over everything deliciously harmonious before your eyes—a true visual feast worthy of any occasion! As you serve this dish family-style or onto individual plates (I recommend both), watch how everyone gathers around excitedly as they breathe in those fragrant aromas wafting through dining space.
And there you have it—the ultimate Peruvian Chicken And Rice with Green Sauce experience awaits you at home! Your friends will be raving about this meal long after dinner is done—I promise you that much! Enjoy every bite knowing you’ve crafted something truly special filled with love and passion straight from my kitchen to yours.
Storage and Enjoyment Tips for Your Peruvian Chicken And Rice with Green Sauce
Now that you’ve crafted this vibrant masterpiece of a meal, it’s time to revel in the joy of serving your Peruvian Chicken And Rice with Green Sauce! Picture the golden brown chicken glistening under that luscious green sauce, inviting everyone to dig in. It’s truly a dish that brings people together, sparking lively conversations and satisfied smiles around the table. But what if you have leftovers? Fear not! I have some wonderful tips to ensure you can savor this incredible combination even after the feast.
Storing Leftover Peruvian Chicken And Rice with Green Sauce
To keep your delightful creation fresh and flavorful, store any leftover Peruvian Chicken And Rice with Green Sauce in an airtight container. The key here is to make sure everything is sealed tightly to prevent moisture loss and preserve those beautiful flavors. If you happen to have a large batch, separating the chicken from the rice can help maintain their individual textures—after all, we want that rice to stay fluffy! You can enjoy your leftovers for up to three days when stored in the refrigerator. A little pro tip: place a slice of bread in the container with your rice; it absorbs excess moisture and keeps your grains from getting sticky. When reheating, gently warm everything up on the stove or in the microwave, adding a splash of broth or water if needed to revive its original juiciness. Trust me when I say that those flavors meld beautifully over time, and you might just find yourself savoring it even more!
Freezing Components for Later
If you’re looking ahead and want to prepare for busy days, freezing portions of your Peruvian Chicken And Rice with Green Sauce is an absolute game-changer! Simply let everything cool down completely before transferring it into freezer-safe bags or containers—be sure to squeeze out as much air as possible before sealing them tight. This dish will keep well in the freezer for about three months without losing its charm. When you’re ready to indulge again, simply thaw it overnight in the refrigerator and reheat gently on the stove or microwave until piping hot. Imagine pulling a container out on a chilly evening—just picture how comforting it would be to enjoy this vibrant dish again without any hassle! It’s such a lovely way to have homemade goodness at your fingertips whenever you crave something special.
Peruvian Chicken And Rice with Green Sauce

Peruvian Chicken and Rice with Green Sauce is a vibrant dish that captures the essence of comfort food with a twist of Latin American flair. The succulent chicken thighs are seasoned to perfection, resting atop fluffy cilantro-lime rice that absorbs the zesty flavors beautifully. Topping it all off is the iconic green sauce—aji verde—a creamy blend of jalapeños, cilantro, and lime that adds a refreshing kick. This recipe not only offers a delightful mix of textures and tastes but also serves as a heartwarming reminder of shared meals and cherished moments with loved ones. Whether for a weeknight dinner or a special gathering, this dish promises to satisfy and impress.
- Prep Time: 15 minutes
- Cook Time: 40 minutes
- Total Time: 55 minutes
- Yield: Serves 4
- Category: Main
- Method: Baking and Searing
- Cuisine: Peruvian
Ingredients
- 4 bone-in, skin-on chicken thighs
- 2 tablespoons olive oil
- 1½ cups jasmine rice
- 2¼ cups chicken broth
- ¼ cup fresh cilantro, chopped
- 2 tablespoons lime juice
- 4–5 jalapeño peppers
- ½ cup mayonnaise (or vegan mayo)
- Optional: ¼ cup queso fresco
Instructions
- Preheat your oven to 400°F (200°C).
- Season chicken thighs with olive oil, cumin, smoked paprika, garlic powder, salt, and black pepper.
- Heat olive oil in an oven-safe skillet over medium-high heat. Sear chicken thighs skin-side down for about 4-5 minutes until golden brown.
- Flip the chicken and sear the other side for another 3 minutes before transferring the skillet to the oven. Roast for 20-25 minutes until fully cooked.
- While chicken roasts, rinse jasmine rice under cold water until clear. In a saucepan, bring chicken broth to a boil; add rice and salt. Cover and simmer on low for 18 minutes.
- For the green sauce, blend jalapeños, cilantro, mayonnaise, lime juice, and salt until smooth.
- Allow chicken to rest before serving on a bed of rice drizzled generously with green sauce.
Nutrition
- Serving Size: 1 thigh with rice (approx. 300g)
- Calories: 570
- Sugar: 1g
- Sodium: 780mg
- Fat: 30g
- Saturated Fat: 7g
- Unsaturated Fat: 22g
- Trans Fat: 0g
- Carbohydrates: 50g
- Fiber: 2g
- Protein: 33g
- Cholesterol: 110mg