Smashed Chickpea Avocado Dill Pickle Sandwiches
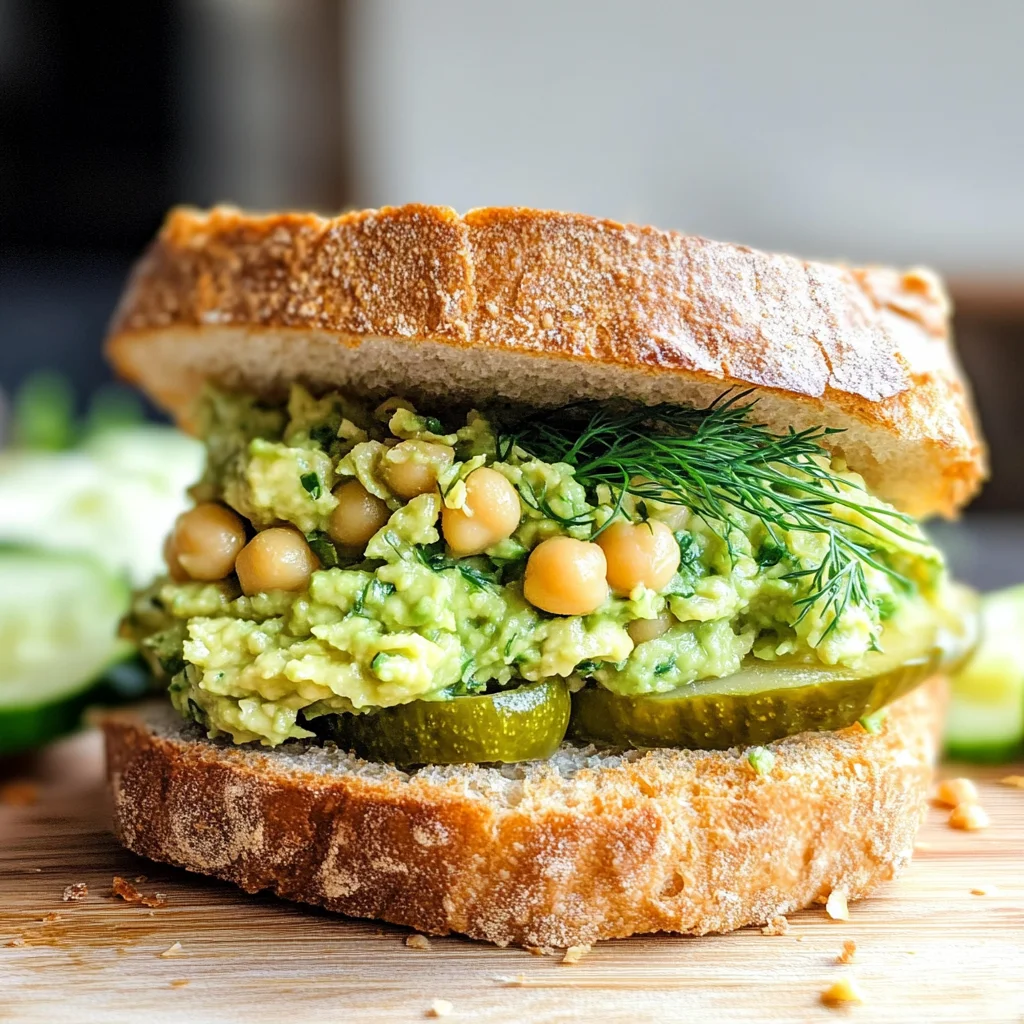
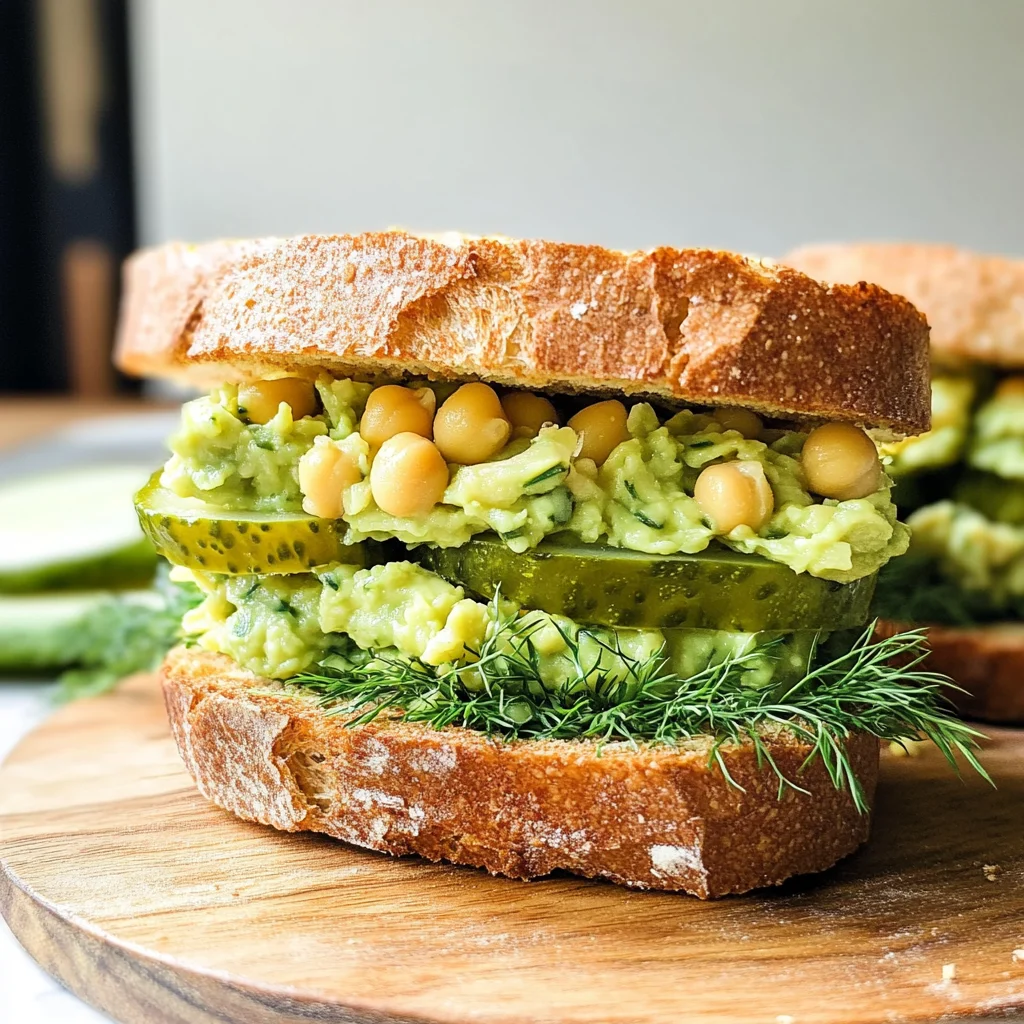
There’s something incredibly heartwarming about a simple sandwich. It’s not just a meal; it’s an experience, a cozy hug of flavors that brings people together around the table. Imagine taking your first bite of these Smashed Chickpea Avocado Dill Pickle Sandwiches—a delightful blend of creamy avocado and hearty chickpeas that dances on your palate with every mouthful. The freshness of dill and the crunch of pickles add a vibrant touch, elevating this dish into a realm that’s both nourishing and utterly delightful. I promise you, this isn’t just another sandwich; it’s a revelation in taste that will leave you feeling satisfied, healthy, and oh-so-happy.
What I love most about this recipe is its versatility—it’s perfect for a leisurely lunch at home or an effortless picnic treat. There’s something deeply satisfying about smashing those chickpeas and avocados together, creating a luscious spread that’s brimming with healthy fats and proteins. This dish feels like it has roots in tradition while also embracing modern flavors. Whether you’re looking to impress friends at a gathering or simply craving something delicious for yourself, these sandwiches deliver on all fronts.
Smashed Chickpea Avocado Dill Pickle Sandwiches: A Wholesome Delight
Let’s dive into this easy yet remarkable recipe! Trust me when I say that once you make these Smashed Chickpea Avocado Dill Pickle Sandwiches, they’ll become your go-to for quick lunches or snacks that truly satisfy. The combination of textures and flavors is nothing short of extraordinary, making each bite an experience worth savoring.
Ingredients:
Before we embark on this culinary journey together, let’s talk about the ingredients that will bring our sandwiches to life. Each component plays a pivotal role in crafting the perfect balance of taste and nutrition.
1 1/2 cups cooked chickpeas (or 1 14-oz can, drained and rinsed). Chickpeas are our hearty base here, offering not just protein but also fiber to keep you feeling full longer. When using canned chickpeas, look for those packed in water with no added preservatives—this ensures you’re getting the purest flavor possible. If you prefer cooking dried chickpeas from scratch, soak them overnight and boil until tender; the freshness is worth it!
1 ripe avocado, pitted. Ahh, the star of our show! Avocado brings in that creamy texture we crave while also contributing healthy fats that are essential for our bodies. Look for avocados that yield slightly when pressed; this indicates ripeness. Trust me on this—using a perfectly ripe avocado transforms your sandwich into something truly luxurious.
3 tablespoons freshly squeezed lemon juice. This zesty ingredient adds brightness to our mixture—it’s like sunshine in a bottle! Freshly squeezed is non-negotiable here as bottled lemon juice lacks the vibrant flavor we need. Plus, lemon juice helps prevent the avocado from browning too quickly—a little kitchen magic!
1 large garlic clove, minced. Garlic not only enhances flavors but also brings an aromatic punch that complements the creaminess of avocado so well. Mince finely to release those potent oils; remember not to rush this step because raw garlic can be quite overpowering if left too chunky.
1 celery rib, diced. Celery adds a delightful crunch to our mixture, providing texture contrast against the smoothness of avocado and chickpeas. Choose fresh celery with bright green stalks and crispy leaves—these will ensure your sandwiches have that refreshing bite.
1/4 cup finely chopped pickles. These tangy bites introduce an unexpected twist to our filling! The sharpness of pickles pairs beautifully with creamy elements, cutting through richness while adding layers of flavor. You can use dill pickles or even bread-and-butter varieties if you want something sweeter.
1/4 cup finely chopped dill, or to taste. Fresh dill is like summer captured in herb form! Its fragrant aroma makes every bite feel special—feel free to adjust based on how much you adore its flavor! If fresh isn’t available, dried dill can work in a pinch but won’t be as vibrant.
2 green onions, finely chopped. Green onions offer a mild onion flavor without being overpowering. Their subtle crunch complements other ingredients perfectly while adding a pop of color to your filling.
Pinch each fine sea salt and freshly ground black pepper. These are essential seasonings that elevate all other flavors present in your mix; they bring balance and make everything sing together harmoniously!
Whole grain bread, pitas, bagels, or tortillas. This choice is yours! Whole grain options provide more nutrients than white bread while offering satisfying texture—you might even consider experimenting with different types each time!
Lettuce or arugula. Greens act as crisp bedding for your filling; they provide freshness and help keep everything intact when assembling the sandwich!
Mustard. A simple layer adds depth—a dash of mustard cuts through richness beautifully while enhancing overall flavor complexity!
Equipment You’ll Need:
Now that we’ve gathered our ingredients let’s ensure we have the right tools at our disposal—the unsung heroes in any kitchen adventure! Having quality equipment not only makes cooking easier but also allows us to express ourselves creatively without frustration.
*Potato masher or fork – Essential for mashing up those chickpeas! A potato masher gives you more control over how smooth or chunky you’d like your filling to be; however, if you don’t have one handy—a sturdy fork does just fine too!
*Mixing bowl – A spacious bowl provides room for all ingredients when combining them into one glorious mixture without risking spills everywhere!
*Cutting board – An absolute must-have while chopping veggies—it protects your countertops from scratches while allowing you ample space for dicing up celery or mincing garlic efficiently.
*Knife – A sharp blade makes slicing through veggies easy-peasy! Investing in quality knives pays off tremendously as they cut cleanly compared to dull ones which can bruise delicate produce.
*Spoon – For mixing everything together after mashing—we want uniformity here so every bite captures all components involved seamlessly!
Step 1: The Joyful Smash
To kick things off with our Smashed Chickpea Avocado Dill Pickle Sandwiches, begin by placing your cooked chickpeas (or canned ones) into a mixing bowl. Using either a potato masher or the back of a sturdy fork—start smashing away! You’re aiming for roughly broken-up pieces rather than complete mush; leaving some whole chickpeas adds delightful texture later on. Trust me when I say don’t rush this step—it’s where all the fun begins! Once you’ve reached your desired consistency (a few lumps are totally acceptable), it’s time to introduce the creamy avocado into our mix!
Step 2: The Creamy Fusion
Now comes the moment where everything transforms into something magical—mash in one ripe avocado until it blends harmoniously with those smashed chickpeas! As you do this, think about how each element contributes uniquely to overall flavor profiles—the rich creaminess from avocados combined with nutty undertones from chickpeas creates an entirely new dimension worthy enough to serve anyone who takes one bite! At this stage add in three tablespoons of freshly squeezed lemon juice along with minced garlic cloves; their brightness amplifies existing flavors while preventing browning (a little kitchen trick!).
Step 3: Crunch Time
With our base now beautifully combined it’s time for some texture—add diced celery along with finely chopped pickles straight into that delicious mash-up we’ve created so far! Toss everything gently ensuring each ingredient melds together nicely without losing individual identities entirely—that crunch from celery paired alongside tangy bursts from pickles will transform ordinary bites into extraordinary experiences worth savoring long after lunchtime’s over…
Step 4: Herbaceous Bliss
Finally comes my favorite part—finishing touches! Sprinkle in freshly chopped dill followed by green onions before seasoning generously with fine sea salt & freshly ground black pepper based upon individual tastes/preferences (I encourage tasting along!). This final addition breathes life back into each mouthful—it’s what elevates simple ingredients beyond mere sustenance turning them instead toward flavorful triumphs within every single sandwich made thereafter…
I can’t wait for you to savor these Smashed Chickpea Avocado Dill Pickle Sandwiches—they’re more than just food; they’re an invitation to enjoy life’s simple pleasures wrapped up between slices of wholesome goodness!
Step 5: Create the Perfect Mash
Now that you have your chickpeas all prepped and ready, it’s time to unleash your inner culinary artist! Begin by taking a sturdy potato masher or simply the back of a fork—this isn’t about perfection; it’s about achieving that satisfying texture. You want to press down on those chickpeas until they start to break apart, releasing their nutty flavors into the air. Don’t worry if a few whole chickpeas remain intact; they add delightful little bursts of flavor and texture in every bite, making your Smashed Chickpea Avocado Dill Pickle Sandwiches even more interesting.
As you mash away, remember that this step is crucial for the overall mouthfeel of your sandwich filling—it needs to be creamy yet chunky enough to provide substance. Once you’ve reached a consistency that feels just right (think of it as a rustic mash), it’s time to introduce the star ingredient: the avocado! Scoop out the perfectly ripe avocado, which should yield easily to gentle pressure—it’s like unearthing liquid gold! Incorporating it into your chickpea mixture not only adds an incredible creaminess but also infuses healthy fats that are truly satisfying. The combination of flavors here is extraordinary; I promise you, each bite will be a symphony of taste!
Step 6: Infuse with Flavor
Next comes the moment where your sandwich filling transforms from simple to sensational! Add in the freshly squeezed lemon juice—it’s not just for zest; it’s an essential counterbalance to the rich avocado and earthy chickpeas. The acidity from the lemon will brighten up all those flavors beautifully, making each bite refreshing and invigorating. Don’t skip this step! I can’t stress enough how important it is to taste as you go. So after adding in that garlic clove, minced just right to release its pungent aroma, give everything a good stir.
As you mix in the diced celery for that coveted crunch and depth, let yourself get lost in the process. Feel free to adjust seasonings as you go along—maybe a little more salt or an extra squeeze of lemon if you’re feeling adventurous. Remember, this dish is all about personal preference! And don’t forget about those finely chopped dill pickles; they’ll bring an element of tangy brightness that dances on your palate! It’s so satisfying to watch your mixture come together—trust me when I say this is where magic happens.
Step 7: Assemble Your Sandwich Masterpiece
Now comes one of my favorite parts—assembly! Take whatever bread option you’ve chosen (whether that’s hearty whole grain bread, fluffy pitas, or even crispy tortillas) and lay them out on a clean surface. Generously scoop that vibrant smashed chickpea avocado salad onto one slice and spread it out evenly with a spatula or even the back of a spoon. You’ve poured so much love into this filling; let it shine through!
Then, take a crisp lettuce leaf or some peppery arugula and place it right on top of that delicious mound. This addition is not merely decorative; it provides an essential crunch that contrasts beautifully with the creamy filling underneath. Now gently place another slice of bread atop your carefully crafted creation, pressing down just enough so everything holds together without squishing out all that flavorful goodness. Can you feel how satisfying this moment is? It’s like wrapping up a cozy hug for your taste buds!
Step 8: The Final Slice
Now that you’ve assembled your sandwiches with tender loving care, it’s time for one last flourish before indulging in this delightful meal! Use a sharp knife (preferably one with serrated edges) to cut each sandwich diagonally—the presentation really does matter here! You want those vibrant colors peeking out from between each layer—a beautiful green against speckled brown bread is absolutely eye-catching.
What makes this final step so special? It’s all about creating excitement! Each slice reveals glistening layers of flavor waiting to be devoured. Plus, cutting them into smaller pieces makes them perfect for sharing at lunch gatherings or picnics—who doesn’t love charming little bites? As you plate these beauties up, consider serving them alongside some crunchy veggie sticks or fresh fruit for an extra pop of color on your table.
Final Touches: Serve and Enjoy!
Now it’s time for what we’ve all been waiting for—the grand tasting! As you take your first bite into these Smashed Chickpea Avocado Dill Pickle Sandwiches, close your eyes and savor every layered flavor explosion happening on your palate. That creamy avocado blending seamlessly with zesty dill pickles creates an utterly intoxicating experience—one that’s healthy yet incredibly satisfying!
Remember, these sandwiches are versatile too; feel free to customize them according to what speaks to you most or what ingredients are available in your pantry. Perhaps some sliced tomatoes would add another layer of freshness, or maybe you’d like to sprinkle on some sunflower seeds for added crunch? The beauty lies in making this recipe truly yours.
So gather around with friends—or perhaps enjoy them solo while taking a moment for yourself—and relish in this simple yet profound delight of homemade goodness. Each bite tells a story—a celebration of wholesome ingredients coming together in perfect harmony—and I can’t wait for you to share this experience too! Trust me when I say these sandwiches will become a cherished favorite in no time at all!
Storage and Enjoyment Tips for Your Smashed Chickpea Avocado Dill Pickle Sandwiches
Now that you’ve crafted these delightful Smashed Chickpea Avocado Dill Pickle Sandwiches, it’s time to savor the fruits of your labor! I can already imagine you taking that first bite, the creamy avocado mingling with the zesty dill and crunch of pickles—absolutely heavenly! But what if you have leftovers? Fear not! Proper storage will ensure you can relish these flavors again without losing any of that delightful freshness.
Storing Leftover Smashed Chickpea Avocado Dill Pickle Sandwiches
To keep your Smashed Chickpea Avocado Dill Pickle Sandwiches in top form, I recommend using an airtight container. This helps to lock in all those vibrant flavors while keeping out any unwanted moisture. Ideally, store them in the refrigerator where they’ll stay fresh for about 1-2 days. A little pro tip: if you’re concerned about the bread getting soggy, consider storing the filling separately from the bread. This way, when you’re ready to enjoy them again, you can assemble a fresh sandwich that tastes just as good as it did on day one. Trust me on this—nobody wants a mushy sandwich! After storage, you’ll find that the flavors have had a chance to meld beautifully; the garlic becomes even more aromatic, and those pickles add a delightful tang. When it’s time to eat, simply construct your sandwich anew or serve it open-faced with a sprinkle of fresh herbs for an extra burst of flavor!
Freezing Components for Later
If you want to plan ahead (which I highly encourage!), consider freezing the chickpea-avocado mixture for later use. To freeze properly, simply spoon your smashed chickpea avocado filling into a freezer-safe container or bag, making sure to leave some space at the top since it will expand as it freezes. This delicious filling can be kept frozen for up to three months—you’ll thank yourself later when you have a quick meal option ready at your fingertips! When you’re ready to use it, simply thaw it overnight in the refrigerator or defrost it in a microwave if you’re short on time. The beauty of this is how convenient it makes lunch prep; imagine pulling out that vibrant filling after a long day and slapping together a sandwich in mere minutes—it’s like having gourmet comfort food without any fuss!
Smashed Chickpea Avocado Dill Pickle Sandwiches
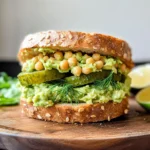
Enjoy nutritious Smashed Chickpea Avocado Dill Pickle Sandwiches packed with flavor! Try this easy recipe today and elevate your lunch game!
- Prep Time: 15 minutes
- Cook Time: N/A
- Total Time: 0 hours
- Yield: Serves 2 sandwiches 1x
- Category: Lunch
- Method: Mixing
- Cuisine: American
Ingredients
- 1 1/2 cups cooked chickpeas (or 1 can drained)
- 1 ripe avocado
- 3 tablespoons freshly squeezed lemon juice
- 1 large garlic clove, minced
- 1 celery rib, diced
- 1/4 cup finely chopped pickles
- 1/4 cup finely chopped dill
- 2 green onions, finely chopped
- Salt and pepper to taste
- Whole grain bread, pitas, or tortillas
- Lettuce or arugula
- Mustard (optional)
Instructions
- In a mixing bowl, mash the cooked chickpeas using a potato masher or fork until roughly broken up.
- Add the ripe avocado and mash until well combined.
- Stir in the lemon juice, minced garlic, diced celery, chopped pickles, dill, green onions, salt, and pepper until evenly mixed.
- Assemble your sandwich by spreading the mixture onto your choice of bread or wrap; add lettuce or arugula and a layer of mustard if desired.
- Cut the sandwich in half and enjoy immediately.
Nutrition
- Serving Size: 1 sandwich (200g)
- Calories: 420
- Sugar: 2g
- Sodium: 450mg
- Fat: 18g
- Saturated Fat: 3g
- Unsaturated Fat: 15g
- Trans Fat: 0g
- Carbohydrates: 55g
- Fiber: 12g
- Protein: 13g
- Cholesterol: 0mg