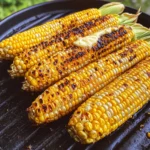
Grilled Corn on the Cob
There’s something utterly enchanting about the aroma of freshly grilled corn wafting through the air, isn’t there? It evokes memories of sun-soaked summer days, laughter echoing in the background, and those cherished moments spent with family and friends around a lively grill. When you take that first bite of grilled corn on the cob, it’s not just about the taste; it’s a celebration of the season—a sweet and smoky symphony that dances on your palate. The charred kernels burst with juicy sweetness, their golden hue glistening like sunshine, inviting you to indulge. As I stand by the grill, watching those ears sizzle and pop, I feel a connection to generations past, each bite a reminder that good food nourishes more than just our bodies; it nourishes our souls.
Grilling corn is truly an art form that transforms this humble vegetable into something extraordinary. The direct heat caramelizes the natural sugars in the corn, creating a depth of flavor that’s both sweet and slightly nutty. This simple yet satisfying dish is perfect for backyard barbecues or even as a delightful side to elevate any meal. Whether you’re enjoying it as part of a family feast or sharing with friends at a picnic, grilled corn on the cob brings joy to every occasion. Trust me when I say that this recipe will become a cherished part of your culinary repertoire—one taste and you’ll understand why!
Grilled Corn on the Cob: A Summer Essential
Let’s dive headfirst into this delightful recipe! Grilled corn on the cob is not just an accompaniment; it’s a star in its own right. The process is straightforward yet full of little tips and tricks that will elevate your grilling game. This dish celebrates simplicity—fresh corn, some butter, and a sprinkle of salt are all you need to create magic on your plate.
Ingredients:
As we embark on this culinary journey together, let’s appreciate each ingredient for its vital role in crafting our grilled corn masterpiece.
- 6 ears fresh corn. Choosing fresh corn is fundamental because it’s the heart of this dish. Look for ears that feel firm to the touch with bright green husks and plump kernels peeking through—the sweeter, the better! Ideally, you want to use corn that has been harvested recently as it begins losing its natural sugars soon after being picked. If you’re feeling adventurous, consider experimenting with different varieties like bi-color or even sweet white corn for unique flavor profiles.
- 2 tbsp softened unsalted butter (approximately). Butter adds richness and creaminess to our grilled corn—a touch of liquid gold! Using unsalted butter gives you control over seasoning your dish perfectly; we can always add salt later if needed. Make sure your butter is at room temperature before spreading; this ensures it melts beautifully atop the hot corn without clumping up awkwardly. If you want to jazz things up further, infuse your butter with herbs or garlic beforehand for an unforgettable flavor bomb.
- Kosher salt (to taste). Salt acts as a flavor enhancer—it draws out the natural sweetness in our grilled corn while balancing flavors beautifully. Kosher salt is preferred here due to its fine texture that adheres well to food without overpowering it. Remember to sprinkle gently; you can always add more if needed after tasting!
Equipment You’ll Need:
Before we get grilling, let’s ensure we have all our trusty tools at hand! Having the right equipment makes for a seamless cooking experience and helps us achieve those gorgeous grill marks we desire.
- Grill – Whether you’re using gas or charcoal doesn’t matter much; what matters is preheating it properly! A hot grill creates those beautiful char marks while sealing in moisture—this step is absolutely paramount for achieving succulent grilled corn.
- Tongs – These handy tools are essential for flipping your cobs easily without piercing them—which could lead to lost juices! A good pair will give you grip and control as you turn them over while cooking.
- Basting brush – If you’re planning on brushing your softened butter onto each ear before serving (which I highly encourage!), having a basting brush will make this task effortless while ensuring even coverage across each delectable kernel.
Preparing the Grilled Corn on the Cob
Step 1: Prepare Your Corn
First things first—let’s give our fresh ears some love! Start by removing the husks and silks from each ear of corn carefully. This step may seem trivial but trust me; it’s crucial for achieving optimal grilling results! The silk can burn during grilling and impart an unpleasant flavor if left attached. To do this effectively, grasp the husk at one end and peel it downwards while holding onto all those silky strands—don’t be shy about getting your hands dirty! Once done, rinse them under cool water briefly to remove any remaining silk bits.
Step 2: Fire Up Your Grill
Now that we have our beautiful bare ears ready, let’s turn our attention to heating up that grill! Preheat it to medium-high heat—around 400°F should do nicely. This temperature allows us to caramelize those sugars without turning them into mushy messes—a common pitfall many fall into when grilling corn too long or at too low temperatures! As you’re waiting for it to reach just right warmth, take a moment to enjoy the anticipation—the sound of sizzling kernels soon filling the air will be worth every second.
Step 3: Grill It Right
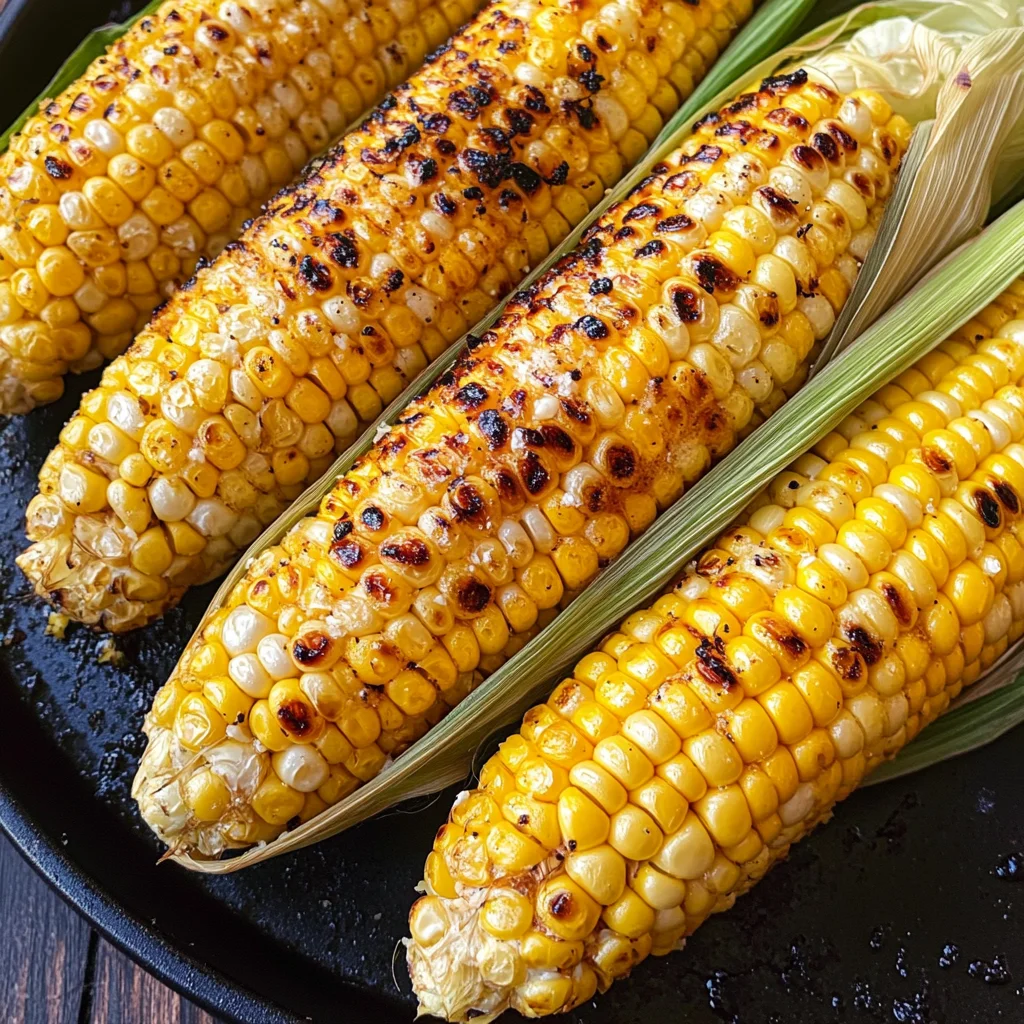
It’s time—the moment we’ve been waiting for has arrived! Place your prepared ears directly onto the grill grates with care (watching out for flare-ups!). You’ll want to cook them over medium-high heat while turning every three to five minutes until all sides are beautifully charred—this usually takes about 15 minutes total depending on how hot your grill gets. Keep an eye out for those lovely light char marks forming; they’re not just aesthetically pleasing—they signal that caramelization has occurred!
Step 4: The Joyful Reveal
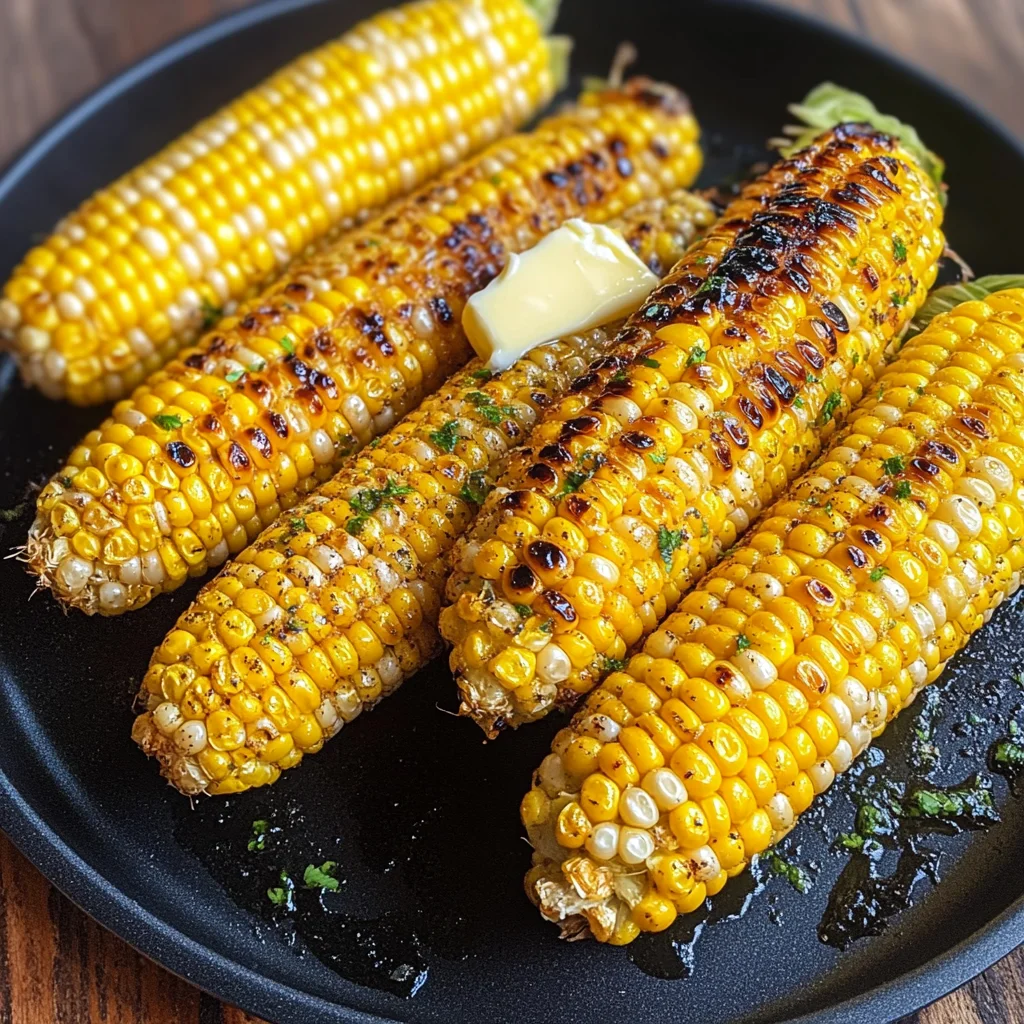
Once grilled perfection is achieved (and trust me—you’ll know when), remove those golden beauties from heat carefully using tongs. Allow them just a moment to cool slightly before serving—but don’t wait too long; they’re best enjoyed warm! Now comes my favorite part: slathering each ear generously with softened butter while sprinkling kosher salt over top according to personal preference… Ahh yes—the ultimate finishing touch bringing everything together in perfect harmony!
With these steps complete, you’ve created something truly special—grilled corn on the cob that embodies summer itself! Each bite promises sweetness balanced by smoky undertones—a dish meant not just for eating but also celebrating life’s simple pleasures among loved ones around shared tables filled with laughter… Enjoy every delicious moment!
The Joy of Grilling: Perfecting Your Grilled Corn on the Cob
Ah, grilling season! There’s something about the tantalizing aroma of food sizzling over an open flame that fills the air with anticipation. It’s a time for gathering, laughter, and sharing delicious meals with friends and family. I’ve always been captivated by how grilling transforms simple ingredients into extraordinary culinary experiences, and when it comes to vegetables, few things are more delightful than Grilled Corn on the Cob. With its sweet, juicy kernels kissed by smoke and char, this dish is a summer staple that never fails to evoke joy.
Step 5: The Art of Grilling – A Dance with Fire
Now that your grill is prepped and your corn is husked, it’s time to embrace the fire! Preheat that grill to medium-high heat—around 400°F to 450°F is ideal. This temperature allows for a perfect sear while ensuring the inside of the corn remains tender and juicy. As you place each ear of corn directly onto the grates, listen closely; you should hear that satisfying sizzle as the kernels begin to caramelize. This initial searing is absolutely crucial because it locks in moisture while creating those beautiful char marks that add both flavor and visual appeal.
As your corn cooks, turn each ear every 3 to 5 minutes. This turning is not just a suggestion; it’s essential for even cooking! You want all sides to bask in the heat so they develop that irresistible char without burning. Look for those lovely golden-brown stripes—they’re not just pretty; they signify that natural sugars within the corn are caramelizing, creating layers of flavor that will make each bite profoundly satisfying. Trust me on this: if you rush this step, you might end up with unevenly cooked corn—certainly not what we want!
Step 6: Patience is a Virtue – The Waiting Game
After about 15 minutes—or once you see those gorgeous char marks forming—it’s time to take your grilled corn off the heat. But wait! Before diving into eating this delectable creation right away, let’s talk about resting. Allowing your grilled corn to sit for a few moments off the grill is often overlooked but absolutely paramount. Why chill? Resting gives the juices time to redistribute throughout each kernel rather than running out immediately when bitten into. Picture it like letting a fine wine breathe; giving it space enhances its flavors.
During this resting period of just 2-3 minutes, consider setting up your butter station! While unsalted butter is a classic choice—softened just enough to slather on easily—you can elevate this experience by mixing in fresh herbs or spices for flavored butters that will delight your taste buds! Imagine fresh basil or zesty lemon zest mingling with creamy butter—that symphony of flavors will take your Grilled Corn on the Cob from ordinary to extraordinary.
Step 7: The Savory Spread – Butter Bliss
Now comes one of my favorite parts—the buttery finish! Once rested, grab that softened butter (or perhaps your herb-infused creation) and generously smear it over each ear of corn. You want every inch coated in this liquid gold because let’s be honest: butter makes everything better! As it melts over those warm kernels, it takes on an utterly intoxicating quality—you’ll find yourself wanting more with each savory bite.
But don’t stop there; sprinkle kosher salt over your buttery masterpiece while it’s still warm. This seasoning should be done according to your taste—some enjoy just a pinch for enhancement while others prefer a heavier hand. Salt acts as a flavor magnifier here; it draws out the natural sweetness from the corn itself and balances out any richness from the butter. It’s truly magical how such simple ingredients can come together so harmoniously!
Step 8: The Grand Finale – Serving Your Grilled Corn
And there you have it—your stunning Grilled Corn on the Cob ready for serving! But before you call everyone over for their first bite, consider presenting them in an inviting way—a rustic platter or even standing them upright in tall glasses can create an eye-catching centerpiece at any gathering. Not only does this make sharing easier, but visually appealing presentations heighten our appetite even before we take that first luscious bite!
As everyone gathers around, watch their eyes light up as they take their first bites—their smiles will tell you everything you need to know about how well you’ve executed this recipe! Each kernel bursting with flavor is nothing short of extraordinary; it’s deeply satisfying knowing you’ve created something so special from something so simple.
Conclusion:
As we wrap up our culinary journey through this delightful Grilled Corn on the Cob recipe, I can’t help but feel a surge of excitement for all of us who share a passion for good food and cherished moments around the table. From selecting those perfect ears of corn at your local market to witnessing how grilling transforms them into golden nuggets bursting with flavor—this recipe encapsulates everything beautiful about cooking with fresh ingredients. It’s truly extraordinary how such simple elements—a bit of heat and some love—can create a symphony of flavors that dance harmoniously on your palate!
This dish isn’t just about taste; it’s an experience waiting to unfold. The joy lies not only in eating but also in preparing this vibrant side dish that complements any gathering, from backyard cookouts to festive holidays. Imagine pulling those perfectly charred cobs from the grill, their aroma wafting through the air as friends and family gather ‘round, anticipation building as everyone reaches for their share—it’s these moments that make life feel special! I promise you’ll find endless ways to enjoy this delicious treat.
For serving suggestions, imagine savoring one with a sprinkle of zesty lime juice and fresh herbs for an invigorating twist—or try slathering on some flavored butter infused with garlic or smoked paprika! For an afternoon pick-me-up during those lazy weekends, pair it with refreshing salads or grilled veggies drizzled with balsamic glaze. And if you’re looking for something truly decadent, why not serve alongside grilled shrimp or veggie skewers? The possibilities are as endless as they are exciting!
Feeling adventurous? This recipe is wonderfully adaptable—try brushing on different marinades before grilling or experimenting with spices like chili powder for an extra kick! Or perhaps toss in some cheese or nutritional yeast afterward for a savory touch that elevates each bite even further. Whatever path you choose, let me encourage you: dive into this recipe wholeheartedly! Share your creations and experiences; I’d love nothing more than to connect over our shared love for good food and lasting memories made around the dinner table.
Grilled Corn on the Cob
Enjoy sweet and smoky Grilled Corn on the Cob with simple steps! Perfect for summer gatherings—try this delightful recipe today!
- Prep Time: 10 minutes
- Cook Time: 15 minutes
- Total Time: 25 minutes
- Yield: Serves 6
- Category: Side Dish
- Method: Grilling
- Cuisine: American
Ingredients
- 6 ears fresh corn
- 2 tbsp softened unsalted butter
- Kosher salt (to taste)
Instructions
- Prepare Your Corn: Remove husks and silks from each ear of corn, rinsing briefly under cool water.
- Fire Up Your Grill: Preheat grill to medium-high heat (400°F).
- Grill It Right: Place corn on grill grates. Cook for 15 minutes, turning every 3-5 minutes until all sides are charred.
- The Joyful Reveal: Remove from grill and let rest for 2-3 minutes. Slather with softened butter and sprinkle with salt.
Nutrition
- Serving Size: 1 ear of corn (90g)
- Calories: 115
- Sugar: 6g
- Sodium: 50mg
- Fat: 5g
- Saturated Fat: 2g
- Unsaturated Fat: 3g
- Trans Fat: 0g
- Carbohydrates: 18g
- Fiber: 2g
- Protein: 3g
- Cholesterol: 0mg