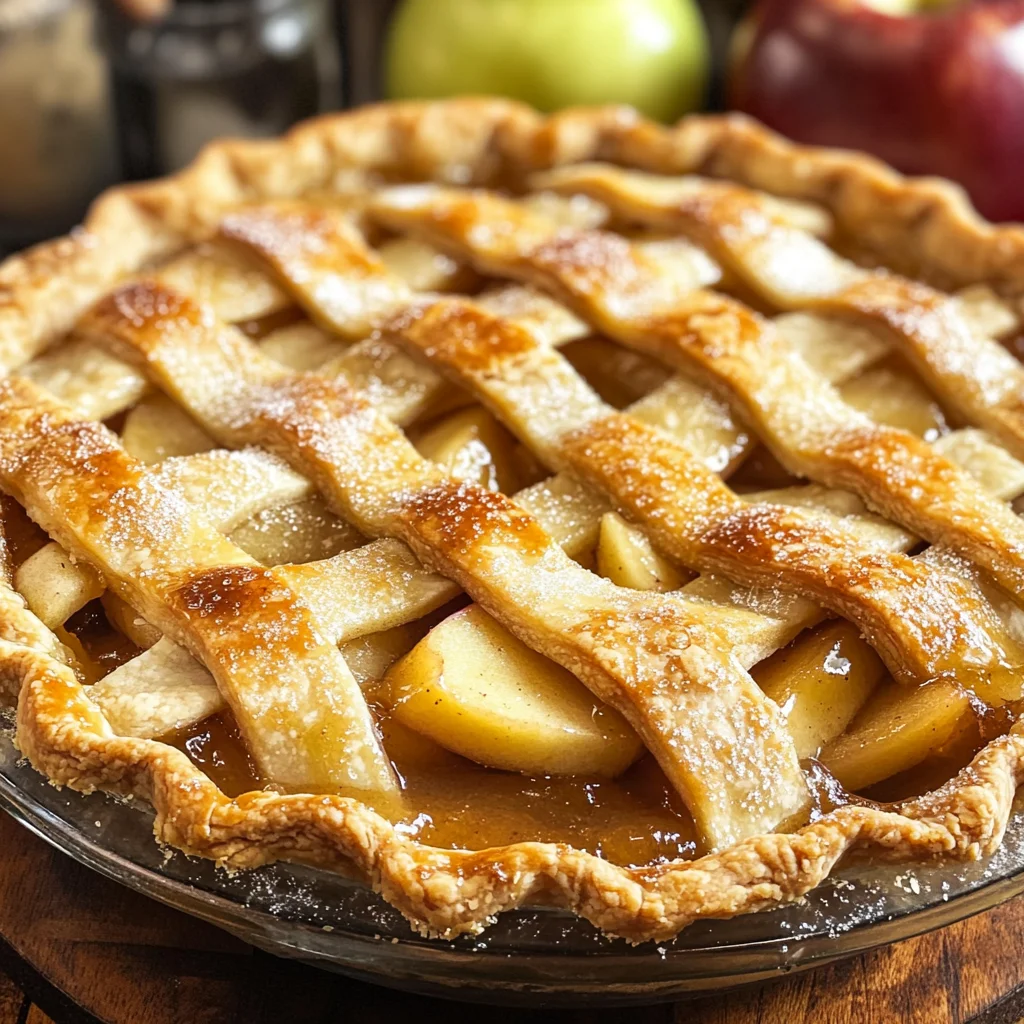
Grandma’s Easy Apple Pie Recipe
There’s something truly magical about the aroma of freshly baked apple pie wafting through the house, isn’t there? It stirs memories of warmth, laughter, and sweet moments shared over comforting slices of goodness. This isn’t just a recipe; it’s a cherished tradition that has been passed down through generations in my family. As I stand in the kitchen, surrounded by the familiar sounds of chopping and mixing, I feel an overwhelming sense of connection to those who came before me. My heart swells as I remember my grandma, her hands deftly preparing each ingredient with love and care, turning simple apples into a symphony of flavors that dance on your taste buds. That’s why I’m so excited to share with you Grandma’s Easy Apple Pie Recipe—this pie is more than just dessert; it’s an experience that wraps you in nostalgia and warmth.
The beauty of this recipe lies not only in its delightful taste but also in its simplicity. With just a handful of ingredients, you can create something profoundly satisfying and utterly extraordinary. The apples—oh, those glorious apples!—are the stars of the show, bringing both tartness and sweetness that meld beautifully with aromatic spices like cinnamon and nutmeg. Each bite transports you to crisp autumn days when the trees are heavy with fruit, reminding us how nature blesses us with such bounty. And let’s not forget about the buttery crust that cradles all this deliciousness! It’s the kind of recipe you’ll cherish making for holidays or gatherings with loved ones because it invites everyone to slow down and savor life together.
Grandma’s Easy Apple Pie Recipe: A Slice of Home
I can’t wait for you to dive into this delightful journey! This recipe is straightforward enough for beginners yet rewarding enough for seasoned bakers looking to relive those heartwarming moments from their childhood kitchens. So grab your apron, roll up your sleeves, and let’s embark on this culinary adventure together!
Ingredients:
As we prepare to whip up this masterpiece, let’s take a moment to appreciate each ingredient we’ll be using. Each one plays a vital role in crafting that delicious pie we all know and love.
- 6-7 cups medium apples, cored, peeled, and thinly sliced. The choice of apples is truly paramount in our Grandma’s Easy Apple Pie Recipe. Varieties like Granny Smith or Honeycrisp bring that perfect balance of tartness and sweetness while holding their shape during baking. When selecting your apples, look for firm fruits without blemishes or bruises; they should feel heavy for their size—this indicates juiciness! The act of peeling and slicing them releases their natural sugars and juices which will mingle beautifully with the other ingredients as they bake into an intoxicating filling.
- 1/2 cup sugar. This ingredient is essential for balancing out the tartness of our apples while encouraging caramelization during baking. Sugar acts as a flavor enhancer; it draws out moisture from the apples creating a delectable syrupy filling that’s simply irresistible. Depending on your apple variety’s sweetness level, feel free to adjust this amount slightly—it’s all about finding that perfect balance!
- 1/4 cup brown sugar. Brown sugar not only adds sweetness but also depth with its rich molasses undertones. This ingredient is absolutely crucial as it contributes a wonderful complexity to our pie filling—imagine that luscious taste mingling with the fresh apples! When purchasing brown sugar, opt for one that’s soft and moist; if it feels hard or crumbly in your hand, it may have lost its magic.
- 1/4 tsp salt. Hold on now—don’t skip adding salt! It may seem counterintuitive since we’re making a dessert, but a pinch of salt boosts all flavors—and trust me when I say it enhances that sweet apple goodness brilliantly!
- 3/4 tsp cinnamon. Ahh—the warm embrace of cinnamon! This spice is non-negotiable; it brings warmth and familiarity to our pie filling while complementing the natural flavors of our apples perfectly. Seek out high-quality ground cinnamon for an aromatic punch; you’ll be amazed at how this small addition transforms everything into something truly special.
- 1/4 tsp nutmeg. Just like cinnamon does its magic here too—it adds another layer of warmth and complexity that makes each bite sing! Nutmeg is potent though; just a pinch will do wonders without overpowering your dish.
- 2 Tbsp all-purpose flour. Now here’s where some science comes into play! Flour acts as a thickening agent during baking by absorbing excess moisture released from our juicy apple filling—a vital step for preventing any soggy bottom crusts! Make sure to sprinkle it evenly over your apple mixture so it integrates smoothly without clumping.
- 2 Tbsp butter. Finally, we have butter—the golden liquid gold that brings richness and depth to our pie filling! Dotting chunks throughout ensures every slice has bursts of creaminess that melds beautifully with those tender apples—a little indulgent touch that elevates this dish from good to unforgettable!
Equipment You’ll Need:
Before we dive into making this beloved pie come alive in your kitchen, let’s gather some essential tools that will make your experience smooth sailing—from mixing bowls to measuring cups—you’ll want to ensure you’re fully equipped for success!
- Mixing bowl: A sturdy mixing bowl serves as the heart where all our ingredients come together harmoniously. Opt for one that’s large enough so you can mix without fear of spilling over—trust me; you don’t want apple juice everywhere when you’re trying to create deliciousness!
- Sharp knife: A sharp knife makes peeling and slicing those beautiful apples effortless while ensuring clean cuts—there’s nothing worse than wrestling with dull blades when you’re trying to get dinner on the table!
- Measuring cups/spoons: Accurate measurements are crucial when baking; precision matters especially when creating something as delightful as Grandma’s Easy Apple Pie Recipe! Invest in good quality measuring tools so you can confidently get those proportions just right every time.
- Microwave-safe dish: Since we’ll be microwaving our apple filling briefly before placing it into our crust (this helps soften them), having a microwave-safe bowl on hand is essential—as well as making cleanup easier afterward!
With everything gathered around us like trusted friends ready to help create something wonderful, let’s dive deeper into preparing Grandma’s Easy Apple Pie Recipe!
Step 1: Mixing Up Magic
First things first: take those beautiful sliced apples and toss them gently into your large mixing bowl along with sugar, brown sugar, salt, cinnamon, nutmeg, and flour. Why do we mix these separately? It allows all those lovely flavors to coat each slice evenly before they hit the oven—this step ensures every bite tastes harmonious rather than unevenly sweet or bland! Gently fold everything together until each slice glistens under its sugary coat—it should look inviting already! After mixing well (don’t rush this step!), we’ll pop this mixture into the microwave for about 2-3 minutes until slightly softened—this technique kickstarts their cooking process while allowing those sugars to dissolve beautifully together.
Step 2: Filling Our Crust
Once you’ve microwaved those captivating apple slices into submission (just kidding—they’re still mighty!), carefully pour them into your prepared pie crust nestled snugly within its dish waiting patiently for their turn at glory! Take care not to overfill; aim for an even layer across so every slice remains stable when serving later on—it’ll be difficult resisting diving straight into that bubbling goodness once baked if done right!
Step 3: The Buttery Touch
Now comes another important moment: take chunks of butter (about 2 tablespoons) and dot them generously atop our apple filling before sealing everything up with another layer of pastry crust (you’ve got this!). Butter is essential here—it melts down during baking creating pockets of rich flavor while enhancing moisture levels throughout our pie resulting in tender bites bursting forth from underneath flaky layers above—all absolute bliss!
Step 4: Sealing In That Flavor
With everything set inside its cozy crust haven now comes time for sealing things properly—you wouldn’t want any precious juices escaping during baking would you? So grab your knife again—we need steam slits cut strategically across top crust allowing trapped air & moisture release without compromising structural integrity…trust me on this part too—it keeps things looking picture-perfect once baked golden brown too!
As we continue through these steps together—the anticipation builds—and soon enough you’ll be rewarded with your very own piece from Grandma’s legacy—one filled not only with flavor but also memories woven through time shared among loved ones gathered around tables enjoying simple pleasures life offers us daily…stay tuned because there’s much more joy ahead within those walls filled laughter waiting patiently outside oven doors!
Let me know when you’re ready—I promise it’ll be worth every moment spent putting love back into what homemade desserts should taste like after all these years…
Step 5: Pouring in the Filling and Dotting with Butter
Now that you’ve mixed all those delightful ingredients together, it’s time to bring them into the embrace of your pie crust. Take a moment to appreciate the aroma wafting from your bowl; it’s a beautiful blend of sweet apples mingling with cinnamon and nutmeg, creating an utterly intoxicating fragrance that will have everyone in your home eagerly anticipating dessert. Carefully pour the apple mixture into the bottom pie crust, ensuring you capture every last slice of apple and drop of that luscious juice. The filling should sit generously, almost overflowing, invitingly promising a symphony of flavors once baked.
Next comes the magic touch: dotting this glorious filling with small chunks of butter. This step may seem minor, but believe me when I say it’s absolutely paramount! The butter melts during baking and creates a golden ooze that enriches the apple filling, turning it into a velvety sauce that clings lovingly to each slice. Use about two tablespoons of butter—cut it into tiny pieces and scatter them evenly over the apples. Trust me on this one; your tastebuds will thank you later as they revel in this profoundly satisfying experience.
Step 6: Sealing Your Pie with Love
It’s time to cover your masterpiece! Gently lay the top crust over the filled pie and take a moment to admire your work. Make sure to align it well with the edges of the bottom crust, sealing in all that deliciousness you just created. To seal the pie properly, press down around the edges with your fingers or use a fork to create charming little imprints—this not only seals in flavors but also adds an appealing decorative touch that makes your pie feel extra special.
Now comes another crucial moment where we need to cut steam slits into the top crust. These slits are essential because they allow steam to escape during baking; without them, your pie could become soggy or worse, explode from built-up pressure! Using a sharp knife or kitchen scissors, make several small cuts in various patterns across the top—think Xs or simple lines will do beautifully. As you do this, imagine how these simple cuts will lead to an irresistible golden-brown crust and bubbling juices peeking through!
Step 7: Sprinkling Sugar for Extra Crunch
Before sending your pie off to its oven destiny, let’s add one final flourish: sugar! Sprinkle a light dusting of granulated sugar over the top crust; not only does this enhance sweetness, but it also creates an irresistible crispy topping as it bakes. The sugar caramelizes slightly while cooking, forming a delightful texture that contrasts beautifully with the tender apples underneath. Aim for about one tablespoon—don’t be shy; this little touch makes a world of difference! As you sprinkle, visualize yourself creating layers of flavor and texture that will deepen with every bite.
This step may seem trivial compared to others, but I assure you it’s not! It’s all about those little details that turn something good into something extraordinary—a common thread throughout Grandma’s Easy Apple Pie Recipe!
Step 8: Baking Your Pie to Perfection
Finally, we arrive at perhaps one of the most exciting parts—baking! Preheat your oven to a sizzling 450°F (230°C). Once it’s hot enough, carefully place your pie on the middle rack (this is crucial for even heat distribution) and set a timer for 15 minutes. This initial high temperature is key because it helps set your crust quickly while starting to cook those apples just right without losing their crispness too soon.
After those first exhilarating 15 minutes are up—and trust me, you’ll want to keep an eye on it as heavenly aromas fill your kitchen—it’s time for a gentle shift in temperature. Lower the oven temperature to 350°F (175°C) and continue baking for another 35-45 minutes. This second phase allows those apples to soften beautifully while letting their juices mingle with sugars and spices in an utterly luscious way. You’ll know it’s nearly done when you see bubbling juices spilling out of those steam slits—a telltale sign that magic is happening inside!
As every oven can be slightly different due to variations in heating elements or airflow, I encourage you to peek at around 30 minutes after lowering the temperature. If you notice any parts browning too quickly or unevenly (and they might), you can always shield them lightly with aluminum foil until they bake through completely. When finished baking, let it cool on a wire rack for at least an hour—this resting period allows everything inside to settle beautifully before cutting into what will undoubtedly be some slices of pure joy.
Final Touches: The Moment You’ve Been Waiting For
As we wrap up this culinary journey together, let me impress upon you how truly rewarding this wait will be! Your home is now filled with warmth and nostalgia—the air thick with hints of cinnamon and buttery pastry—that feeling alone is enough reason to celebrate! After allowing your pie some time to cool down but before diving in (I know it’s hard!), take a moment to appreciate how far you’ve come from just raw ingredients.
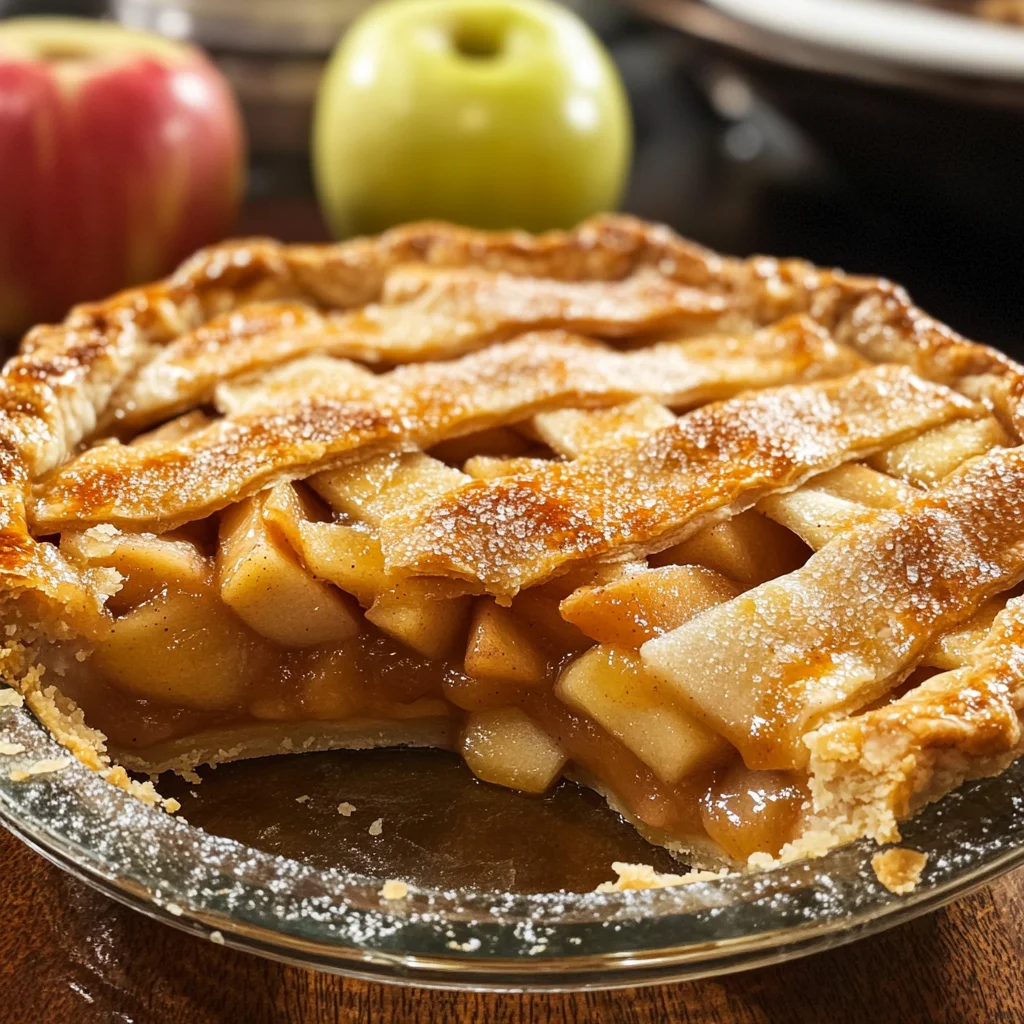
When you’re ready for serving—and I promise you’ll want everyone around when it’s time—consider pairing slices of Grandma’s Easy Apple Pie Recipe with scoops of dairy-free vanilla ice cream or even whipped coconut cream for an added treat that elevates every bite effortlessly. Each slice reveals tender apple slices nestled under flaky pastry crowned with a sweet crunch—a truly extraordinary experience worth savoring!
So as you share this cherished recipe with loved ones (or even keep it all for yourself!), remember that cooking is not just about feeding hungry bellies; it’s about creating lasting memories filled with laughter and love around your table. Enjoy every single crumb—you’ve earned it!
Storage and Enjoyment Tips for Your Grandma’s Easy Apple Pie Recipe
Oh, the moment has finally arrived! Your kitchen is filled with the intoxicating aroma of baked apples, warm spices, and golden crust. I can almost hear the delighted gasps as you slice into that perfectly baked pie. But what if there are leftovers? Fear not! Storing your beautiful creation properly ensures that every slice remains as delightful as the first.
Storing Leftover Grandma’s Easy Apple Pie Recipe
To keep your leftover Grandma’s Easy Apple Pie Recipe fresh and delicious, I recommend wrapping it tightly in plastic wrap or aluminum foil to lock in moisture and flavor. Alternatively, a well-sealed container will do wonders for preserving those sweet apple slices. If stored in the fridge, your pie will remain tasty for about 3-4 days, but trust me—it’s unlikely to last that long with all its scrumptiousness! A little pro tip: place a slice of bread in the container with your pie; this clever trick helps maintain moisture without making the crust soggy. When you take it out to enjoy later, you’ll find that those flavors have melded beautifully over time, creating an even more profound satisfaction in each bite. To reheat, simply pop slices in the oven at 350°F for about 10-15 minutes until warmed through, or use a microwave if you’re short on time—though nothing beats that fresh-from-the-oven taste!
Freezing Grandma’s Easy Apple Pie Recipe for Later
If you’re looking to save some for a special occasion down the line—or you just want to indulge later—freezing is an excellent option! To freeze your pie properly, let it cool completely before wrapping it tightly in plastic wrap followed by aluminum foil to prevent freezer burn. This way, you can enjoy your creation at its best even weeks later! It will keep wonderfully frozen for up to three months. When you’re ready to savor that slice of nostalgia, simply thaw it overnight in the refrigerator and then reheat as desired. The convenience factor here is absolutely paramount; imagine pulling out a homemade pie on a chilly evening or during a festive gathering—it’s like unearthing little treasures from your kitchen memories!
Grandma’s Easy Apple Pie Recipe

Indulge in the warmth and nostalgia of Grandma’s Easy Apple Pie Recipe, a delightful dessert that captures the essence of home. This pie is a celebration of tender apples, aromatic spices, and a flaky crust, inviting you to create cherished memories with every slice. With each bite, experience the perfect balance of tartness and sweetness from the apples, harmoniously blended with cinnamon and nutmeg. Whether it’s for a family gathering or a quiet evening at home, this pie brings people together, wrapping them in comfort and joy.
- Prep Time: 15 minutes
- Cook Time: 60 minutes
- Total Time: 1 hour 15 minutes
- Yield: Serves approximately 8 slices 1x
- Category: Dessert
- Method: Baking
- Cuisine: American
Ingredients
- 6–7 cups medium apples (cored, peeled, and thinly sliced)
- 1/2 cup sugar
- 1/4 cup brown sugar
- 1/4 tsp salt
- 3/4 tsp cinnamon
- 1/4 tsp nutmeg
- 2 Tbsp all-purpose flour
- 2 Tbsp butter (cut into small pieces)
- Pie crust (store-bought or homemade)
Instructions
- Preheat oven to 450°F (230°C).
- In a large mixing bowl, combine sliced apples, sugars, salt, cinnamon, nutmeg, and flour. Toss gently to coat.
- Microwave the apple mixture for 2-3 minutes until slightly softened.
- Pour the apple filling into the prepared pie crust and dot with butter.
- Cover with a top crust, seal edges, and cut steam slits.
- Sprinkle sugar over the crust before baking.
- Bake for 15 minutes at 450°F then lower temperature to 350°F (175°C) and bake for an additional 35-45 minutes until golden brown and bubbly.
- Allow cooling for one hour before serving.
Nutrition
- Serving Size: 1 slice
- Calories: 250
- Sugar: 20g
- Sodium: 150mg
- Fat: 10g
- Saturated Fat: 5g
- Unsaturated Fat: 4g
- Trans Fat: 0g
- Carbohydrates: 38g
- Fiber: 2g
- Protein: 1g
- Cholesterol: 15mg