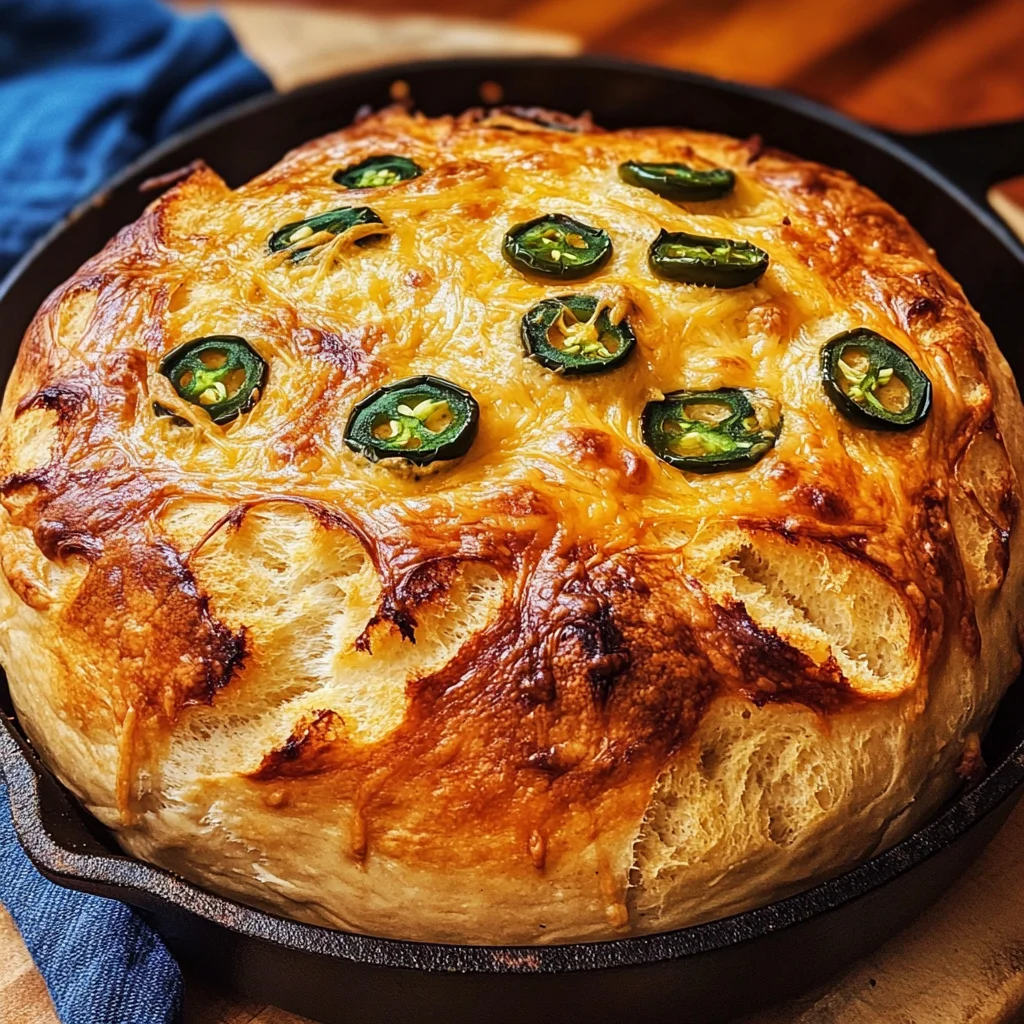
Jalapeno Cheddar Dutch Oven Bread
There’s something utterly magical about the smell of fresh bread wafting through your home. It’s a sensory experience that transcends mere sustenance; it evokes warmth, comfort, and a sense of togetherness. The moment you take that first bite of Jalapeno Cheddar Dutch Oven Bread, you’ll be enveloped in the delightful combination of spicy jalapenos and rich, creamy cheddar cheese, all wrapped up in a crusty exterior that gives way to an airy, tender crumb. This isn’t just bread; it’s a revelation, a bridge between tradition and innovation that brings people together around the table. I promise you, each loaf tells its own story, one that makes even the simplest of moments feel profoundly satisfying.
As we embark on this culinary journey together, let me share a little secret: baking bread is as much about patience as it is about technique. This Jalapeno Cheddar Dutch Oven Bread is designed to be a high-hydration dough, meaning it won’t behave like your typical bread dough; it will be looser and somewhat more unpredictable. But don’t let that intimidate you! That’s precisely what creates the beautiful texture and flavor we’re after. So grab your apron and let’s dive into this incredible recipe—trust me, your kitchen (and everyone in it) will thank you for this delicious pursuit.
Jalapeno Cheddar Dutch Oven Bread: A Spicy Twist on Comfort Food
If you’re looking for a bread that can elevate any meal or stand alone as a snack, this Jalapeno Cheddar Dutch Oven Bread is your answer. It’s not just about the ingredients; it’s about how they come together to create something truly extraordinary. The heat from the jalapenos dances with the richness of cheddar cheese, forming a symphony of flavors that will leave your taste buds buzzing with delight. Whether you’re serving it at dinner, using it for sandwiches, or simply enjoying it warm with a pat of butter (or perhaps some olive oil), this bread will make every moment feel special.
Ingredients:
Before we dive into the art of making this delightful bread, let’s gather our ingredients. Each one plays a vital role in bringing this recipe to life and contributing to its unique character.
- 3 1/2 cups bread flour: This is the backbone of our Jalapeno Cheddar Dutch Oven Bread. The high protein content in bread flour helps develop gluten structure, which provides that chewy texture we love in artisan breads. When selecting your flour, look for brands labeled specifically for bread-making; they often yield better results than all-purpose flour due to their higher protein levels. If you find yourself without bread flour, you can substitute all-purpose flour but know that the texture may vary slightly.
- 1 1/2 tsp kosher salt: Salt is not just for seasoning; it’s absolutely paramount in enhancing flavor and strengthening gluten strands during fermentation. It helps control yeast activity too—too much salt can inhibit rising while too little can lead to an overly rapid rise that compromises flavor development. Kosher salt is preferred here because its larger crystals dissolve slowly and distribute evenly throughout the dough.
- 2 cups shredded cheddar cheese: Ahh, cheese—the star player in our savory symphony! Using freshly shredded cheddar ensures better melting and flavor compared to pre-packaged varieties because they often contain anti-caking agents. The gooeyness of melted cheese combined with the heat from jalapenos gives our bread an addictive quality that keeps everyone coming back for more.
- 1 large jalapeno (diced): Fresh jalapenos are key here! They add not only heat but also vibrant flavor and texture to our bread. When dicing your jalapeno, consider removing some seeds if you prefer less heat—just note that it’s that spicy kick paired with cheesy goodness that makes this recipe truly special!
- 2 cups warm water: Water is essential for activating our yeast and hydrating our flour mixture to achieve the right dough consistency. It should feel comfortably warm—think baby bath temperature—to encourage yeast blooms without killing those hardworking microbes.
- 2 1/4 tsp instant yeast (that’s 1 standard .25oz packet): Instant yeast is incredibly convenient because it doesn’t require proofing like traditional active dry yeast does—it can be mixed directly into dry ingredients! This means less waiting time for us bakers who are eager to get started on our delicious creation.
- 1/3 – 1/2 cup shredded cheddar: Reserve some shredded cheese for topping before baking! This extra layer on top becomes beautifully golden brown while adding even more cheesy goodness to every bite of crusty perfection.
- 10 round slices jalapeno (or more, to taste): Sliced jalapenos sprinkled atop before baking not only elevate the visual appeal but enhance the flavor profile beautifully! You can adjust this depending on how adventurous you’re feeling with spice—more slices mean more heat!
Equipment You’ll Need:
Now that we have our ingredients prepped and ready to go, let’s talk about the tools you’ll need to make this process smooth sailing! While these items might not be ingredients themselves, they’re essential partners in crafting something wonderful.
- Dutch oven: A good-quality Dutch oven is non-negotiable for achieving that perfect crust while allowing steam to circulate within as your bread bakes. The heavy lid traps moisture released from the dough during baking which results in that sought-after crispy exterior while keeping the interior fluffy and light.
- Mixing bowls: You’ll need both medium-sized bowls for combining dry ingredients and a large bowl for mixing everything together. Having sturdy mixing bowls allows you to knead (or fold) comfortably without worrying about spills or breakage.
- Rubber spatula: A flexible rubber spatula will be your best friend when mixing your dough—it helps incorporate all ingredients without leaving any streaks behind while also being gentle on delicate wet doughs like ours!
- Parchment paper: This simple kitchen staple ensures easy transfer of your shaped dough into the hot Dutch oven without sticking—a crucial step to prevent frustration later!
- Wire rack: Once baked beautifully golden brown, letting your Jalapeno Cheddar Dutch Oven Bread cool on a wire rack allows air circulation around all sides so you won’t end up with soggy bottoms—nobody wants that!
Preparing the Jalapeno Cheddar Dutch Oven Bread
Step 1: Mix Dry Ingredients
To begin our adventure into baking bliss, grab a medium mixing bowl and combine those dry ingredients—your bread flour, kosher salt, diced jalapeños (those fiery little gems!), and two cups of shredded cheddar cheese! Stir them together gently until they’re evenly mixed; this process not only combines flavors but ensures each slice will have pockets filled with cheesy goodness throughout! Once well-combined set aside because we’ll be returning soon enough!
Step 2: Activate Yeast
Now it’s time for some science magic—activate our yeast! In a large mixing bowl (it needs room because we’ll see some serious expansion soon), add two cups warm water followed by two teaspoons plus one-quarter teaspoon instant yeast packets! Give them time together briefly allowing this mixture sit undisturbed until foamy bubbles form atop—a sign those tiny yeasty warriors are waking up and ready to work their magic making our dough rise beautifully!
Step 3: Combine Everything
Once you’ve got those lovely bubbles forming atop your warm water mixture—now comes my favorite part—combine everything! Carefully pour in flour mixture into yeasty waters using your rubber spatula stirring gently until no dry streaks remain visible—that’s right folks; we’re creating liquid gold here! Don’t worry if everything looks messy right now—it’s SUPPOSED TO BE LOOSER than traditional dough—it’ll tighten up nicely during fermentation later!
Step 4: Fold Dough
Now using your trusty spatula again—we’re going to fold rather than knead since we want minimal handling here due its high hydration nature (which means sticky!). Gently lift edges towards center turning bowl slightly each time until you’ve folded around eight-to-ten times overall—this technique helps build strength within gluten structure without overworking gluten strands already present from initial mixing phase ensuring perfect airy crumb later on!
And there you have it—the first steps toward creating something utterly intoxicatingly delicious awaits ahead! Feel free to join me next time as we continue exploring further steps needed bring forth irresistible aroma filling every corner home sweet home…
Step 5: The Art of Folding for Texture and Rise
Now that we’ve let our dough rise beautifully in the warm embrace of the kitchen, it’s time to add some love through folding. This step is not just a matter of mixing; it’s an essential technique that helps develop the gluten structure, which is absolutely crucial for achieving that airy, fluffy crumb we all adore in bread. With your trusty rubber spatula in hand, gently fold the dough from the outside of the bowl toward the center. Picture yourself tucking the dough in for a cozy nap as you turn the bowl slightly each time—this gentle motion helps create those lovely air pockets that will make your bread rise magnificently. Aim for about 8-10 folds total; you want to feel some resistance, which indicates that gluten is forming and gaining strength.
As you fold, take a moment to appreciate how your dough transforms before your eyes—it’s going from a sticky mass into something more cohesive and elastic. This tactile engagement is not just about technique; it’s about connecting with your food and allowing it to tell its story. Trust me on this—don’t rush this step! The patience you invest now will reward you with a loaf that boasts an utterly intoxicating texture and flavor profile.
Step 6: The Second Rise – Elevating Flavor and Structure
After you’ve lovingly folded your dough, cover it with a towel and let it rise again for another hour. This second rise is where the magic happens—your dough will continue to ferment, deepening those flavors while creating even more air bubbles within. During this time, I often find myself daydreaming about how amazing the aroma of freshly baked Jalapeno Cheddar Dutch Oven Bread will fill my home. The yeast is working hard, consuming sugars in the flour and creating carbon dioxide gas, which makes the dough puff up like a fluffy cloud.
You might be tempted to peek at it after thirty minutes—resist that urge! Instead, focus on nurturing an environment that’s warm enough for rising but not too hot that it kills off our little yeast friends. A simple tip: If your kitchen isn’t particularly warm, you can turn on your oven for a minute or two to create a cozy atmosphere before turning it off again and placing your dough inside (without any heat!). When you’re ready to check after an hour, you should see a noticeable increase in volume; if it’s doubled in size, you’ve done everything just right!
Step 7: Preheating Your Dutch Oven – Setting Up for Success
While your dough is completing its second rise, let’s prepare our Dutch oven—a critical component of this recipe that creates an environment akin to professional steam ovens used in bakeries. Place your Dutch oven (with its lid on) into an oven preheated to 450°F for at least 30 minutes. Why do we do this? This preheating step ensures that when you place your shaped loaf inside, it immediately receives intense heat from all sides, helping form that signature crust while locking in moisture.
While you’re waiting for the oven to reach its zenith of heat, set out a piece of parchment paper large enough to fit inside with some overhang—this little bit of preparation will make transferring your bread seamless and hassle-free later on. This is crucial because moving wet dough can be tricky; having parchment ready means no sticky surprises! Just imagine lifting out that golden loaf without tearing or damaging its beautiful form—it’s pure joy!
Step 8: Shaping Your Dough – Crafting Perfection
Now comes one of my favorite parts—the transformation from a shaggy mass into something more refined! Lightly dust your countertop or cutting board with flour; we want to prevent sticking while maintaining moisture within our dough. Flour also helps create a bit of traction as you handle it—you’ll find things much easier with well-floured hands! Gently turn out your risen dough onto this floured surface and flip it over so any excess flour can be brushed away without losing any precious ingredients.
Next up is shaping! Fold the corners of the dough towards the center about six to eight times until you’ve formed a rough ball. Don’t worry if it’s not perfect—perfection isn’t necessary here; it’s about coaxing out shape while ensuring structural integrity remains intact! Once you’ve gathered everything together nicely, flip the dough over onto your piece of parchment paper. Now comes an important visual cue: you want it to look smooth on top and somewhat taut around the sides—that’s when you know you’ve given it enough love!
Next Major Phase: Baking Your Perfect Jalapeno Cheddar Dutch Oven Bread
Step 9: Scoring & Adding Toppings – Finishing Touches
After shaping comes one last exciting twist—the scoring! Using a sharp knife or razor blade (a baker’s lame works wonders), carefully score an X or any design that speaks to you across the top of your loaf before baking. This step serves two primary purposes: first, it allows steam to escape during baking so your bread doesn’t crack unexpectedly—and second, it adds a beautiful artisan touch to your final product! It’s like giving your creation a little personality; after all, every loaf has its own story waiting to unfold.
Now sprinkle generously with more cheese and sliced jalapeños—this is where we amplify those flavors even further! Visualize how those bits will melt into gooey goodness while providing bursts of spice throughout each mouthful. Trust me when I say this added layer elevates everything from good bread to truly extraordinary fare.
Once adorned with toppings galore, use oven mitts (safety first!) to remove that hot Dutch oven from the oven carefully—this part requires attention since it’s sizzling hot! Gently use the parchment paper as handles to lift and transfer your beautifully prepared dough into this fiery vessel before putting on its lid once again.
Step 10: The Baking Symphony – Creating Crusty Perfection
With everything in place now—and oh my goodness, can you smell those aromas already?—it’s time for baking magic! Place your covered Dutch oven back into that blazing-hot oven and allow it to bake for 30 minutes with its lid securely fastened. This initial covered phase traps steam inside; think of it as giving our bread a spa treatment while creating unparalleled crust characteristics.
After thirty minutes have passed—and trust me when I say you’ll want every single second—you’ll remove the lid cautiously (watch out for escaping steam!) and continue baking uncovered for another twenty minutes. At this stage, watch closely as transformation unfolds right before your eyes—the crust turns golden-brown while developing deep flavor nuances thanks to caramelization reactions happening within those outer layers.
When done perfectly—toasty all around but still soft beneath—it should sound hollow when tapped gently on its bottom—a vital sign indicating doneness! Remove from heat using mitts once again (remember safety!), tilt slightly so steam escapes quickly before using parchment paper edges gently slide out onto cooling rack below.
Step 11: Cooling – The Final Countdown
As tempting as it may be—and trust me—I know how hard waiting can be—you’ll want to resist slicing into warm bread right away! Allowing this glorious creation time on wire racks cool down completely ensures optimal texture development—trust me here because ripping into hot loaves leads only disappointment later on when textures become gummy instead of light & airy.
Letting cool between one hour up until two hours provides ample opportunity for flavors mingle harmoniously plus guarantees easy slicing later without squashing goodness inside either way round—it truly makes all difference between merely delightful versus life-changing experiences!
Conclusion:
As we wrap up our journey through this delectable recipe for Jalapeno Cheddar Dutch Oven Bread, I can’t help but feel an overwhelming sense of joy thinking about all the wonderful moments you’ll share over this delightful loaf. This isn’t just bread; it’s a symphony of flavors where the spicy jalapeños dance harmoniously with rich cheddar cheese, creating an experience that’s both comforting and exhilarating. The beautiful crust gives way to an utterly intoxicating soft interior—a texture you’ll find yourself dreaming about long after your last slice.
This recipe is truly a must-try because it’s not just about satisfying your hunger; it’s about embracing the joy of cooking! The process is simple yet deeply rewarding; there’s something profoundly satisfying about kneading dough and watching it rise beautifully in your kitchen. Whether it’s for a cozy family dinner or a lively gathering with friends, serving this bread fresh from the oven will undoubtedly steal the show—and trust me, there’s nothing quite like pulling off that lid of your dutch oven to reveal your crusty masterpiece!
Imagine savoring one warm slice slathered with rich avocado spread as part of your brunch spread; or perhaps dipping chunks into chili on a chilly evening—it pairs perfectly with so many dishes! For an afternoon pick-me-up, serve thick slices alongside creamy soups where each bite brings forth that perfect kick of heat mixed with cheesy goodness. And if you’re feeling adventurous? Try pairing it with fresh salsa for an explosive flavor combination that dances on your palate!
Feeling adventurous? This recipe is wonderfully adaptable! You could easily swap out jalapeños for roasted red peppers if you’re looking for something milder yet still bursting with flavor—or add herbs like rosemary or thyme for an aromatic twist! The possibilities are endless! I wholeheartedly invite you to experiment: throw in some olives or even sun-dried tomatoes if you’re feeling bold; let your creativity soar! Whatever path you choose, I can’t wait to hear how your Jalapeno Cheddar Dutch Oven Bread turns out—so please share your experience with me!
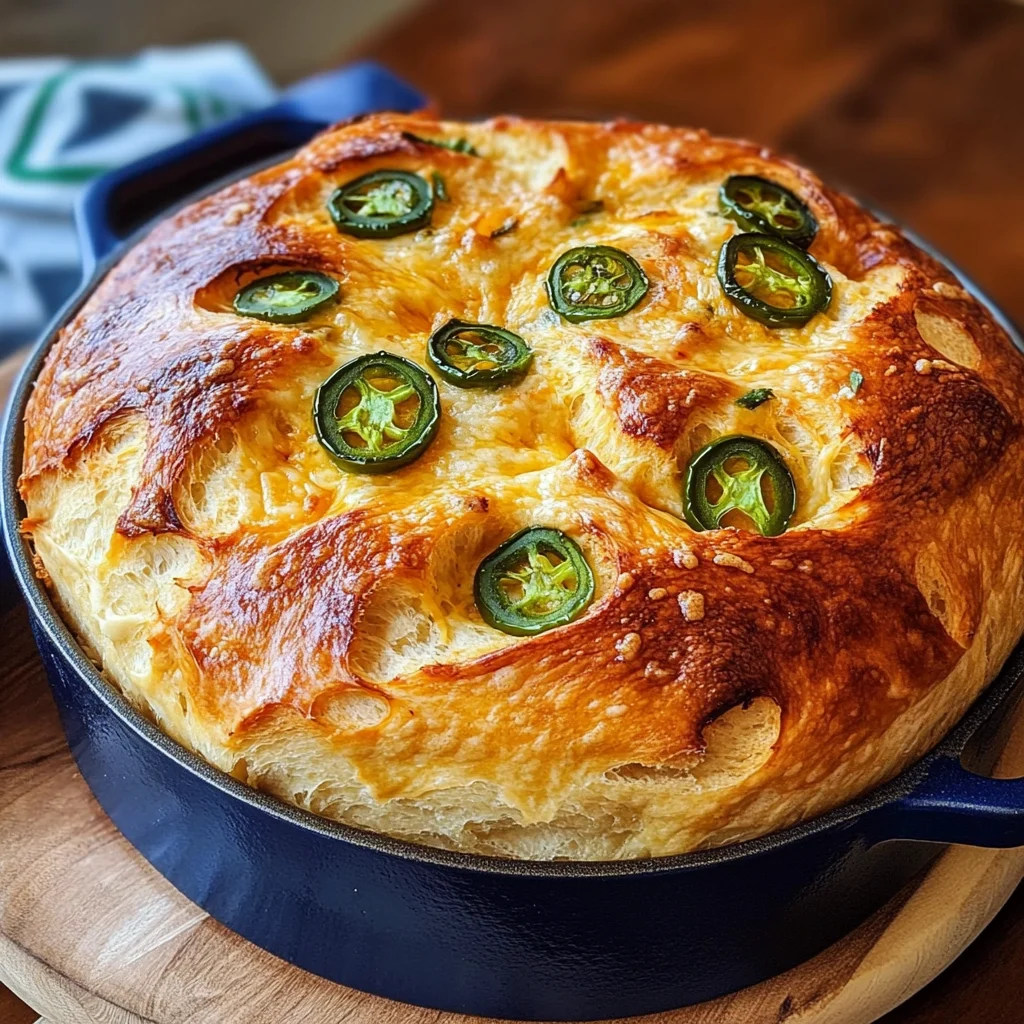
Jalapeno Cheddar Dutch Oven Bread

Jalapeno Cheddar Dutch Oven Bread is a delightful and savory twist on traditional bread that will elevate any meal or stand out as a comforting snack. This easy-to-make, high-hydration dough is infused with fiery jalapenos and rich cheddar cheese, creating a harmonious blend of flavors that will tantalize your taste buds. The crusty exterior gives way to a tender, airy crumb, making each bite an experience to remember. Perfect for serving alongside soups or enjoying warm with butter, this warm homemade bread is sure to become a staple in your kitchen.
- Prep Time: 25 minutes
- Cook Time: 50 minutes
- Total Time: 1 hour 15 minutes
- Yield: Approximately 12 servings 1x
- Category: Bread
- Method: Baking
- Cuisine: American
Ingredients
- 3 1/2 cups bread flour
- 1 1/2 tsp kosher salt
- 2 cups shredded cheddar cheese
- 1 large jalapeno (diced)
- 2 cups warm water
- 2 1/4 tsp instant yeast
- 1/3 – 1/2 cup shredded cheddar (for topping)
- 10 round slices jalapeno (for topping)
Instructions
- In a medium mixing bowl, combine the bread flour, kosher salt, diced jalapeños, and two cups of shredded cheddar cheese. Set aside.
- In a large mixing bowl, mix the warm water and instant yeast until foamy.
- Gradually add the dry ingredients to the wet mixture using a rubber spatula until fully combined.
- Gently fold the dough in the bowl about 8-10 times to build strength without kneading.
- Cover and let rise for one hour in a warm place until doubled in size.
- Preheat your Dutch oven at 450°F for at least 30 minutes.
- Turn out the risen dough onto a floured surface, shape it into a ball, and place it on parchment paper.
- Score the top and sprinkle with reserved cheddar and sliced jalapeños.
- Carefully transfer the dough into the hot Dutch oven, cover with the lid, and bake for 30 minutes.
- Remove the lid and bake uncovered for an additional 20 minutes until golden brown.
- Transfer to a wire rack to cool completely before slicing.
Nutrition
- Serving Size: 1 slice (60g)
- Calories: 180
- Sugar: 0g
- Sodium: 230mg
- Fat: 7g
- Saturated Fat: 4g
- Unsaturated Fat: 2g
- Trans Fat: 0g
- Carbohydrates: 23g
- Fiber: 1g
- Protein: 7g
- Cholesterol: 15mg