Shrimp Rice Bowls: A Delicious and Easy Recipe for Seafood Lovers
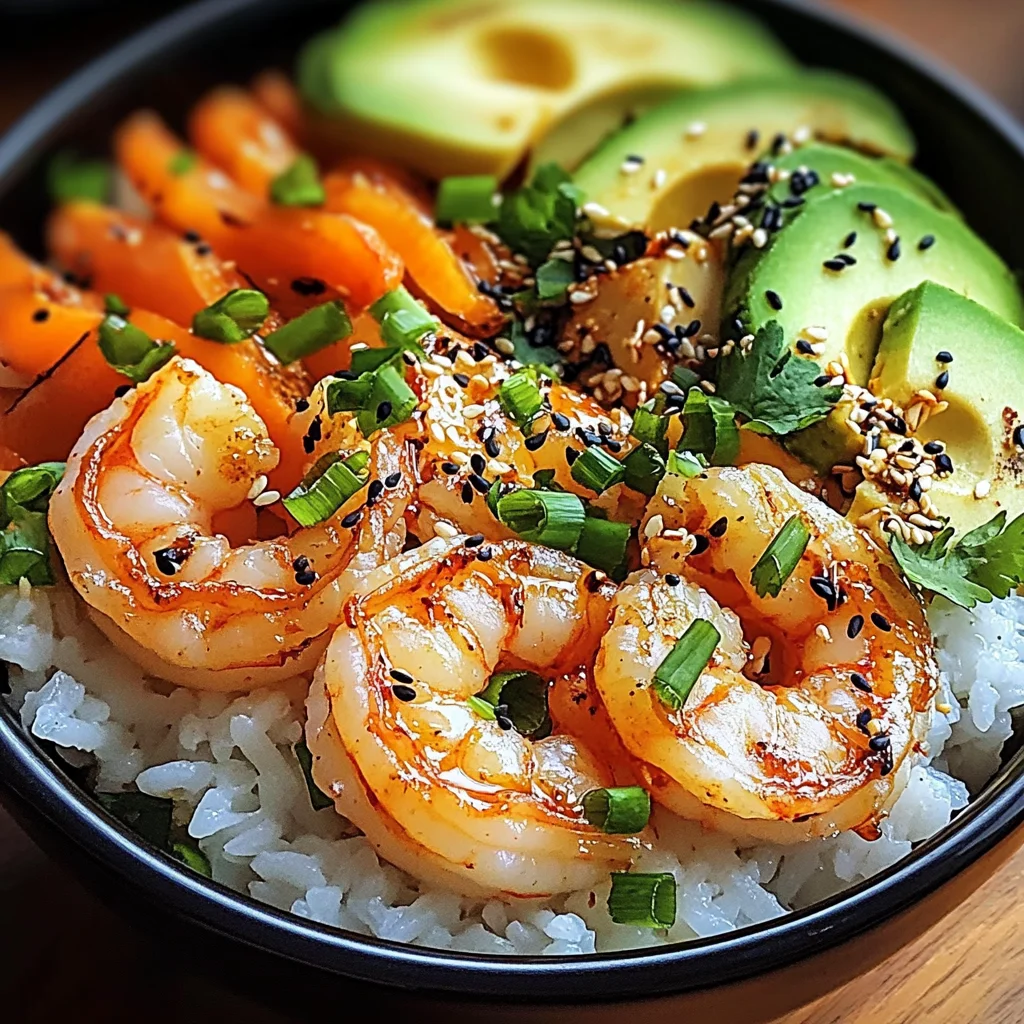
There’s something utterly magical about a bowl filled with vibrant colors, enticing aromas, and delightful textures—like a little piece of art that you can eat! This Shrimp Rice Bowl is not just a meal; it’s an experience that unfolds with every bite. Imagine plump, tender shrimp dancing on a bed of fluffy jasmine rice, mingling with crisp snap peas, sweet corn, and the subtle warmth of garlic and ginger. With each forkful, you’re not just tasting food; you’re feeling a symphony of flavors that transport you to sun-kissed shores where seafood reigns supreme. This dish combines simplicity with sophistication, making it a perfect choice for weeknight dinners or cozy gatherings with friends. Trust me on this: once you master these Shrimp Rice Bowls, they will become your go-to recipe for all occasions.
What makes these bowls so special is their versatility and the harmony of fresh ingredients that come together in such an effortless way. The vibrant vegetables not only add color but also provide crunchiness that beautifully contrasts the tender shrimp and soft rice. And let’s not forget about the sauce—a magical mixture that ties everything together with its umami richness and gentle kick from chili paste if you choose to add it. This recipe has a way of bringing people together around the table, sparking laughter and conversation while everyone savors the happiness in every bite. So gather your ingredients, roll up your sleeves, and let’s dive into the joy of creating these delightful Shrimp Rice Bowls!
Ingredients:
As we embark on this culinary journey together, let’s take a moment to appreciate each ingredient that goes into our Shrimp Rice Bowls: A Delicious and Easy Recipe for Seafood Lovers. Each component is important—not just for flavor but for the overall experience you’ll create.
- 1 pound large shrimp, peeled and deveined. These succulent beauties are the stars of our dish! Opt for large shrimp for their juicy texture; they cook quickly and absorb flavors beautifully without becoming rubbery. When purchasing shrimp, look for shells that are firm to the touch and have a slight sheen—this indicates freshness. If you’re ever unsure about using shrimp, feel free to substitute them with chicken or tofu; both will soak up the savory sauce wonderfully!
- 2 cups jasmine rice. This fragrant rice is absolutely paramount to our dish—it brings an aromatic quality that’s simply irresistible. Jasmine rice has a slightly sticky texture when cooked, which means it holds onto flavors beautifully without becoming mushy. Rinse your rice under cold water until it runs clear; this step washes away excess starch and ensures each grain cooks perfectly fluffy.
- 4 cups water or low-sodium chicken broth. Using broth instead of plain water elevates the flavor profile significantly. It infuses the rice with savory notes that complement our shrimp and veggies perfectly! If you’re looking for a vegetarian option, feel free to swap in vegetable broth—your taste buds won’t complain.
- 2 tablespoons olive oil. This liquid gold is essential for sautéing our garlic and ginger while adding richness to our stir-fry. Olive oil has wonderful health benefits due to its monounsaturated fats and antioxidants. Make sure to use extra virgin olive oil for its superior flavor—it gives depth without overpowering other ingredients.
- 3 cloves garlic, minced. Ahh, garlic—the aroma alone can transport you straight into culinary bliss! Freshly minced garlic adds aromatic warmth to our dish; it caramelizes slightly when sautéed, imparting a rich flavor that enhances every bite of shrimp and vegetables.
- 1 tablespoon fresh ginger, grated. Ginger introduces a lovely zing that dances alongside garlic in perfect harmony! Its slight spiciness cuts through richness while adding complexity to our dish’s flavor profile. Always opt for fresh ginger—ground ginger simply doesn’t compare in terms of vibrancy.
- 1 red bell pepper, diced. Not only does this colorful pepper add visual appeal to your bowl, but its sweetness balances out the savory elements beautifully! When selecting bell peppers, look for ones with firm skin—this indicates freshness—and avoid any soft spots or wrinkles.
- 1 cup snap peas, trimmed. These little green gems contribute both crunch and sweetness—a delightful contrast to tender shrimp! Snap peas are packed with nutrients like vitamins A and C; plus they cook quickly, retaining their vibrant color.
- 1 cup corn kernels (fresh or frozen). Corn provides bursts of sweetness in each mouthful—what’s not to love? Whether you use fresh or frozen corn doesn’t matter too much as both work well here; however, fresh corn truly shines when in season!
- 3 green onions, sliced. These mild onions add brightness at the end—it’s like adding confetti on top of your creation! Use both the white and green parts for full flavor impact—they also bring beautiful color contrast to your bowl.
- 2 tablespoons soy sauce. This umami-packed condiment is absolutely non-negotiable! Soy sauce adds depth while enhancing all those delicious flavors we’ve built up throughout cooking—it’s what makes this dish sing!
- 1 tablespoon sesame oil. A drizzle of toasted sesame oil brings nutty warmth that enriches everything it touches—trust me when I say it’s worth seeking out high-quality sesame oil! Just remember: a little goes a long way.
- 1 tablespoon rice vinegar. The tangy brightness from rice vinegar cuts through richness while balancing out flavors beautifully—it acts as an anchor amid all those bold tastes swirling around!
- 1 teaspoon chili paste (optional). If you crave heat (and I promise it’s worth trying!), this ingredient adds just enough spice without overwhelming others’ flavors! Feel free to adjust according to your preference—you may even leave it out entirely if heat isn’t your thing!
- Salt and pepper to taste: Simple yet so effective! Seasoning guarantees we enhance all those vibrant flavors—it’s crucial not just at the end but throughout cooking too.
- Fresh cilantro for garnish: Oh how I adore cilantro! Its bright notes elevate everything—from toppings over spicy dishes down through salads—plus it adds freshness right at serving time!
- Sesame seeds for garnish: Toasted sesame seeds offer delightful crunch along with nutty undertones—they’re like little finishing touches on our masterpiece!
Equipment You’ll Need:
Now that we have gathered all our beautiful ingredients together let’s talk about some essential tools you’ll need in your kitchen adventure! Having the right equipment can make cooking feel smoother while ensuring great results every time—these are truly your partners in creating something wonderful.
- Medium saucepan: You’ll need this trusty pot for cooking your jasmine rice perfectly! A medium-sized saucepan allows enough space without crowding grains together so they can cook evenly—look for one with a lid since covering while simmering keeps moisture locked inside!
- Fine-mesh strainer: This handy tool is crucial when rinsing jasmine rice before cooking—it’s what helps remove excess starch ensuring fluffy results instead of gummy ones! Look for one sturdy enough but lightweight enough so it’s easy to maneuver in the sink.
- Large skillet or wok: For sautéing those vibrant vegetables alongside plump shrimp—a large skillet gives ample surface area allowing everything room-to-breathe during cooking which leads towards beautiful caramelization! If you have access to one—a wok would be incredible here too as its shape promotes even heat distribution.
- Wooden spoon or spatula: A sturdy wooden spoon will be perfect when stirring everything together—you want something durable yet gentle enough against non-stick surfaces ensuring nothing scratches during cooking!
Preparing the Shrimp Rice Bowls: A Delicious and Easy Recipe for Seafood Lovers
Step 1: Rinse Your Jasmine Rice
The first step toward achieving fluffy jasmine rice involves rinsing it under cold water until it runs clear—a process known as washing away excess starches built up during packaging processes which can lead toward clumping later on! Take around 2–3 minutes here; trust me when I say it pays off dividends once cooked—the goal here is achieving individual grains rather than one big sticky blob—no one wants that disappointment!
Step 2: Cook Your Jasmine Rice
In your medium saucepan combine both rinsed jasmine rice along with either four cups water or low-sodium chicken broth (the latter option amps up flavor significantly!). Bring this mixture over medium-high heat until bubbling vigorously—that initial boil signifies readiness before reducing down heat low enough allowing gentle simmering action instead—which takes about 15–20 minutes depending upon desired tenderness level achieved by checking around minute fifteen mark observing liquid absorption progress closely so things don’t overcook unnecessarily…
Step 3: Fluff & Set Aside
Once fully cooked (liquid absorbed), remove from heat allowing covered pan rest undisturbed another five minutes before uncovering finally—it’s crucial since resting allows residual steam do its magic making grains fluffier than ever before enjoying glorious fork-fluffiness afterward!
Step 4: Sauté Aromatics
While waiting patiently on those glorious grains take time now heating two tablespoons olive oil within large skillet over medium-high flame until shimmering before introducing minced garlic along freshly grated ginger directly into hot oil mixture—we want them fragrant but not burned resulting in bitterness ruining everything…so keep stirring gently continuously listening carefully while savoring intoxicating aroma filling kitchen air around us too…
Step 5: Add Veggies!
Next comes diced red bell pepper along trimmed snap peas stepping forward into flavorful scene alongside sautéed aromatics stirring vigorously together ensuring even distribution throughout pan mixing harmoniously bringing out sweetness inherent within every bite before letting them cook around three-four minutes until softening occurs without losing crunch…
And there we have it—the beginning steps toward crafting these delectable Shrimp Rice Bowls: A Delicious and Easy Recipe for Seafood Lovers awaits completion soon after combining everything else following suit keeping excitement levels high throughout preparation process knowing how delicious final outcome will truly be… Stay tuned as we delve deeper soon into next steps ahead!
Step 5: Sautéing to Perfection
Now that your jasmine rice is resting, it’s time to dive into the heart of this dish—our vibrant vegetable and shrimp mix! Begin by heating 2 tablespoons of olive oil in a large skillet or wok over medium-high heat. You want that oil shimmering, which means it’s just about ready for the next step. Why olive oil? Well, it not only adds a beautiful richness but also has a high smoke point, making it perfect for sautéing. Once the oil is hot and glistening, add your minced garlic and grated ginger to the pan. As they hit the surface, you’ll be greeted with an utterly intoxicating aroma that fills your kitchen—a fragrant invitation to what’s cooking!
Allow the garlic and ginger to sauté for about 30 seconds, stirring continuously to prevent burning. This is crucial because burnt garlic can turn bitter and ruin the whole symphony of flavors we are building here. Instead, you want them lightly golden and fragrant, which will infuse the oil with their essence—this step lays down a flavor foundation that makes every bite memorable. After about half a minute, when you can almost taste their warmth in the air, it’s time to add your diced red bell pepper and snap peas. Stir-fry these colorful ingredients for about 3-4 minutes until they start to soften but still retain a delightful crunch. Trust me on this; you don’t want mushy vegetables! The vibrant colors not only make this dish visually stunning but also ensure you get all those nutrients packed within them.
Step 6: The Magic of Shrimp
With your vegetables tender yet crisp, it’s time for the star of our dish: the shrimp! Gently add your pound of peeled and deveined shrimp to the skillet. As they hit the hot oil, you’ll hear that lovely sizzling sound—a sure sign that you’re on the right track! Cook these beauties for about 3-4 minutes while stirring occasionally. What you’re looking for is transformation; they should turn from a translucent grayish hue to a vibrant pink and opaque white as they cook through. This change is not merely aesthetic; it signals that the proteins have denatured properly—essentially cooking them through without becoming rubbery or overdone.
A quick tip here: if you’re unsure whether they’re done, take one out and cut it open—it should be opaque all the way through with no sign of translucency. Overcooked shrimp become tough and chewy, so keep a close eye on them during this step! Once they’re perfectly cooked, add in your corn kernels—whether fresh or frozen—stirring them into the mix for about 2 minutes until they’re heated through. This addition not only enhances sweetness but also adds texture to our bowl.
Step 7: Crafting Your Flavorful Sauce
Now comes one of my favorite parts—crafting that sauce that pulls everything together into a cohesive masterpiece! In a small bowl, whisk together 2 tablespoons of soy sauce, 1 tablespoon of sesame oil, 1 tablespoon of rice vinegar, and if you’re feeling adventurous, 1 teaspoon of chili paste for an extra kick. This combination brings together salty umami notes from soy sauce, nutty depth from sesame oil, tanginess from rice vinegar, and heat from chili paste (if using). Each element plays its own role in creating an utterly divine flavor profile that balances beautifully with our fresh ingredients.
Once your sauce is whisked together into a harmonious blend (think liquid gold), pour it over your shrimp and vegetable mixture in the skillet. Stir gently but thoroughly to coat everything evenly—the goal here is complete coverage so every bite bursts with flavor! Allow this mixture to cook for another minute or two on medium heat; this step allows those sauces to meld perfectly with our ingredients while intensifying their flavors even further. It’s truly extraordinary how something so simple can elevate an already delicious meal!
Step 8: Seasoning Perfection
As we approach the final stages of crafting these Shrimp Rice Bowls: A Delicious and Easy Recipe for Seafood Lovers, let’s take a moment to talk about seasoning—the often underappreciated hero of any great dish. Before serving up this delightful creation, take a moment to taste your shrimp and vegetable mixture directly from the skillet. Here’s where you can adjust salt and pepper according to your palate’s preference; perhaps you desire just that little bit more saltiness or maybe some cracked black pepper’s warmth? Don’t be shy—this part is fundamentally non-negotiable!
Why do we emphasize tasting here? Because each ingredient’s inherent flavor varies based on freshness or even brand differences (especially with soy sauce). Ensuring everything balances beautifully before serving makes all the difference between good food and outstanding food! If needed, feel free also to sprinkle in more chili paste if you love heat—it’s all about customizing this dish according to what makes you happy. Once you’ve seasoned it just right—and I trust you will—it’s time to plate up!
Final Touches: Assembly Time!
Step 9: Bringing It All Together
Are you ready? The moment we’ve all been waiting for—the assembly of our gorgeous Shrimp Rice Bowls! Start by scooping a fluffy portion of jasmine rice into each bowl; I recommend using about 1 cup per serving as this creates a hearty base without overwhelming other flavors. Use a fork to fluff up that rice if needed—it should be light and airy like clouds after cooking!
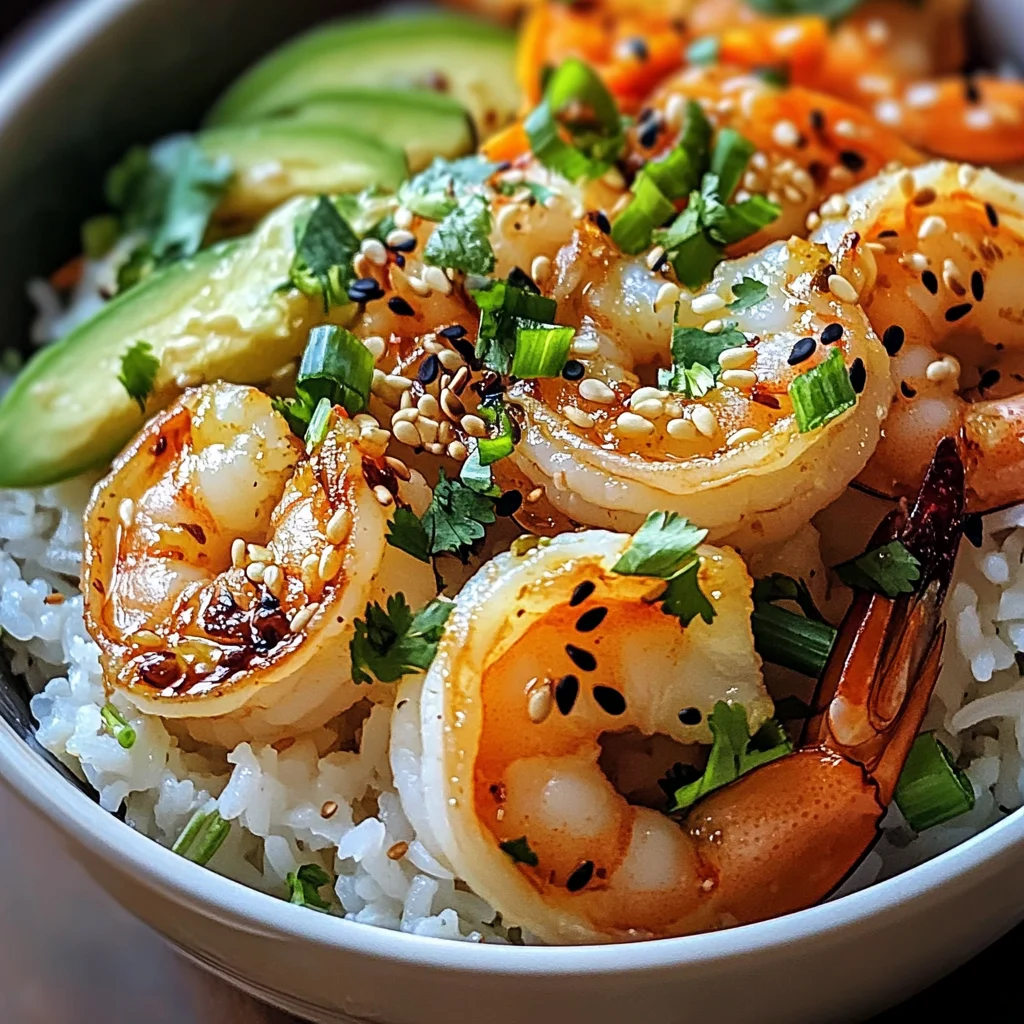
Now comes the fun part: spooning generous amounts of our succulent shrimp and vibrant vegetable mixture right over that beautiful bed of rice. Make sure each mound has an array of colors peeking through; it’s almost like painting on canvas! To finish off these bowls with flair (and flavor), garnish with sliced green onions scattered on top along with a sprinkle of sesame seeds—they add such delightful crunch and visual appeal.
Finally, don’t forget those fresh cilantro leaves—they’re like confetti celebrating this culinary masterpiece you’ve created! Serve these bowls warm; they’re best enjoyed straight away while everything is still steaming hot—a truly profound experience awaits you at every bite!
And there you have it—your very own Shrimp Rice Bowls: A Delicious and Easy Recipe for Seafood Lovers ready for devouring. I promise you’ll find every mouthful incredibly satisfying—each ingredient working harmoniously together creates not just food but memories at your table too! Enjoy every moment as you savor this delightful culinary journey!
Storage and Enjoyment Tips for Your Shrimp Rice Bowls: A Delicious and Easy Recipe for Seafood Lovers
Now that you’ve created this vibrant, delightful dish, it’s time to revel in the joy of your culinary creation! The beautiful colors of the shrimp rice bowls are not just a feast for your eyes but an invitation to dig in and enjoy the flavors that come together so harmoniously. However, if you find yourself with leftovers—though I doubt they’ll last long—let’s talk about how to preserve them without losing that delicious essence you’ve worked hard to achieve.
Storing Leftover Shrimp Rice Bowls: A Delicious and Easy Recipe for Seafood Lovers
When it comes to storing your leftovers, I recommend using airtight containers—these are absolutely crucial for keeping your shrimp rice bowls fresh and flavorful. Glass containers work wonders because they don’t retain odors like plastic can, plus they look lovely when you pull them out to reheat. You can keep your delightful creation in the fridge for about 3-4 days, which is perfect for those busy weeknights when you need a quick meal without any fuss. To maintain the quality of your rice and shrimp, consider placing a slice of bread in the container; it helps absorb moisture and keeps everything nice and fluffy. When you’re ready to enjoy your leftovers, simply reheat them on the stove or microwave until warmed through—trust me, they’ll taste almost as good as when you first made them!
Freezing Components for Later
If you’re looking to extend the life of your delicious shrimp rice bowls even further, freezing is a fantastic option! Just be sure to freeze each component separately—the rice, veggies, and shrimp—so they maintain their textures and flavors beautifully. Spread them out on a baking sheet until frozen solid before transferring them into freezer-safe bags or containers; this prevents clumping together and makes it easy to grab just what you need later. Your shrimp and veggies will stay fresh for up to three months in the freezer! When you’re ready to dive back into this marvelous dish, simply thaw overnight in the fridge then sauté everything together until heated through. The convenience of having a homemade meal ready at your fingertips is not only a time-saver but also adds such joy to those busy days.
Shrimp Rice Bowls: A Delicious and Easy Recipe for Seafood Lovers
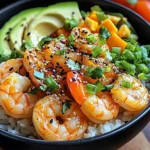
Experience a burst of flavor and color with these Shrimp Rice Bowls, an easy dish that’s perfect for busy weeknights or cozy gatherings. Plump shrimp dance on a bed of fluffy jasmine rice, complemented by vibrant vegetables like crisp snap peas and sweet corn. Infused with aromatic garlic and ginger, each bite offers a delightful balance of textures and tastes that will transport you straight to sun-kissed shores. This recipe is not just about satisfying hunger; it’s about creating memories around the dinner table. Whether you’re a seasoned cook or a beginner, these shrimp rice bowls are simple to prepare yet sophisticated enough to impress your friends and family.
- Prep Time: 15 minutes
- Cook Time: 25 minutes
- Total Time: 40 minutes
- Yield: Serves 4
- Category: Dinner
- Method: Stir-Frying
- Cuisine: Asian
Ingredients
- 1 pound large shrimp, peeled and deveined
- 2 cups jasmine rice
- 4 cups low-sodium chicken broth
- 2 tablespoons olive oil
- 3 cloves garlic, minced
- 1 tablespoon fresh ginger, grated
- 1 red bell pepper, diced
- 1 cup snap peas, trimmed
- 1 cup corn kernels (fresh or frozen)
- 3 green onions, sliced
- 2 tablespoons soy sauce
- 1 tablespoon sesame oil
- 1 tablespoon rice vinegar
- Salt and pepper to taste
- Fresh cilantro and sesame seeds for garnish
Instructions
- Rinse the jasmine rice under cold water until it runs clear.
- In a medium saucepan, combine rinsed rice with chicken broth. Bring to a boil, then reduce heat to low and simmer for about 15–20 minutes until liquid is absorbed.
- While the rice cooks, heat olive oil in a large skillet over medium-high heat. Sauté garlic and ginger for about 30 seconds.
- Add diced red bell pepper and snap peas; stir-fry for approximately 4 minutes until softened but still crunchy.
- Add the shrimp to the skillet and cook for another 3–4 minutes until they turn pink.
- Stir in corn kernels along with soy sauce, sesame oil, rice vinegar, salt, and pepper; cook for another minute to combine flavors.
- Serve the shrimp mixture over jasmine rice, garnished with sliced green onions, fresh cilantro, and sesame seeds.
Nutrition
- Serving Size: 1 bowl (about 400g)
- Calories: 450
- Sugar: 5g
- Sodium: 880mg
- Fat: 15g
- Saturated Fat: 2g
- Unsaturated Fat: 12g
- Trans Fat: 0g
- Carbohydrates: 58g
- Fiber: 5g
- Protein: 25g
- Cholesterol: 180mg