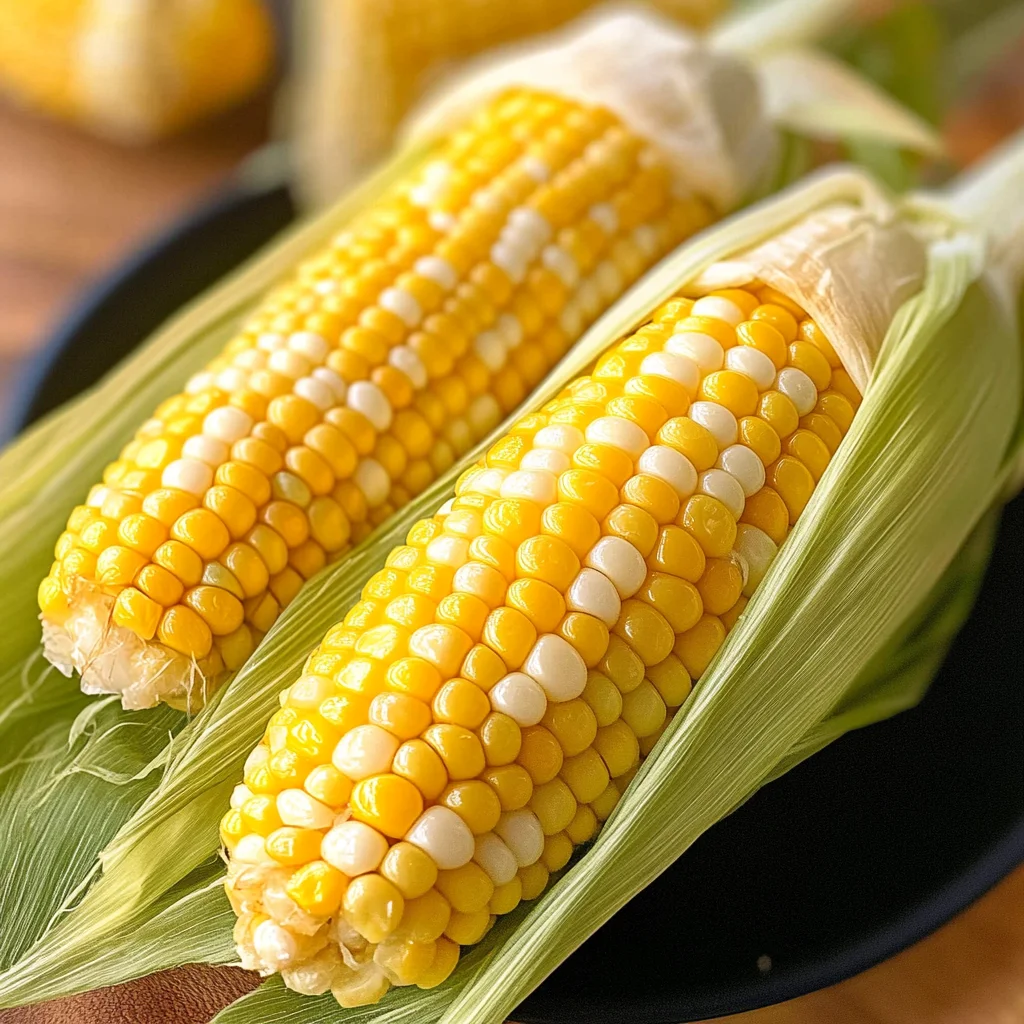
Microwave Corn on the Cob in Husk
There’s something truly magical about the first bite of fresh corn on the cob, isn’t there? As you sink your teeth into those sweet, juicy kernels that burst with summer’s essence, it feels like you’re tasting sunshine itself. For me, enjoying corn is not just a culinary delight; it’s a celebration of the season—a connection to cherished memories of family gatherings, barbecues, and laughter shared around the table. That’s why I’m so excited to share this incredibly simple yet profoundly satisfying method: Microwave Corn on the Cob in Husk. It’s a revelation that transforms an ordinary vegetable into an extraordinary experience without the hassle of dealing with pesky silk. Trust me on this; you won’t want to miss out on this delightful shortcut!
This technique is as much about innovation as it is about tradition. Microwave cooking brings convenience to our busy lives while holding onto the age-old joy of savoring fresh corn. Imagine being able to enjoy perfectly cooked corn in just minutes, all while keeping its natural sweetness and flavor intact. Each ear emerges from the microwave tender and steaming hot, ready to be devoured with just a sprinkle of salt or brushed with your favorite vegan butter. The beauty of cooking corn in its husk is that it locks in moisture and flavor, creating an experience that is not only delicious but also deeply satisfying. So roll up your sleeves and let’s dive into this quick and easy recipe together!
Microwave Corn on the Cob in Husk: A Quick Summer Delight
In this busy world where time often slips away from us, having a simple yet delightful side dish at our fingertips can make all the difference. This recipe for Microwave Corn on the Cob in Husk is one of those gems. It’s quick to prepare and requires minimal clean-up—perfect for those evenings when you want something delicious without spending hours in the kitchen. Whether you’re grilling up some veggie burgers or planning a picnic at the park, this dish will surely impress your friends and family.
Ingredients:
As we embark on this culinary journey together, let’s explore what makes each ingredient essential for our microwave corn adventure.
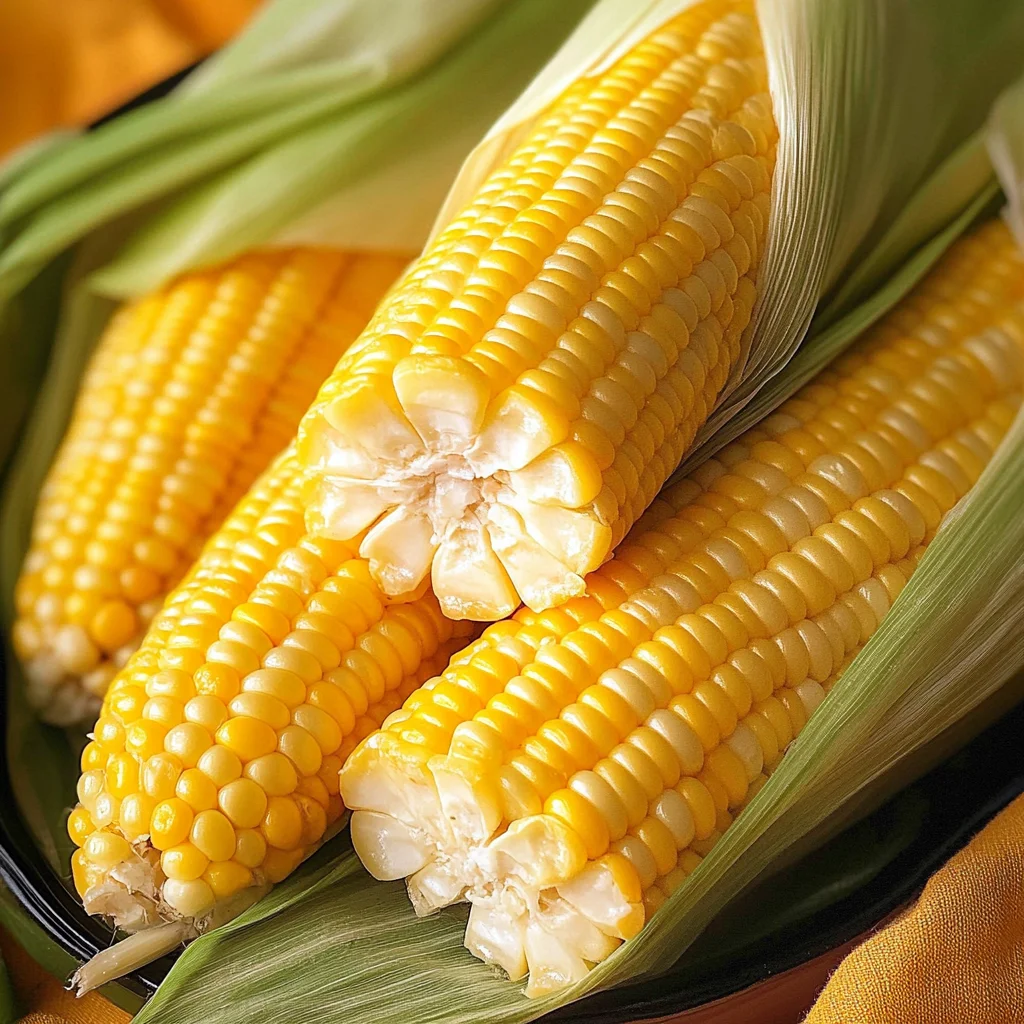
- 4 ears of fresh corn on the cob. When selecting your corn, look for ears that are plump and firm with bright green husks that feel moist to the touch; this is crucial for ensuring freshness and flavor. The kernels should be tightly packed together and bursting with sweetness—those tiny gems waiting to be set free! Fresh corn tastes far superior to anything pre-packaged, so if you can find locally grown varieties at farmer’s markets, I encourage you to grab them! Not only does fresh corn provide unmatched flavor, but it’s also packed with nutrients like fiber and vitamins that contribute positively to your health.
Equipment You’ll Need:
Having the right tools can make all the difference in your cooking experience, turning what could be a mundane task into something joyful and fulfilling. Let’s gather our essential partners for creating this delightful dish.
- Microwave-safe plate – This is where our corn will rest while it cooks. Ensure it’s sturdy enough to hold multiple ears if you’re cooking more than one at a time; otherwise, they might tip over or become unevenly heated.
- Sharp knife – You’ll need a good quality knife for trimming off the ends of your corn after cooking. A sharp knife makes clean cuts easier and safer!
- Kitchen towel or oven mitts – These will come in handy when handling hot corn right out of the microwave; trust me—you don’t want to burn your fingers!
Preparing the Microwave Corn on the Cob in Husk
Step 1: Setting Up Your Corn for Cooking
To begin this delightful process, place each ear of corn directly onto a microwave-safe plate—there’s no need to remove anything from them just yet! The husk acts as a protective layer during cooking, trapping steam inside which helps cook the kernels evenly while preventing them from drying out. This technique is part of what makes microwave cooking so effective; it allows for rapid heat transfer while preserving moisture and enhancing flavor without requiring additional water or oil.
When microwaving one ear of corn, you’ll want to set it for about two minutes; however, if you’re preparing two ears simultaneously, increase that time to four minutes. For three ears, five minutes will do nicely, and if you’re feeling ambitious with four ears like I often do during summer barbecues—then six minutes is perfect! Don’t forget that microwaves can vary widely in power output (some could be more powerful than others), so keep an eye—or rather an ear—on how things are progressing as they cook!
Step 2: Cooling Down Before Handling
Once your timer goes off and you’ve indulged in some mouth-watering anticipation (because who doesn’t love waiting for delicious food?), allow your beautifully cooked corn to cool untouched for about five minutes. This step might seem trivial but trust me—it’s absolutely paramount! Cooling helps ensure that steam continues cooking those kernels gently while preventing burns when you handle them later.
During this cooling period, take a moment to breathe in that intoxicating aroma wafting through your kitchen! It’s such a comforting scent—the sweet smell of fresh corn filling your space—and it sets up an irresistible atmosphere that’s perfect for sharing food with loved ones or simply enjoying by yourself.
Step 3: Trimming Off The End
After five long minutes (which really isn’t long at all), grab your sharp knife because it’s time for some trimming! Carefully cut about an inch off the end of each ear where you’ll see a stub left behind from where it’s attached to its stalk—don’t touch that beautiful end with all the silk showing! This small cut creates an opening through which you’ll eventually pull off those husks.
It’s important not to rush this step; precision here ensures you won’t accidentally cut through any kernels or damage what lies beneath those layers of husk—after all, we want every bit of that deliciousness intact!
Step 4: Peeling Away The Silk
Now comes perhaps my favorite part—the moment when you get to unveil what lay hidden beneath those green layers! Taking hold of that end where you’ve made your cut—with gentle rocking motions if needed—begin pulling downwards towards where you’d hold it comfortably while eating. As you peel away those husks along with their accompanying silk strands behind them (which can sometimes feel quite sticky), let yourself revel in how beautifully satisfying it feels.
Trust me when I say there’s something special about seeing each golden kernel emerge as if saying hello after being tucked away safely within their leafy blanket! This step allows us access not only visually but also provides us opportunity for seasoning options later on too!
By now you’ve transformed simple ingredients into something extraordinary—all while cherishing moments spent crafting these flavors together! In just these few steps filled with care—and perhaps even laughter—you’ve created something worth celebrating every single time it graces your table.
Stay tuned as we continue exploring ways to elevate our Microwave Corn on the Cob even further…
The Joy of Enjoying Microwave Corn on the Cob in Husk
Nothing quite compares to the simple pleasure of biting into a perfectly cooked ear of corn. When you microwave corn on the cob in its husk, you unlock a world where flavors are more vibrant, and textures are utterly delightful. As we dive deeper into this method, I want to share with you the nuances that make this process not just easy but truly enjoyable. Let’s continue our journey to perfecting this side dish that evokes memories of summer barbecues and family gatherings.
Step 5: Cooling Down – The Essential Rest Period
Once your corn has finished its time in the microwave, it’s crucial to allow it to cool untouched for about five minutes. This step might seem trivial, but trust me when I say it’s absolutely paramount! During this resting period, the steam that has built up inside the husk continues to cook the corn gently and evenly. This residual heat helps ensure that every kernel is plump and juicy, yielding that satisfying pop when you bite into it.
As the minutes pass, you might notice a slight hissing sound as steam escapes from tiny openings in the husk. That’s perfectly normal! Just resist the urge to handle the corn immediately; let it do its thing. If you rush this step, you risk ending up with kernels that are undercooked or toughened by sudden temperature changes. After five minutes, you’ll be rewarded with corn that’s tender and moist—just imagine how delightful it’ll taste!
Step 6: The Art of Cutting – Preparing for Perfection
With your cooled corn, it’s time for a little bit of precision work—this part can be quite therapeutic! Using a sharp knife, carefully cut about one inch off the end of the cob that has a stub. It’s essential to avoid cutting into the end with silk still attached because that could disrupt the beautiful presentation we’re aiming for. This technique is key because it allows you to create an opening from which you can easily pull away all that pesky silk without any hassle.
When cutting, take your time and use gentle pressure; there’s no need to force your way through. You want a clean cut to maintain structural integrity while making it easy for you later on. Think of this step as laying down a foundation for what’s to come—a deliciously sweet experience awaits! Once you’ve made that cut, you’re almost ready to savor nature’s candy.
Step 7: Unveiling Your Corn – The Silky Reveal
Now comes perhaps my favorite part—the unveiling of your beautifully steamed corn! Grasp the end of the husk where all those silky strands are peeking out and gently pull it away from the cob. You might need to rock it back and forth slightly if it feels stubborn at first; don’t worry if some silk clings on—just keep pulling gently until it’s all released like a magician revealing their final trick.
This moment is magical; as you peel back each layer of husk, you’re greeted by vibrant golden kernels glistening with moisture. Take a moment here—a deep breath will reward you with an intoxicating aroma reminiscent of sun-kissed fields during harvest season. Feel free to marvel at how effortlessly this method removes all those pesky silks—no more wrestling with sticky threads or worrying about bits stuck between your teeth!
Step 8: Enhancing Flavor – Seasoning Your Corn
Now that your corn is prepped and looking gorgeous, it’s time for one last flourish before serving: seasoning! While many enjoy their corn simply slathered with butter (a classic choice!), consider exploring other flavor avenues that will elevate your dish even further. A drizzle of olive oil can add richness without overpowering those sweet kernels, while a sprinkle of sea salt boosts their natural sweetness remarkably.
Feel free to experiment here! Perhaps you’d like to enhance your corn’s allure by adding fresh herbs like cilantro or basil? Or maybe a squeeze of lime juice would round out those flavors beautifully? Just remember—this is your masterpiece! Each sprinkle or drizzle adds another layer of personality and warmth to your meal. As I always say, cooking is about creativity and joy; don’t shy away from expressing yourself through these flavors!
Final Thoughts on Your Microwave Corn on the Cob in Husk
There you have it—your guide to enjoying perfectly cooked microwave corn on the cob in husk! This method not only saves time but also preserves incredible flavor and texture in every bite. Whether served alongside grilled veggies at a summer barbecue or enjoyed as a cozy weeknight side dish, I promise you that each ear will be met with smiles and satisfied sighs around your table.
Remember, cooking is not just about following steps; it’s about infusing love and care into every moment spent in the kitchen. So gather around with friends or family and make new memories over this delightful dish! Enjoy every kernel—you’ve earned it!
Storage and Enjoyment Tips for Your Microwave Corn on the Cob in Husk
Now that your delightful Microwave Corn on the Cob in Husk is ready to enjoy, let’s talk about how to savor every last bite and ensure you have some delicious leftovers! The beauty of this method is that it allows you to enjoy fresh corn without any hassle, making it a perfect addition to your meals. If by chance you have any ears left over, fret not; storing them properly can keep your corn tasting just as sweet as when it was freshly cooked.
Storing Leftover Microwave Corn on the Cob in Husk
To keep your leftover corn on the cob at its peak flavor, place it in an airtight container or wrap it tightly in plastic wrap before popping it into the refrigerator. It’s best to consume leftover corn within 3 days, but I promise you, if stored correctly, it can still hold onto its sweetness and juiciness even after that! One little pro tip I love is placing a slice of bread in the container with your corn; this helps absorb moisture and keeps your corn from drying out too quickly. Trust me on this—this simple trick can make all the difference! When you’re ready to enjoy the leftovers, just reheat them gently in the microwave for about a minute. You’ll find that they still taste fresh and vibrant, making each bite a tender reminder of summer!
Freezing Corn on the Cob for Later
If you want to extend the joy of fresh corn even further, consider freezing your Microwave Corn on the Cob in Husk! To do this, simply remove any excess husk and silk after cooking, then wrap each ear tightly in aluminum foil or freezer bags. This method not only preserves their delightful flavor but also makes them incredibly convenient for future meals. You can keep frozen corn for up to 6 months without losing much of that sweet, juicy goodness. When you’re ready to use them, simply thaw them overnight in the refrigerator or pop them straight into boiling water for a quick cook—like magic! Isn’t it wonderful knowing you can enjoy that fresh corn flavor any time of year?
Microwave Corn on the Cob in Husk

Enjoy sweet summer flavors anytime with Microwave Corn on the Cob in Husk. Try this easy method today and savor every juicy bite!
- Prep Time: 2 minutes
- Cook Time: 6 minutes
- Total Time: 8 minutes
- Yield: 4 servings 1x
- Category: Side Dish
- Method: Microwave
- Cuisine: American
Ingredients
- 4 ears of fresh corn on the cob
Instructions
- Place unshucked corn directly onto a microwave-safe plate.
- Microwave one ear for 2 minutes; add 2 minutes for two ears (4 minutes total), 5 minutes for three, or 6 minutes for four ears.
- Allow corn to cool for 5 minutes after microwaving.
- Using a sharp knife, trim about an inch off the end of each cob.
- Peel away the husk and silk gently to reveal the beautifully cooked corn.
Nutrition
- Serving Size: 1 ear (90g)
- Calories: 77
- Sugar: 6g
- Sodium: 5mg
- Fat: 1g
- Saturated Fat: 0g
- Unsaturated Fat: 0.5g
- Trans Fat: 0g
- Carbohydrates: 17g
- Fiber: 2g
- Protein: 3g
- Cholesterol: 0mg